This post may contain affiliate links. I only recommend products I use and love. Read the full disclosure here
Updated on: January 30, 2025
Originally published on: May 9, 2024
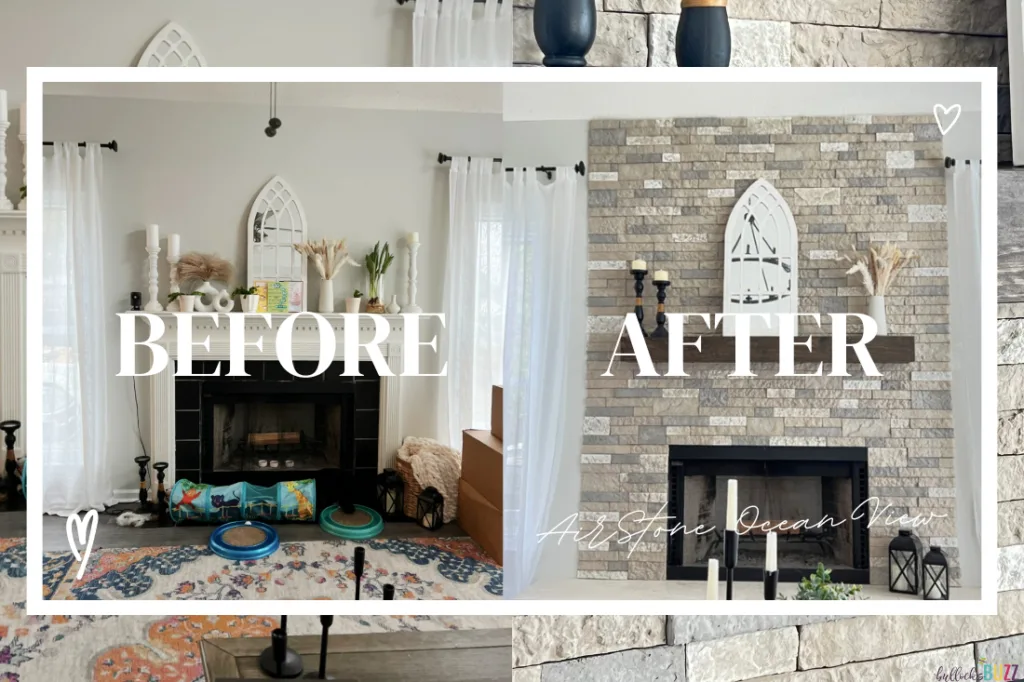
Get ready to be amazed by this incredible DIY Fireplace Remodel with AirStone! See how we turned a boring, builder-grade fireplace into a stunning masterpiece that we love!
Y’all, I am absolutely bursting at the seams with excitement! I cannot wait to show you what we did to take our early 2000s builder-grade fireplace from drab to fab, using the newest color blend from AirStone!


But first, I want to give a big thanks to AirStone for partnering with Bullock’s Buzz on our DIY Fireplace Remodel!
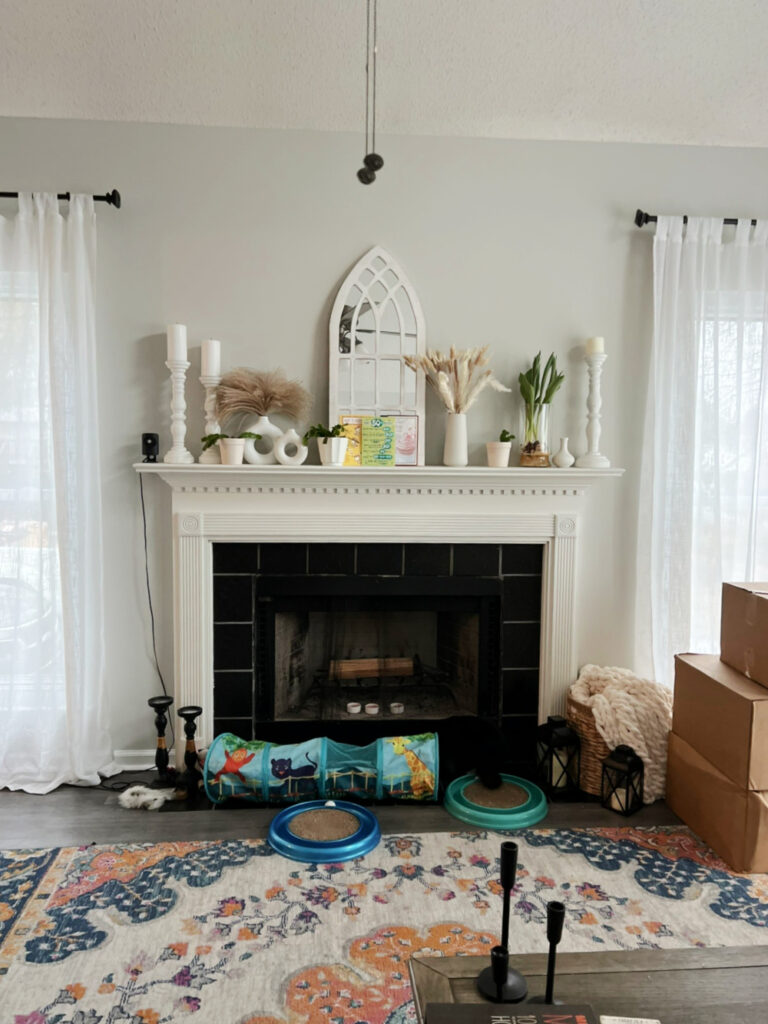
Redoing our outdated fireplace has been on my wish list ever since we purchased our home. With its flat, boring presence against the wall, its outdated large black tile, and its standard 2000’s white mantel, the fireplace left a lot to be desired.
The deteriorating grout and cracked tiles only added to its lackluster appearance. While it wasn’t unbearable to look at, I knew it had the potential to be so much more—a true focal point in our favorite room. A room that, with its cathedral ceiling adding a sense of openness and its many windows flooding it with natural light, is the perfect canvas for a stunning focal point!
However, lacking the expertise of a contractor or designer, I found myself at a loss for where to begin. Plus, our budget didn’t allow for hiring professional help. So after months of poring over fireplace transformations on Pinterest and Instagram, we finally decided to take matters into our own hands.

The Dream: Stone Fireplace with Raised Hearth
I’ve always loved the look of a stone fireplace. Since the fireplace is visible from the entryway, den, dining space, and kitchen, I knew that incorporating stone would take these rooms to a whole new level, while also giving the fireplace the attention it deserved as a focal point. Except once again, budget.
So, while looking for inspiration, I came across several projects using AirStone. I was impressed with its authentic stone appearance, and even more surprised to learn that it is very lightweight—weighing 75% less than real stone.
After reading numerous tutorials and seeing how easy the installation process seemed, I decided to reach out to AirStone and was thrilled when they agreed to work with me!
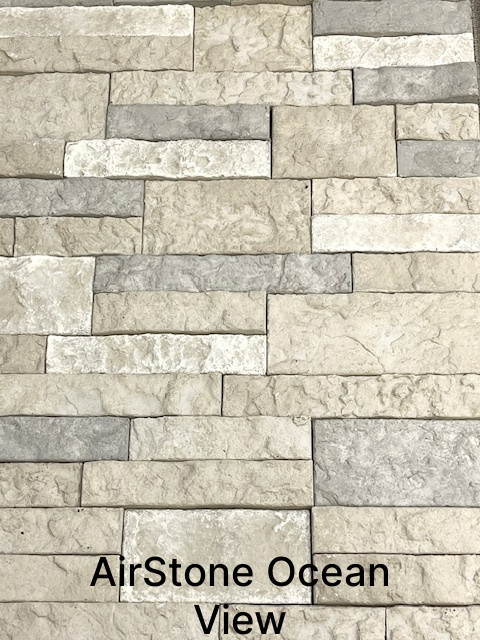
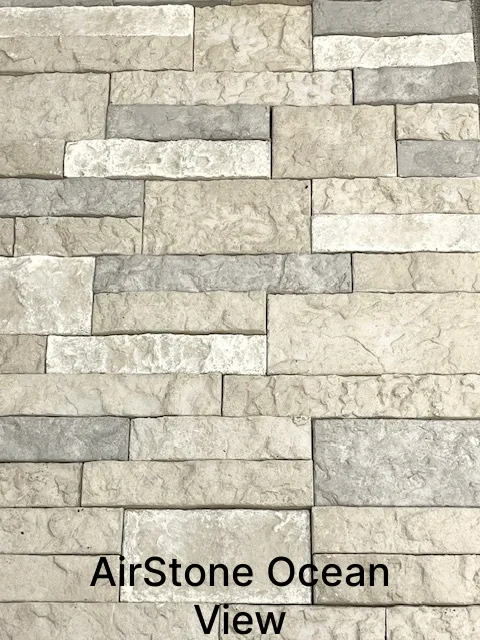
I was even more excited when I learned about the upcoming release of their newest stone blend: Ocean View. Inspired by Sherwin Williams’ 2024 Color of the Year, Ocean View is light, warm, neutral, and inviting – the exact look and feel I wanted to achieve!
What Is AirStone?
AirStone is a faux stone product designed to be easy enough so anyone can DIY. The stones are made from 70% recycled wine bottles, yet they look and feel like real stones. They are also much lighter than real stone, making them easier to work with, cut, and adhere to surfaces.
AirStone faux stone can be used on indoor or outdoor projects and will work with a huge list of materials as long as the surface material is completely rigid (it will not expand, contract, flex, or bow over time). You can even apply it directly on top of materials like tile, stone, concrete, plywood, and others, as long as the surface is in good condition (not chipped, cracked, crumbling, or loose).
Even better, AirStone has a “Class A” fire rating which means it is non-combustible and perfectly safe for use around typical fireplaces.
Our Step by Step AirStone Fireplace Makeover
Today I’m sharing our DIY Fireplace Remodel with you, step by step, where we used AirStone from the hearth up to the ceiling.
The materials we used for this project included:
- AirStone Ocean View – primary and end/corner pieces.
- AirStone Adhesive for interior projects
- Level
- Putty Knife
- Saw with a masonry blade – these blades do not have teeth.
- Pencil – for marking where you will need to make your cuts
- Scrap 1×4’s at various lengths – to hold up the stones over the fireplace opening
- Rag and warm water – for any adhesive that gets where you do not want it
Before we begin, here’s a before picture of our fireplace:

Step One: Demo Time!
Our first DIY Fireplace Remodel step was to demo. Keep in mind this is not required in every project, but for us, we had to. Our original plan was to place the AirStone directly on top of the existing tile. We had already picked out a new floating wood mantel, so we had to remove the old one. But, once we removed it, we began noticing a few problems.
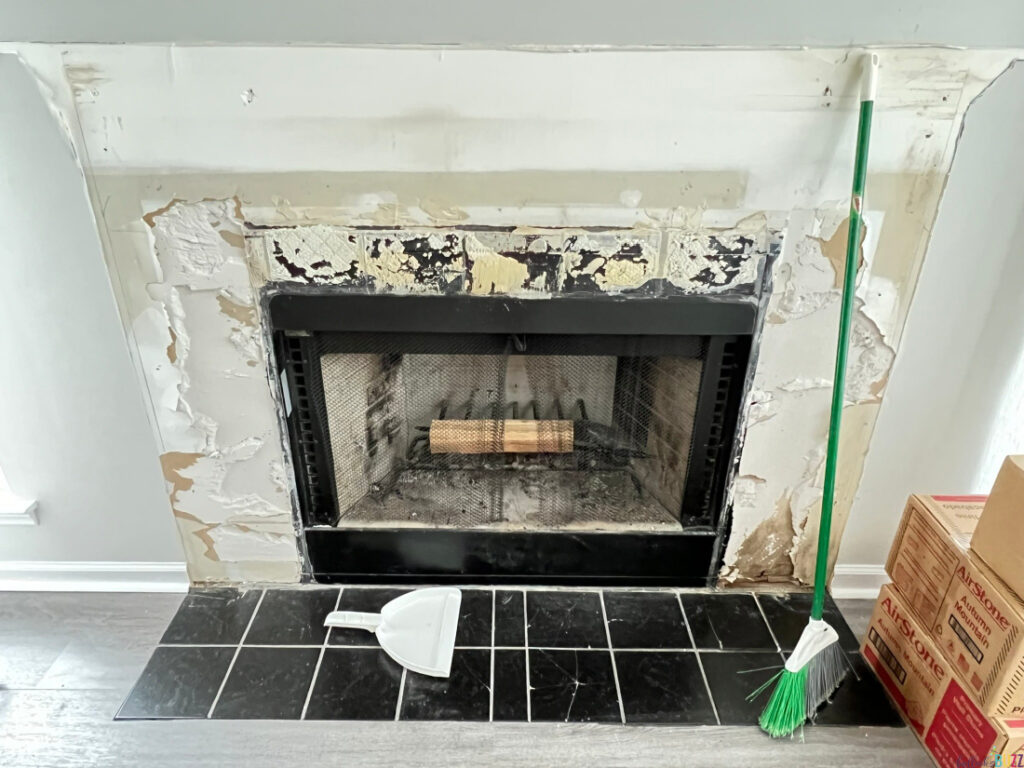

What we had originally thought was a few spots of lose grout and slightly cracked tiles, turned out to be chunks of crumbling grout, and several tiles broken all the way through. The mantel had been holding a lot of the tiles together. We also found other tiles that were barely hanging onto the wall!
Removing the mantel had also revealed an old leak where water had trailed down the inside of the wall damaging the sheetrock behind the outer edges of the tile and the legs of the mantel. Apparently what they say is true: in remodeling, you always uncover more problems!
So off came the tile, grout, and sheetrock, and up went new sheetrock, followed by our new floating mantel. We decided it would be easiest to add the mantel and work around it rather than the other way around.
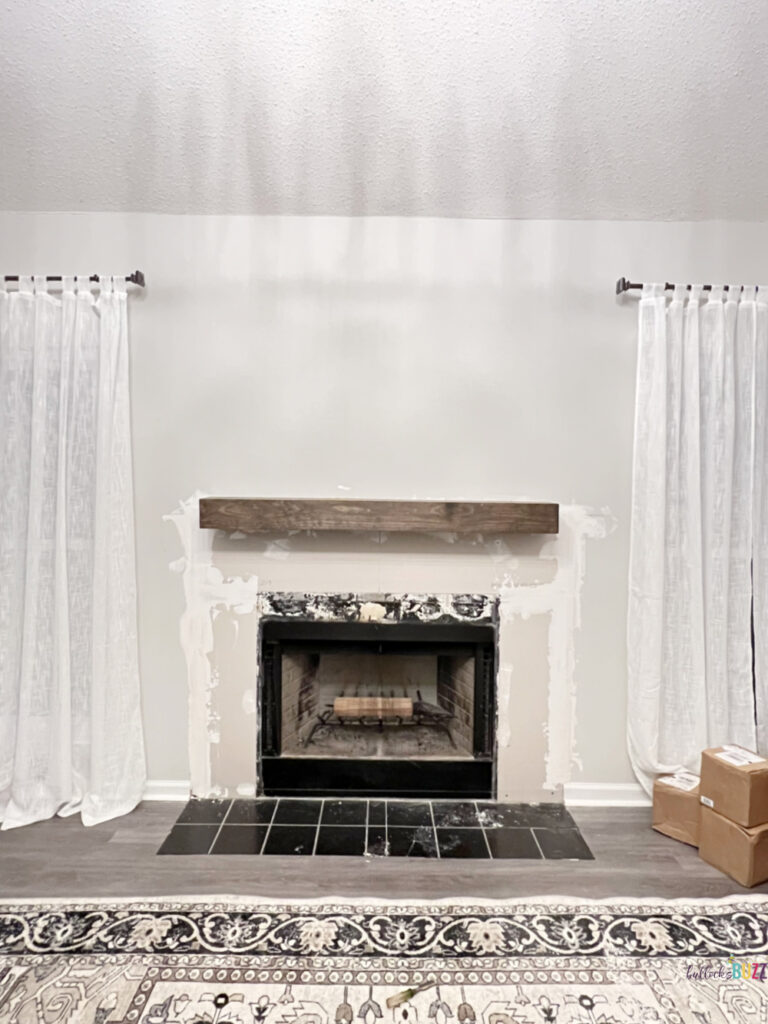
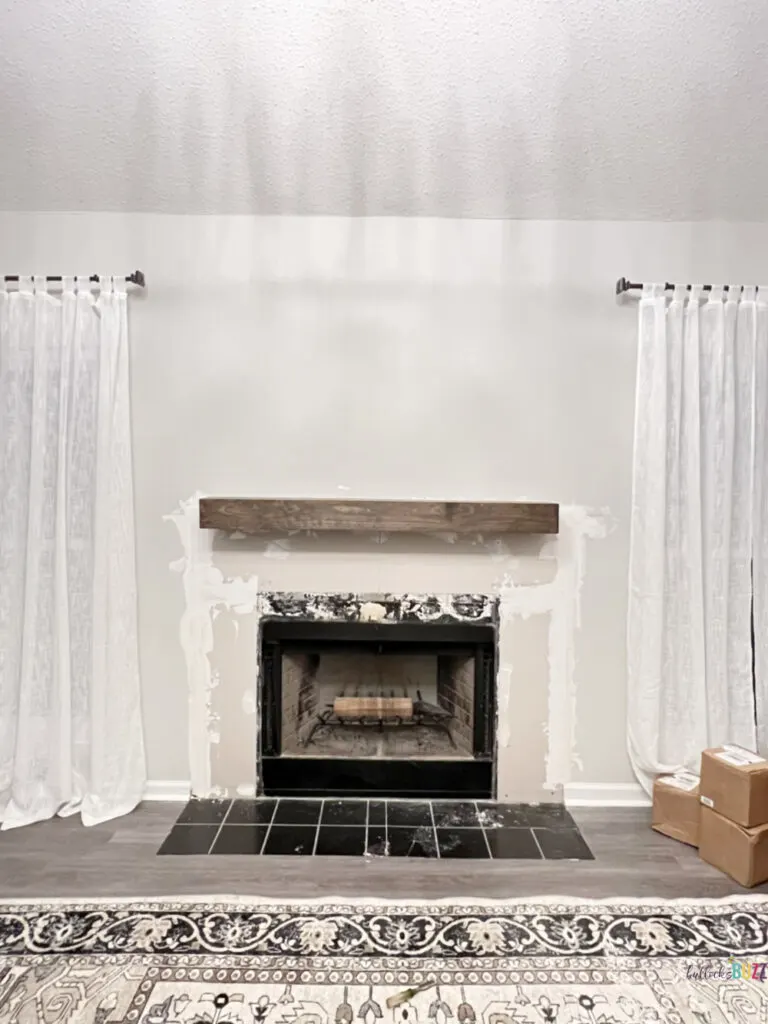
As a bonus, we also realized that by removing the tile instead of adding over it, that area would become flush with the rest of the wall – from the hearth up to the ceiling.
Step Two: Prepping the Surface
Next, we had to finish prepping the surface, which in our case, meant a bit of taping, mudding, and sanding, and then wiping everything down with a damp cloth to remove any lingering dust or dirt.
Again, this is not something you have to do as long as the surface you are adding the AirStone to is not cracked, chipped, loose, or crumbling. A few blemishes or bad spots here and there won’t hurt anything.
Quickly wiping down the surface will help ensure you get the best adhesion.

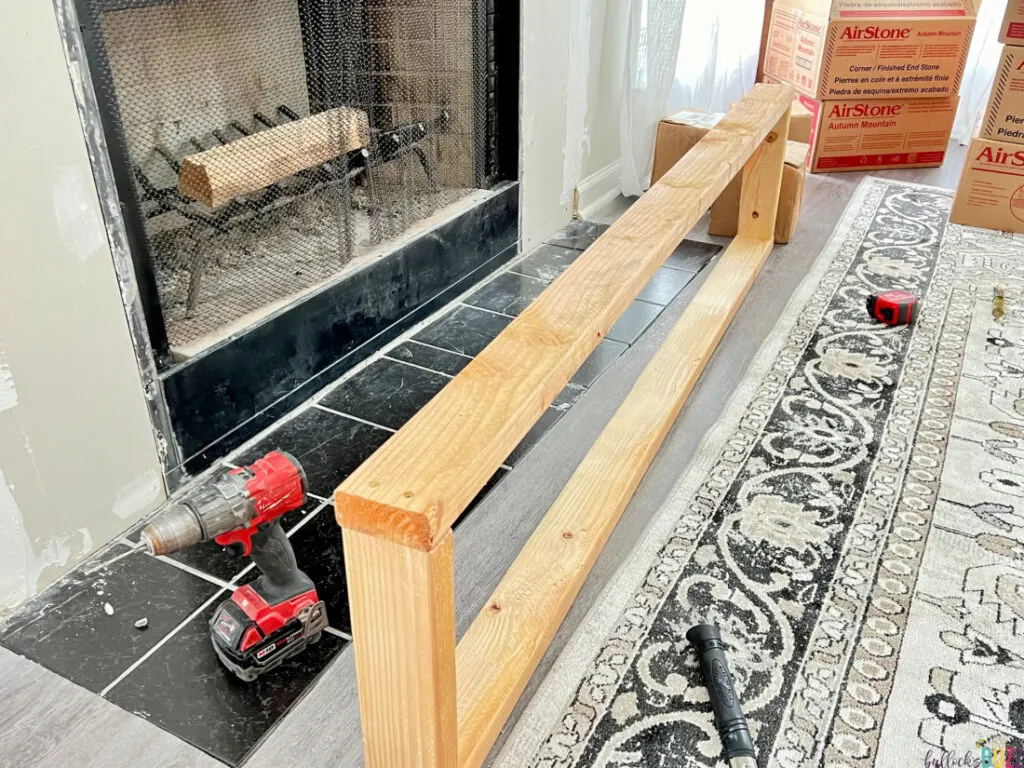
Step Three: Building the Raised Heart
One of the biggest pet peeves about our old fireplace was that its so-called hearth consisted of several pieces of tile flush with the floor. Since we were aiming for a modern-rustic, cozy look with our DIY AirStone fireplace makeover, I wanted a slightly raised hearth. So we created one directly on top of the old tile.
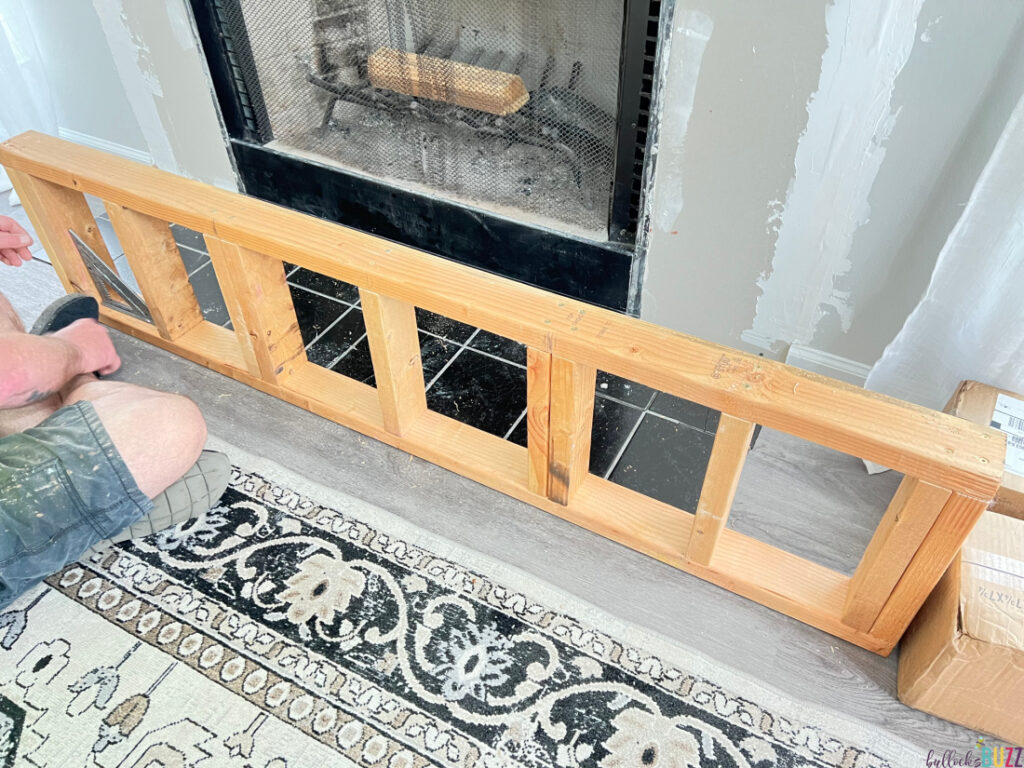
Once we figured out the dimensions, we built a basic wood frame using 2×4s and secured it to the subfloor and the walls on each side of the firebox.
We then selected some beautiful 24″ by 12″ travertine slabs to form the top of the hearth and used a few leftover pieces of AirStone to wrap the front of the hearth.

Step Four: Removing the Stones from their Boxes
Our next step was to remove and sort the AirStone by color and type. Doing this made it much easier to see what we had to work with, while also letting the stone acclimate to the room’s temperature
There are two basic pieces to the AirStone system, the primary wall stone and the corner/finished end stones. The primary stones are the main stones you use, and the corner/end stones are used for corners or exposed edges. You then use either AirStone Interior Adhesive for indoor projects or Loctite® PL® Premium Polyurethane Construction Adhesive for outdoor projects to adhere the stones to your surface.
Each box of AirStone Ocean View, both for the primary stones and the corner/end stones, contained a combination of white, gray, and beige stones in several different lengths ranging from 4 inches up to 10.5 inches. The majority of stones are around 2 inches tall (top to bottom), but there is also a good selection of taller ones, around 4 inches, for variety.
The thickness of the stones varies in spots from a quarter inch to a little over a half inch ‘thick’.
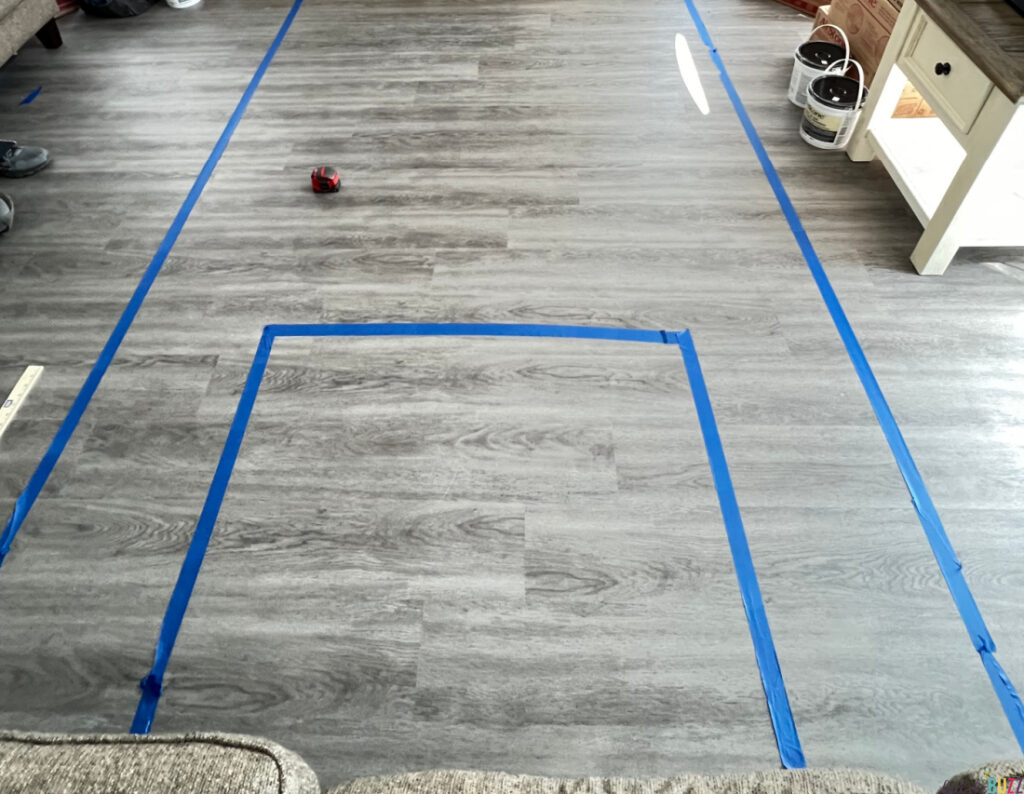

Step Five: Creating a Template to Scale (Optional)
Because we were working with such a large area (taking the fireplace up to the ceiling), I used painter’s tape to create a scaled template on the floor. This helped us stay more organized, have a visual of the general placement, and keep better track of which colors we were using.
It also prevented us from accidentally using too much of the same color in one area. Plus, it gave us a rough idea of how many pieces we would have to cut. While some people go ahead and cut the stones at this point, we chose to do it as we went along to avoid accidentally wasting stones due to mistakes.
When laying out your stone, make sure you mix up the colors. You also want to mix up the sizes. This way, once stacked, the ends of the stones inside each row will not line up with the ones in the rows above or below it. I think creating this staggered look gives it a more natural look overall.
Laying it all out in a template was a time-consuming and tedious process at first, but once I got the hang of it, things went much faster. It was kind of like putting together a giant puzzle. And, for us, it was well worth it.
Step Six: Applying the AirStone
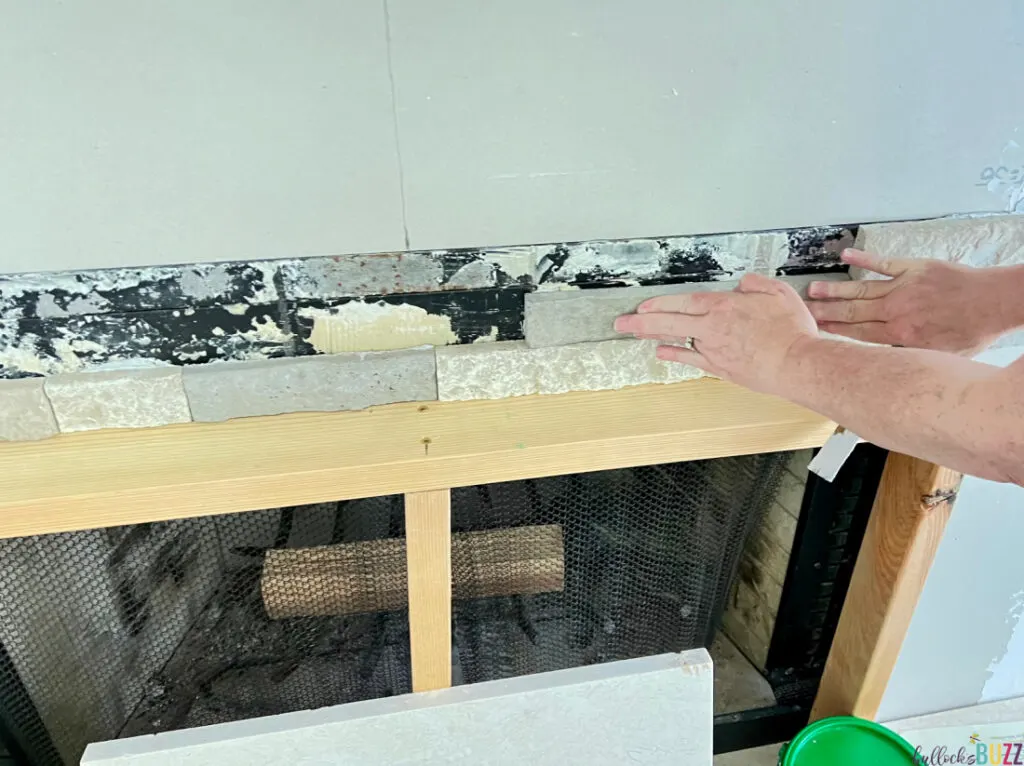
Once everything was ready to go, we simply followed the installation instructions and our template. The process is as simple as slathering each stone with the adhesive and putting it in place. We started with the row directly above the fireplace opening, making sure to use a level on each stone since this row was the foundation for all the rows above and below it.
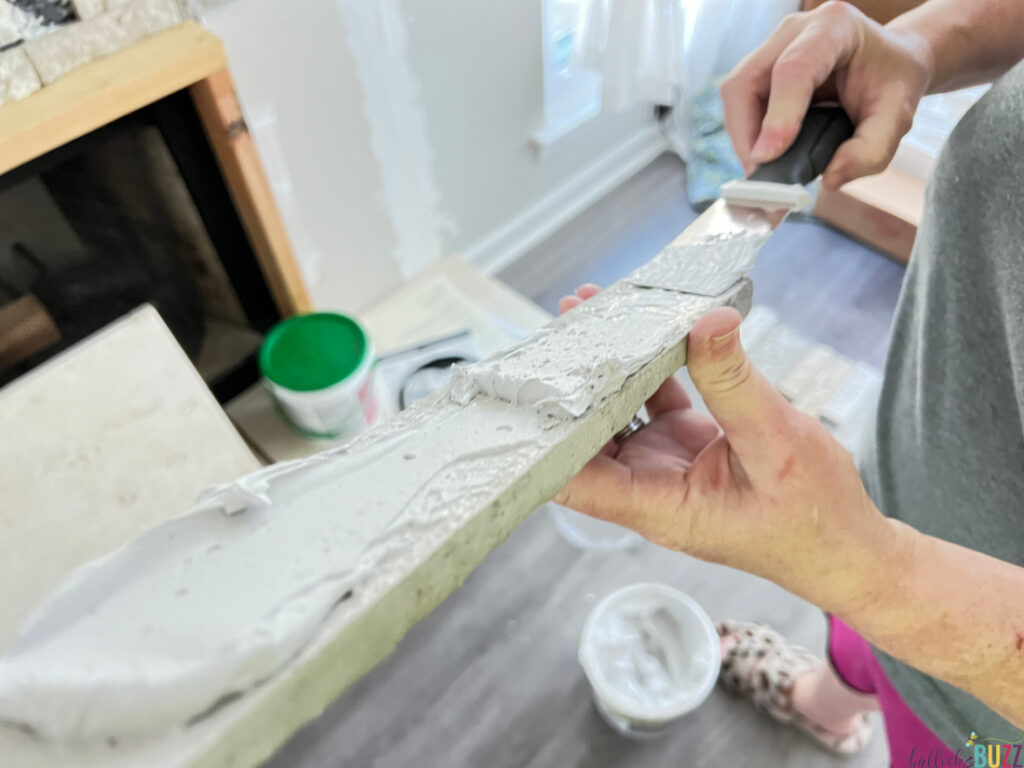
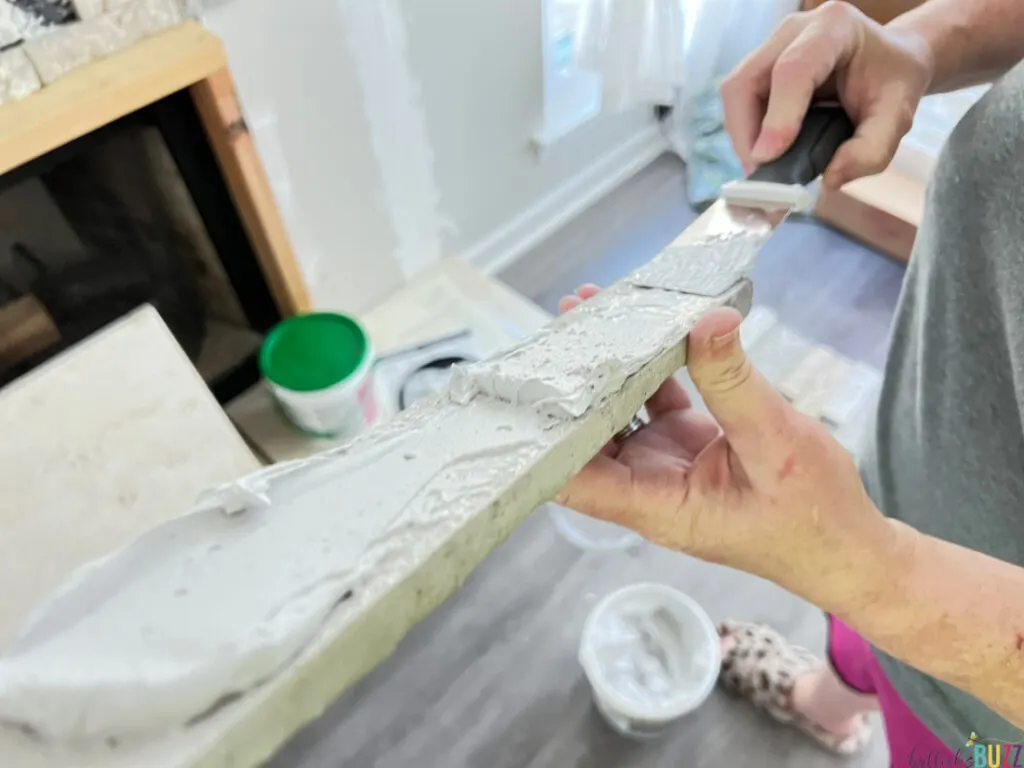
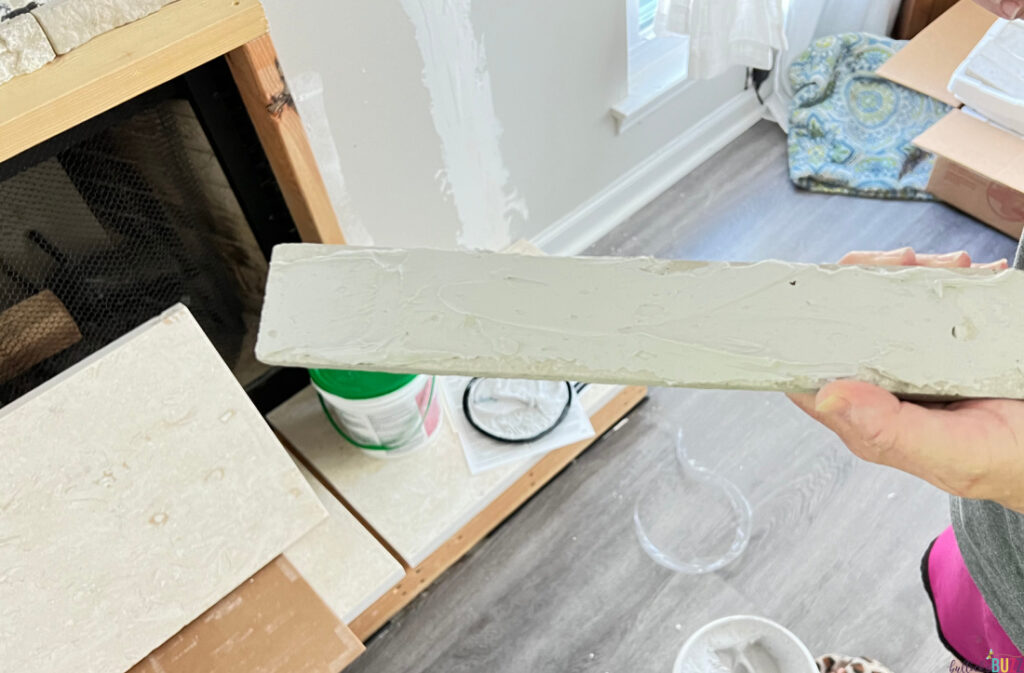
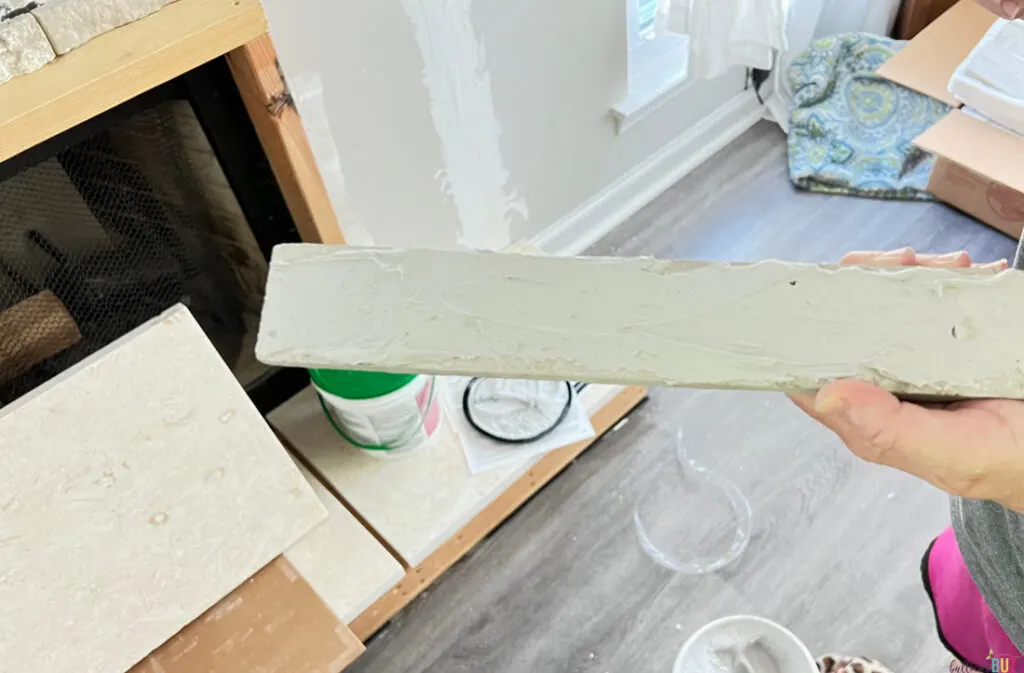
To apply the adhesive, we scooped some out with our putty knife and then spread it on the back side of the piece we were working with. We then pressed the stone firmly in place, allowing the adhesive to compress.
When it comes to the amount of adhesive we used, we thought of it like icing a cupcake, rather than buttering a piece of bread. You don’t have to use a lot, but you definitely want enough to provide a good hold.
We held the stone in place for a few seconds to let the adhesive really ‘grab’, and then moved on to the next one. In the spots where some adhesive got where we didn’t want it, we used a damp rag and warm water to remove it.
Once we had the entire row in place, we noticed that a few pieces were beginning to slip. So we created a brace out of scrap wood to hold the stones in place until the adhesive had completely set.
From there it was as simple as slathering more adhesive on the backs of each stone, and placing them where we wanted them.
Here are a few tips to help you out:
- As you work, you will come across stones with little bumps on the edges. These are from the molding process. Simply scrape them off with the putty knife.
- Since it takes about 30 minutes for the adhesive to really set, you do have a bit of time to adjust things if needed.
- If you get some adhesive on a stone – use a wet rag and warm water to clean it off before it dries.
- Keep using your level as you form more rows. As we went along, we did have a few spots where things were getting a bit off-level. I’m not sure if that was because nothing in a house is truly square or if it was us. To correct it, we used paper clips and other things as spacers. Just be sure you do not allow your spacers to touch any of the adhesive or it will be stuck there once everything sets.

Cutting AirStone Faux Stone Veneer
Chances are pretty good that you’ll have to make some cuts as you work on your project. Luckily, AirStone is a cinch to cut. You can use pretty much any saw you prefer as long as it has a masonry blade. We actually used a RotoZip saw for the majority of our cuts.
All you have to do is use a pencil to mark where you need it and then cut from the back side of the stone. Be sure to cut outside and wear a mask because these stones put out a lot of dust.


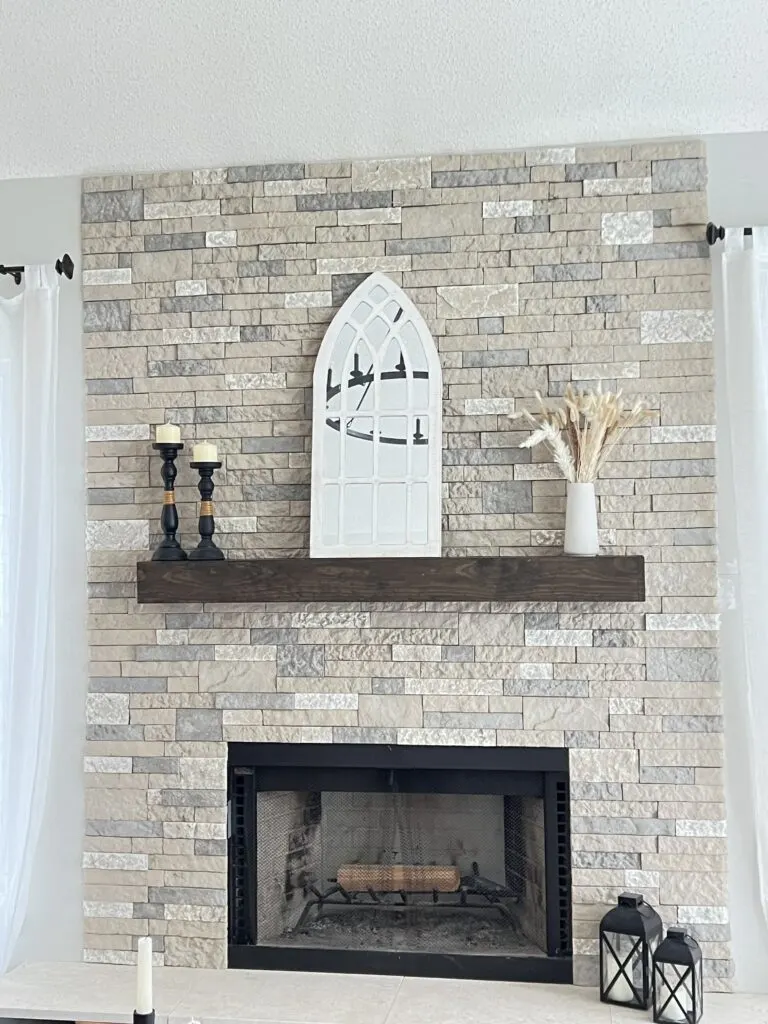
Our fireplace required a lot of cuts, mostly to trim the length of the stones. However, there was an entire row, directly beneath the mantel, where we had to cut stones horizontally to adjust their height. This row needed stones that were narrower than the stones were designed. So for this, we pulled out our miter saw.
How Hard Was A DIY Fireplace Remodel Using AirStone?
Overall, our DIY fireplace remodel was a lot easier than I thought it would be. Yes, at first it was slightly tedious and time-consuming, but once we got the hang of it, things went a lot faster and smoother.
Had we been able to do this all at once, I am pretty sure that we could have finished it within a weekend, if not less. However, because my husband was also working a side job on the weekends, we only had a few hours each evening after he got home. So our DIY fireplace remodel with AirStone wound up taking us multiple weekends to finish.
As far as the difficulty level, it was not that hard. It is a doable DIY project for a beginner! After some initial planning and measuring, the process is as simple as spreading adhesive on the back of the stones and sticking them to the surface. The hardest part for us was figuring out the cuts. Airstone has great videos on its site to help you work through all the steps of this faux stone veneer fireplace.
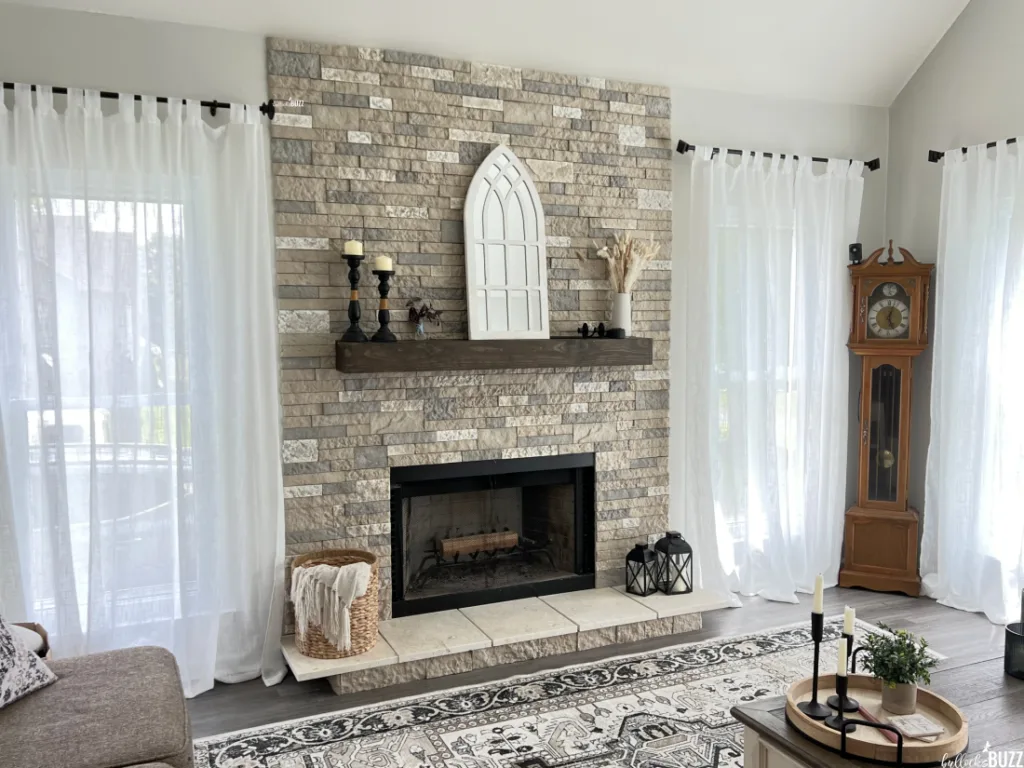
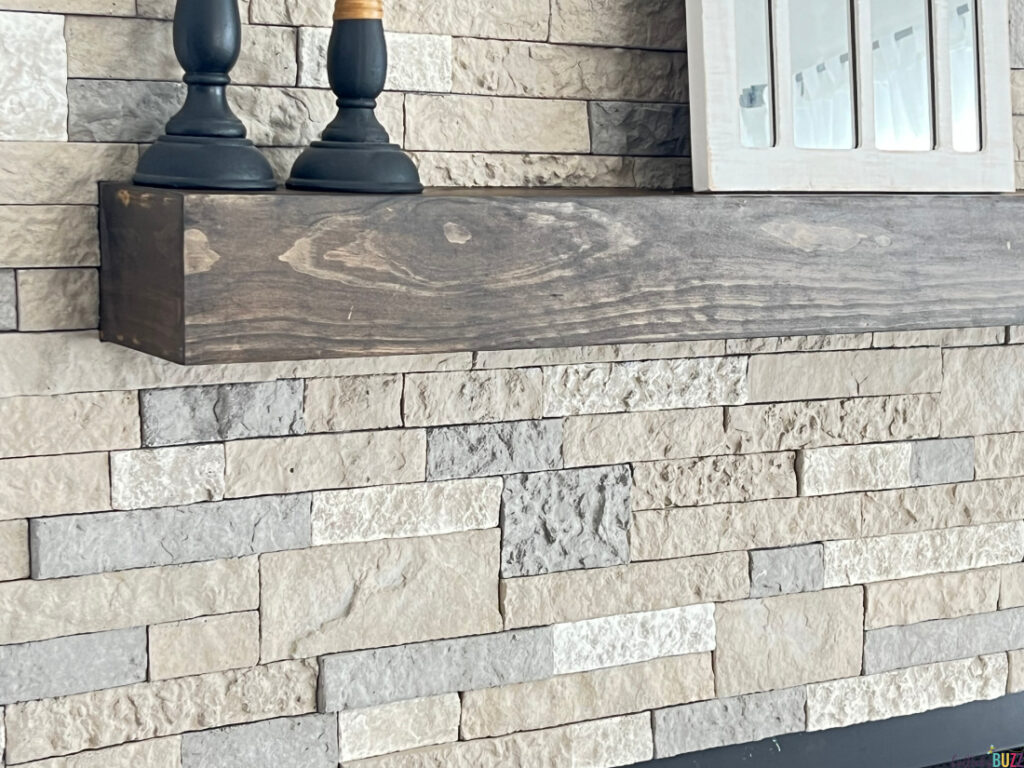
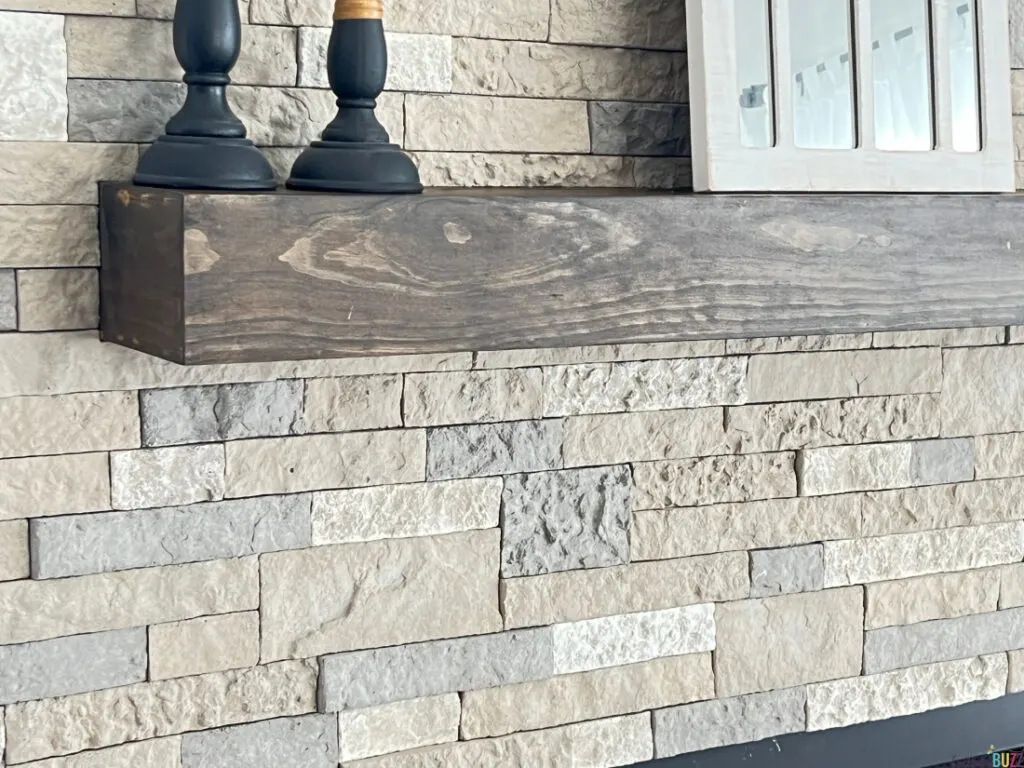
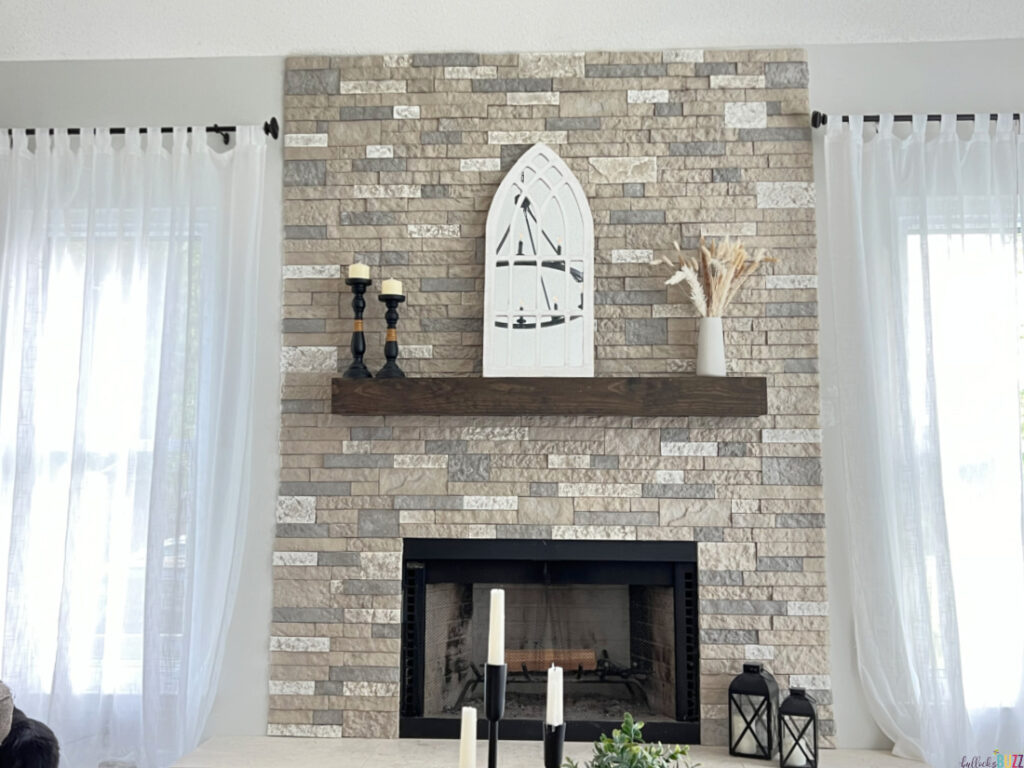
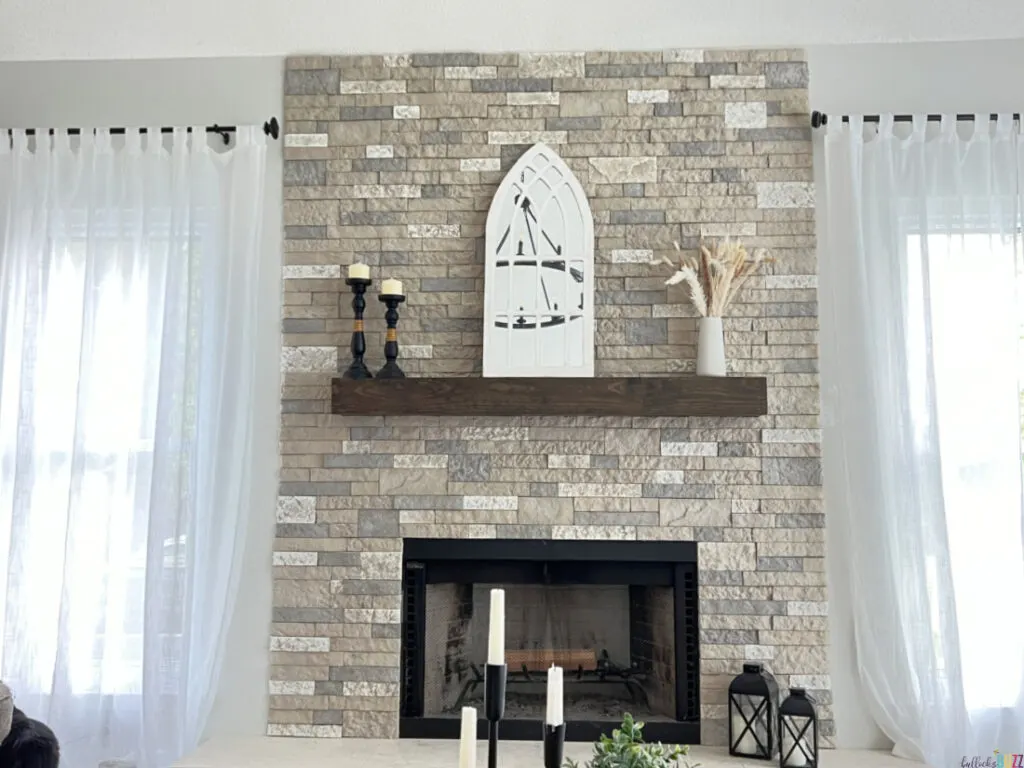
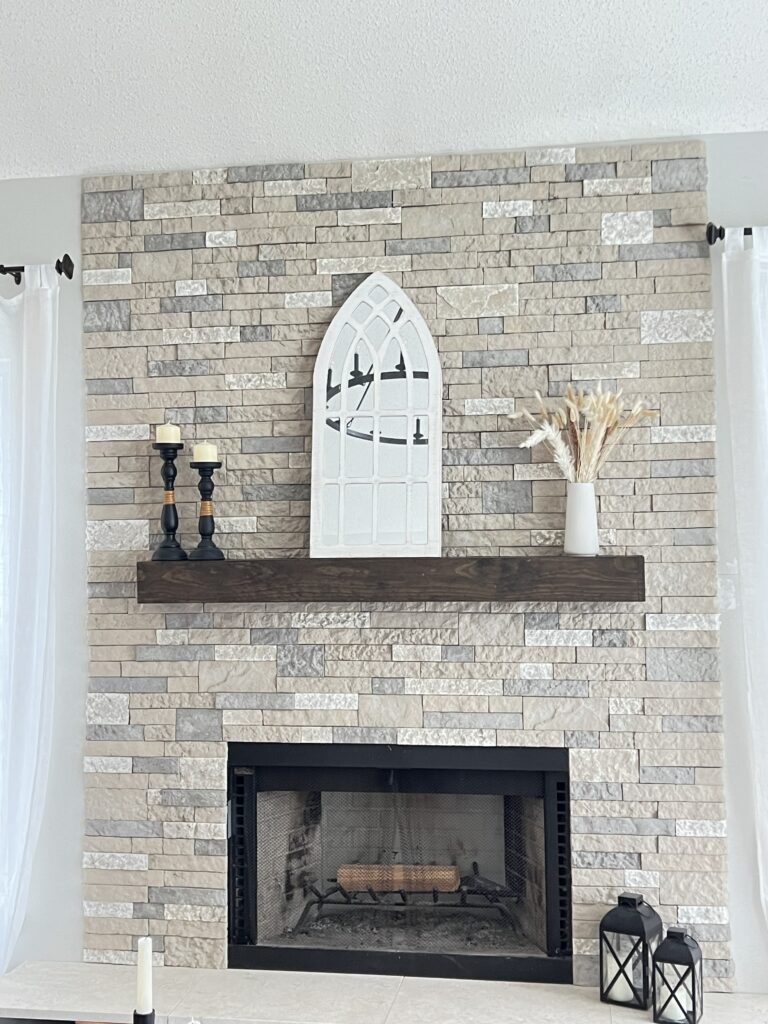
And while our remodel was not without some unexpected surprises and a few challenges, in the end, it was well worth it! We are thrilled with how our new fireplace turned out. The faux stone looks real, and the color, feel, and texture have made the room feel warmer and cozier. And I love how the stones fit together so perfectly, you can’t see any of the wall behind it.
We will eventually add some crown molding to the very top and around the rest of the room, but for now, we think it looks amazing, and the fireplace has become the focal point I knew it could be.
As an added bonus, by doing it ourselves, we saved a lot of money while adding value to our home and a new skill to our repertoire.
Most important of all, we LOVE it!
Where Can I Buy Airstone?
If you’ve been wanting to do some stonework but can’t afford the high cost of real stone, AirStone is a great option for a fraction of the price! It comes in four color palettes: Birch Bluff, Spring Creek, Autumn Mountain, and now Ocean View. You can buy AirStone faux stone online via their online store or Amazon, or any Lowes, Home Depot, or Menards.