This post may contain affiliate links. I only recommend products I use and love. Read the full disclosure here
Updated on: November 2, 2017
Originally published on: October 15, 2013
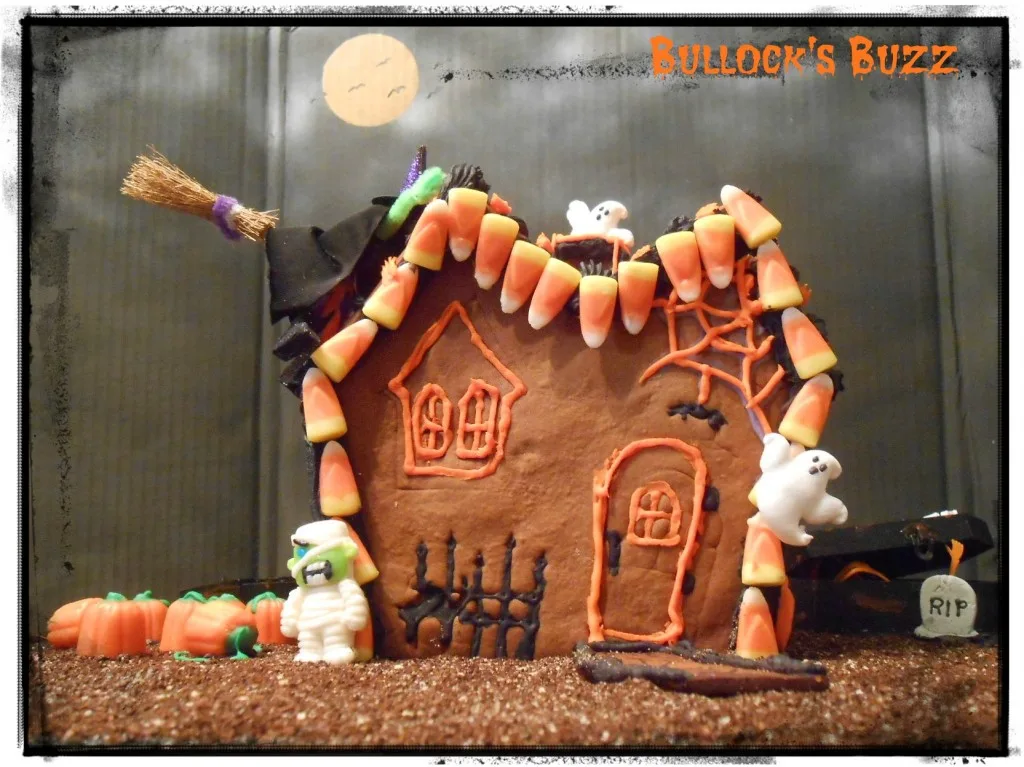
Haunted Gingerbread House Halloween

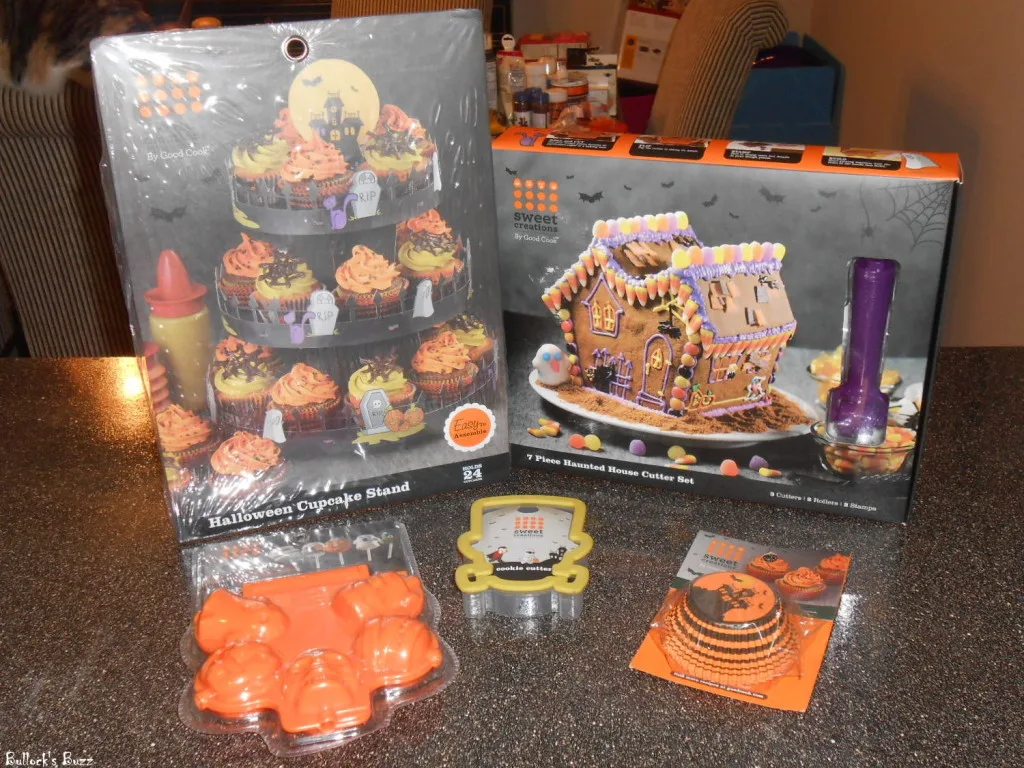
Halloween is one of my favorite holidays! Each year we throw a Haunted House Party, and this year’s was perfect thanks to Good Cook! As a Good Cook blogger I often get sent amazing products to try and share with you, my readers, and this month I received a chillingly awesome Halloween Kit that came with several products from the Sweet Creations line which is a Good Cook product line designed especially for dessert making, baking and holiday parties. Included was a Good Cook Sweet Creations Haunted House Cookie Cutter Set, a Halloween Cupcake Stand, a Halloween Cake Pop Press, a cute 3D Frankenstein Cookie Cutter, cupcake liners, and even some cute treat bags!

Since there were so many delicious goodies to make, and some great recipes I wanted to share, I am going to divide this into two separate posts, starting with my personal favorite, the Haunted House Cookie Cutter Set. Let me start out by saying I am no where close to being a professional baker, in fact, this was actually the first time I have ever made a gingerbread house, unless you count the one I made in elementary school using graham crackers and milk cartons! That being said, this was a very challenging experience, but one from which I learned a lot! Had I not had the opportunity to learn from my fellow Good Cook blogger’s tips and experiences, had I not done some research, and had I not had my husband’s help, this would not have come out as well as it did!

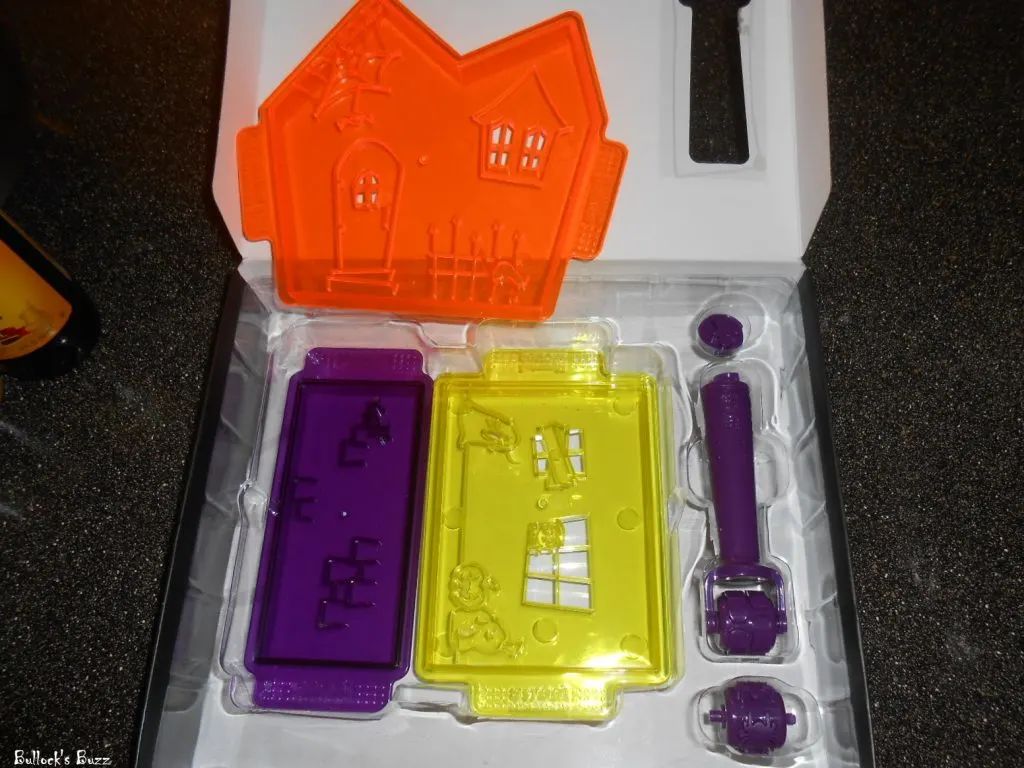
The Good Cook Sweet Creations Haunted House Cookie Cutter Set is not a pre-made Gingerbread House kit, instead it is one you make from scratch. It comes with 7 pieces: three cookie cutters (the front/back, the sides and the roof), 2 rollers and 2 stamps. There is an easy-to-make GingerBoo Cookie Dough recipe on the back, as well as basic instructions. I want to go ahead and say that the kit itself is great! It is durable, innovative, fun and easy-to-use and to clean; user inexperience is what caused all of the mishaps and made it extremely time-consuming! But in the long run, it was worth it!
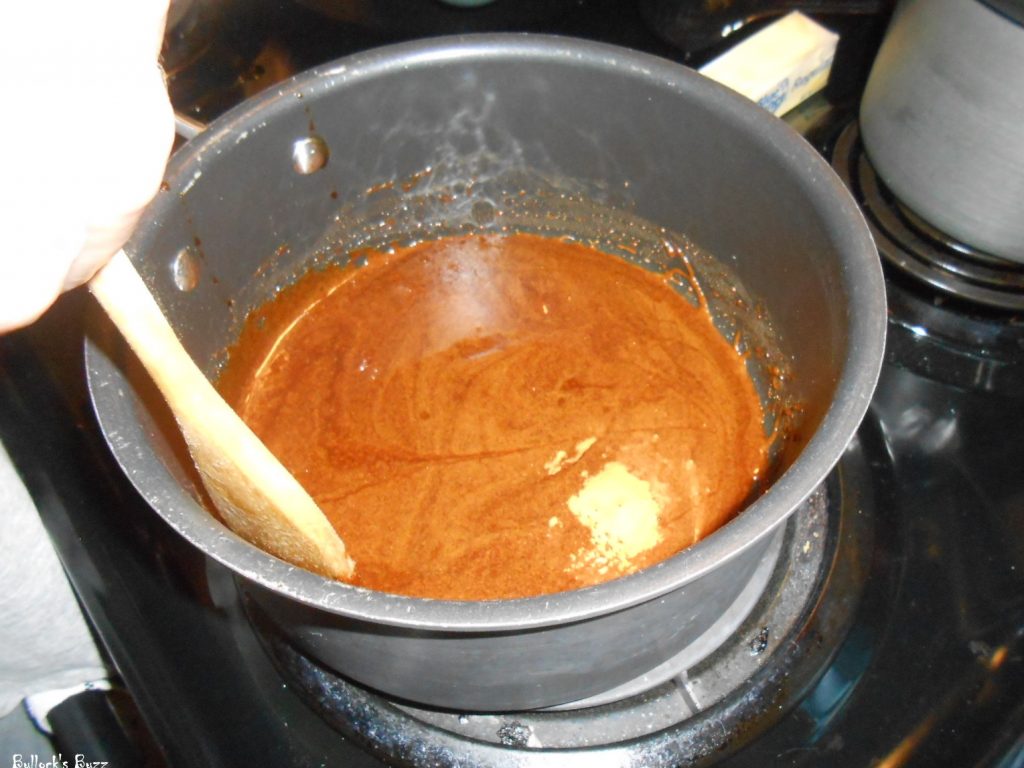

First you make your gingerbread dough. This was quite easy, and did not take long at all. Once the dough is made, work with it until it comes together and is no longer sticky, then put it into the refrigerator for about an hour or so to thoroughly cool. We left it in a bit too long, and wound up having to wait for it to get closer to room temperature to roll it out. Once chilled, using a rolling mat or parchment paper, split the dough in half and roll it out until it is around 1/8″ thick. If you do not roll it thin enough,there’s a chance you will not have enough dough. Thankfully, we had plenty of dough left to where we were able to make a chimney, a sidewalk and an emergency wall as we dropped one of ours and it broke!
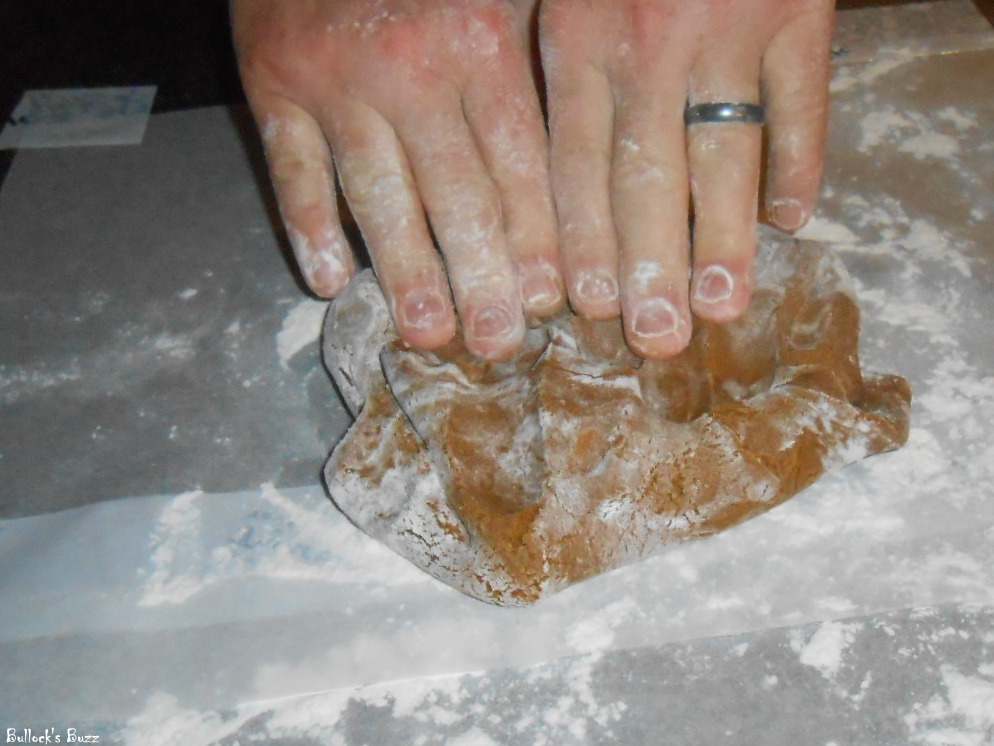
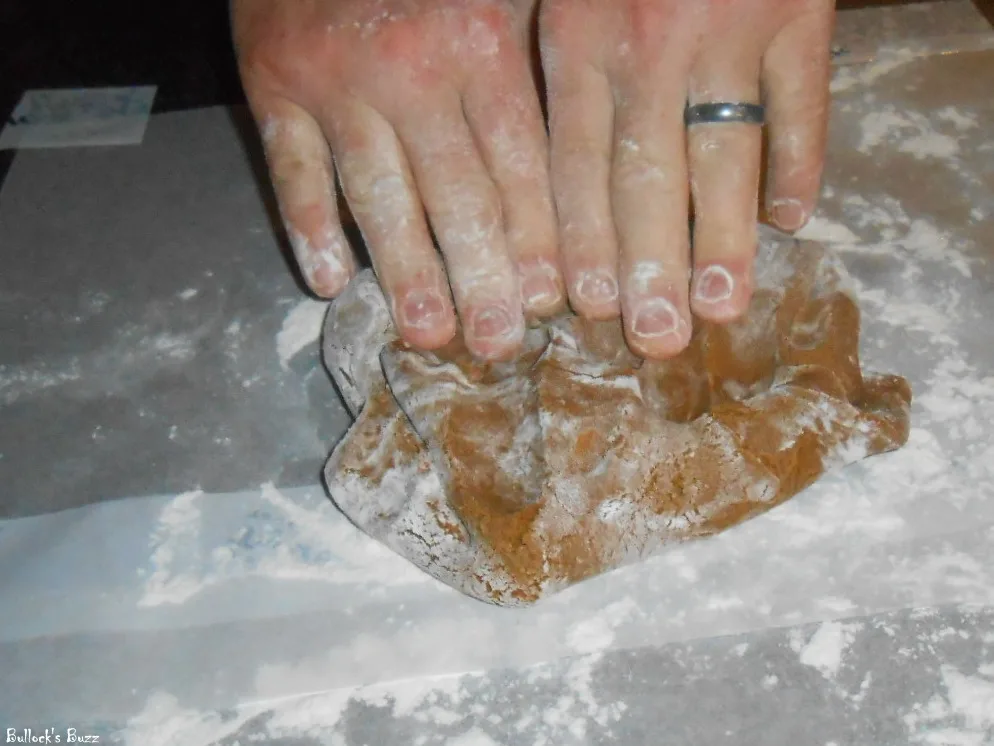
As you get it rolled out, use the cookie cutters to cut out the individual pieces. While there are designs in the molds, you can use the included stamps and roller to add more if you’d like. Once you have all of the dough rolled out and have stamped and cut it, place each piece on a baking sheet and bake it at 325° for about 12 minutes or until the edges begin to brown. We had used parchment paper to roll out the dough, so transferring the pieces to the sheet was as easy as sliding the parchment paper onto the sheet and placing it in the oven. This kept the pieces from bending and/or stretching. Once baked, let it cool completely before you assemble it.


Now it is time to put it together. I highly recommend using a recipe for Royal Icing as this will work the best to hold your house together – the one I included below worked perfectly, once we figured it out! Having never made it before, I mixed it until it was way too thick and hard! We wound up having to add water until we got it to what finally turned out to be the right consistency. Here’s another tip: this icing will dry out quickly if left exposed to air, so if you need to stop, stick the end of the icing bag in another plastic bag to keep it airtight and stick it in the refrigerator.
Royal Icing Recipe
Makes 3 cups
3 tbsp Meringue
4 cups Confectioners Sugar
6 Tbsp warm water
Mix all ingredients together until icing peaks. Approximately 10 minutes. We used a handheld blender and it took about 7 to 8 minutes.


Once you have the icing made to the correct consistency, spoon it into either an icing bag or a sandwich bag with a corner cut off. Carefully pipe a thick line of icing around the edges of the wall pieces. We starting by “gluing” a wall to the front piece first, then adding the other wall, then the back and then the roof. This house is designed to where the walls lean inwards just a bit to completely connect. After each piece was glued together, we braced them with random items to hold them in place. If you made the icing correctly, they will hold easily and within a few hours the icing will dry hard as a rock. The roof was applied last. Once you have it together, leave it alone to dry for several hours before decorating – we left it to dry overnight, and the next morning it was very secure!
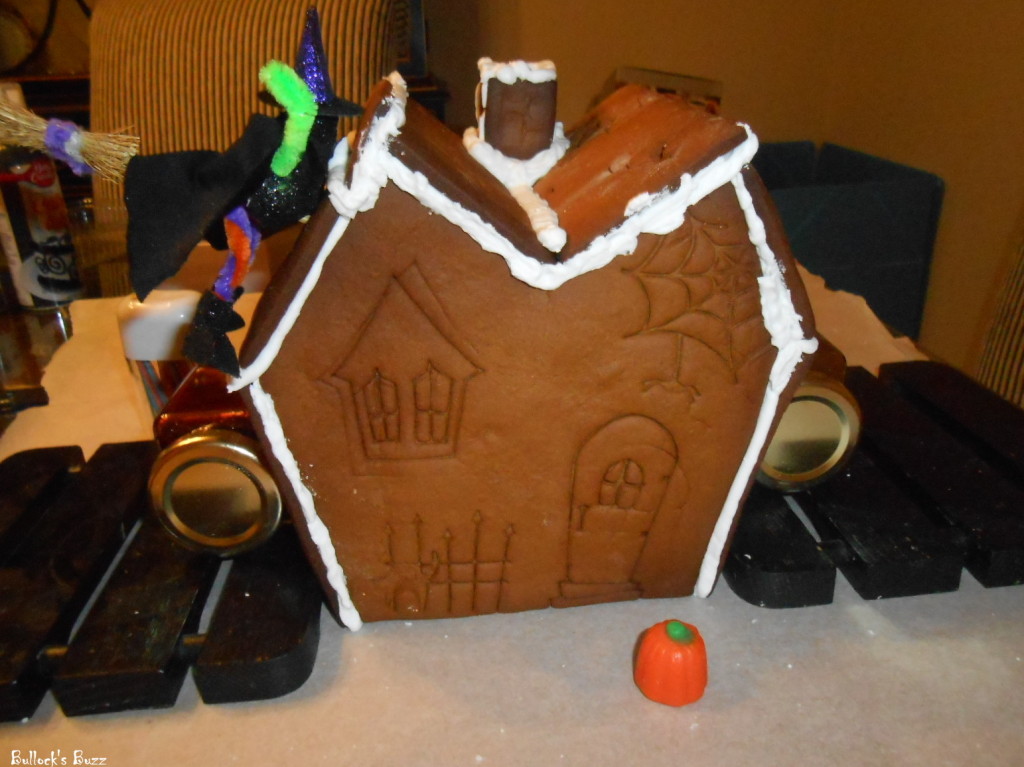

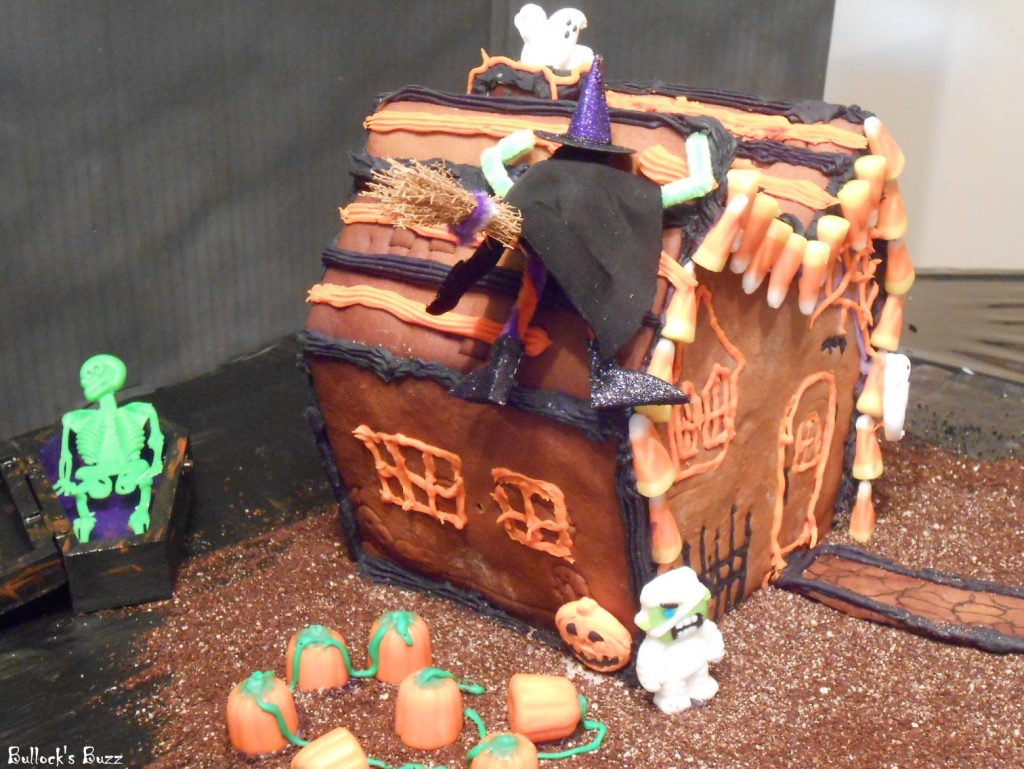
The witch was our personal addition, and was made using a $2 foam decoration from Michael’s. My husband was able to use a toothpick to carefully ‘drill’ a hole in the roof piece to stick the “broomstick” through. We used a tiny clamp to secure it on the inside. Originally we had planned to stick her into the wall, so before we baked the walls, he had stuck a toothpick through the dough to make a hole. After the house was together, we realized the roof would work better. I was biting my nails the whole time he was making the hole, just waiting for the cookie to crack! LOL!

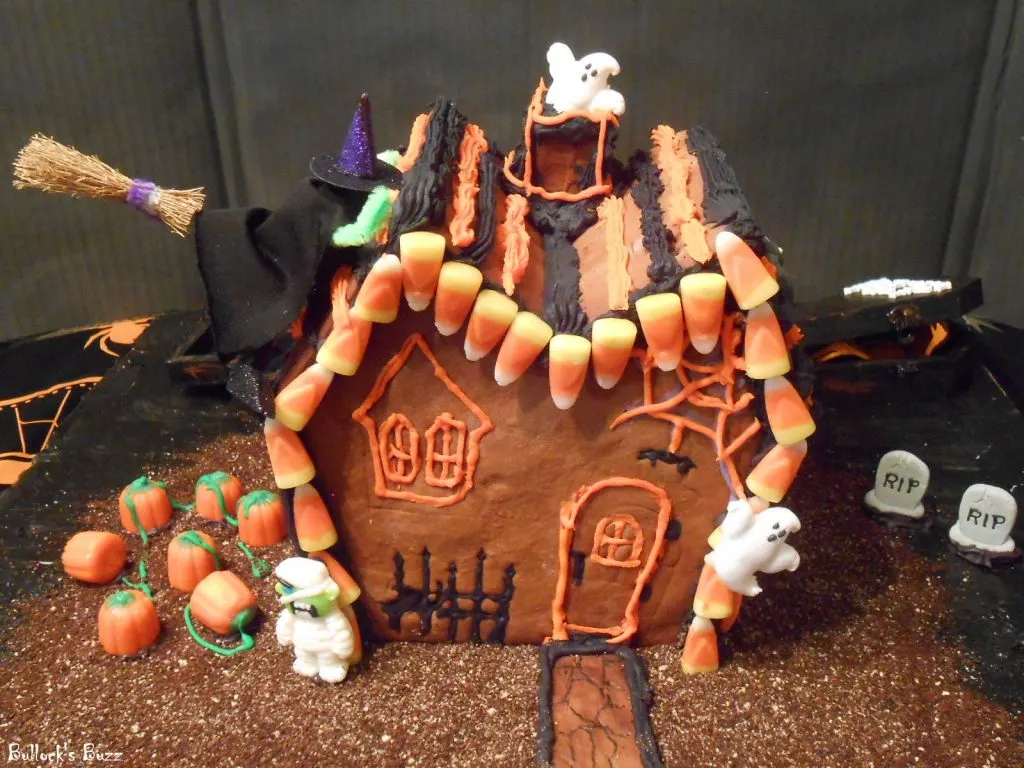
Once your house is dry, it’s time to decorate! Use icing, candy, cereal…whatever you can think of…we used old coffee grounds mixed with breadcrumbs for the dirt…use your imagination and have fun!

Now I bet you can’t wait to create your own! Right? Well, guess what! Good Cook is offering all of my readers a 25% discount to GoodCook.com for any Sweet Creations Halloween product! YAY! All you have to do is use the promo code: HAUNTED23 when you check out.
AND…if you want to enter to win your very own Haunted House Cookie Cutter Kit, plus several other awesome Good Cook Sweet Creations products, be sure not to miss our giveaway coming up in the next Good Cook Sweet Creations Halloween post!
Agata Pokutycka
Thursday 17th of October 2013
Oh, I want one of these sets! Mark would have so much fun creating a hunted house ;-)
Nikki
Wednesday 16th of October 2013
That came out so cute! Love this for a fun weekend craft!
mommy2jam
Wednesday 16th of October 2013
My boys would absolutely love this! I need to get this especially for this spooky season.
Debi@TheSpringMount6Pack
Wednesday 16th of October 2013
That is so cool. My kids and I would love to make one of these.
cindy b
Wednesday 16th of October 2013
This is awesome! I totally need to get one of these! thanks so much for sharing!
Staci L.
Wednesday 16th of October 2013
This looks so fun! My four year old would love this!