This post may contain affiliate links. I only recommend products I use and love. Read the full disclosure here
Updated on: January 31, 2022
Originally published on: June 16, 2013
This post for DIY Candle Holders may contain affiliate links.
Those of you who read this blog often may remember my recent post about the BIC Mark-It Permanent Markers and the cute butterfly wind chimes I made thanks to BIC and Smiley360. These awesome markers will work on almost every medium from plastic to glass, from metal to ceramic, from photos to foils and so much more!
Thirty-six bold and bright colors come in one handy three-fold case. These markers have really brought out my urge to craft and create, and I couldn’t wait to see how well they would work on different surfaces.

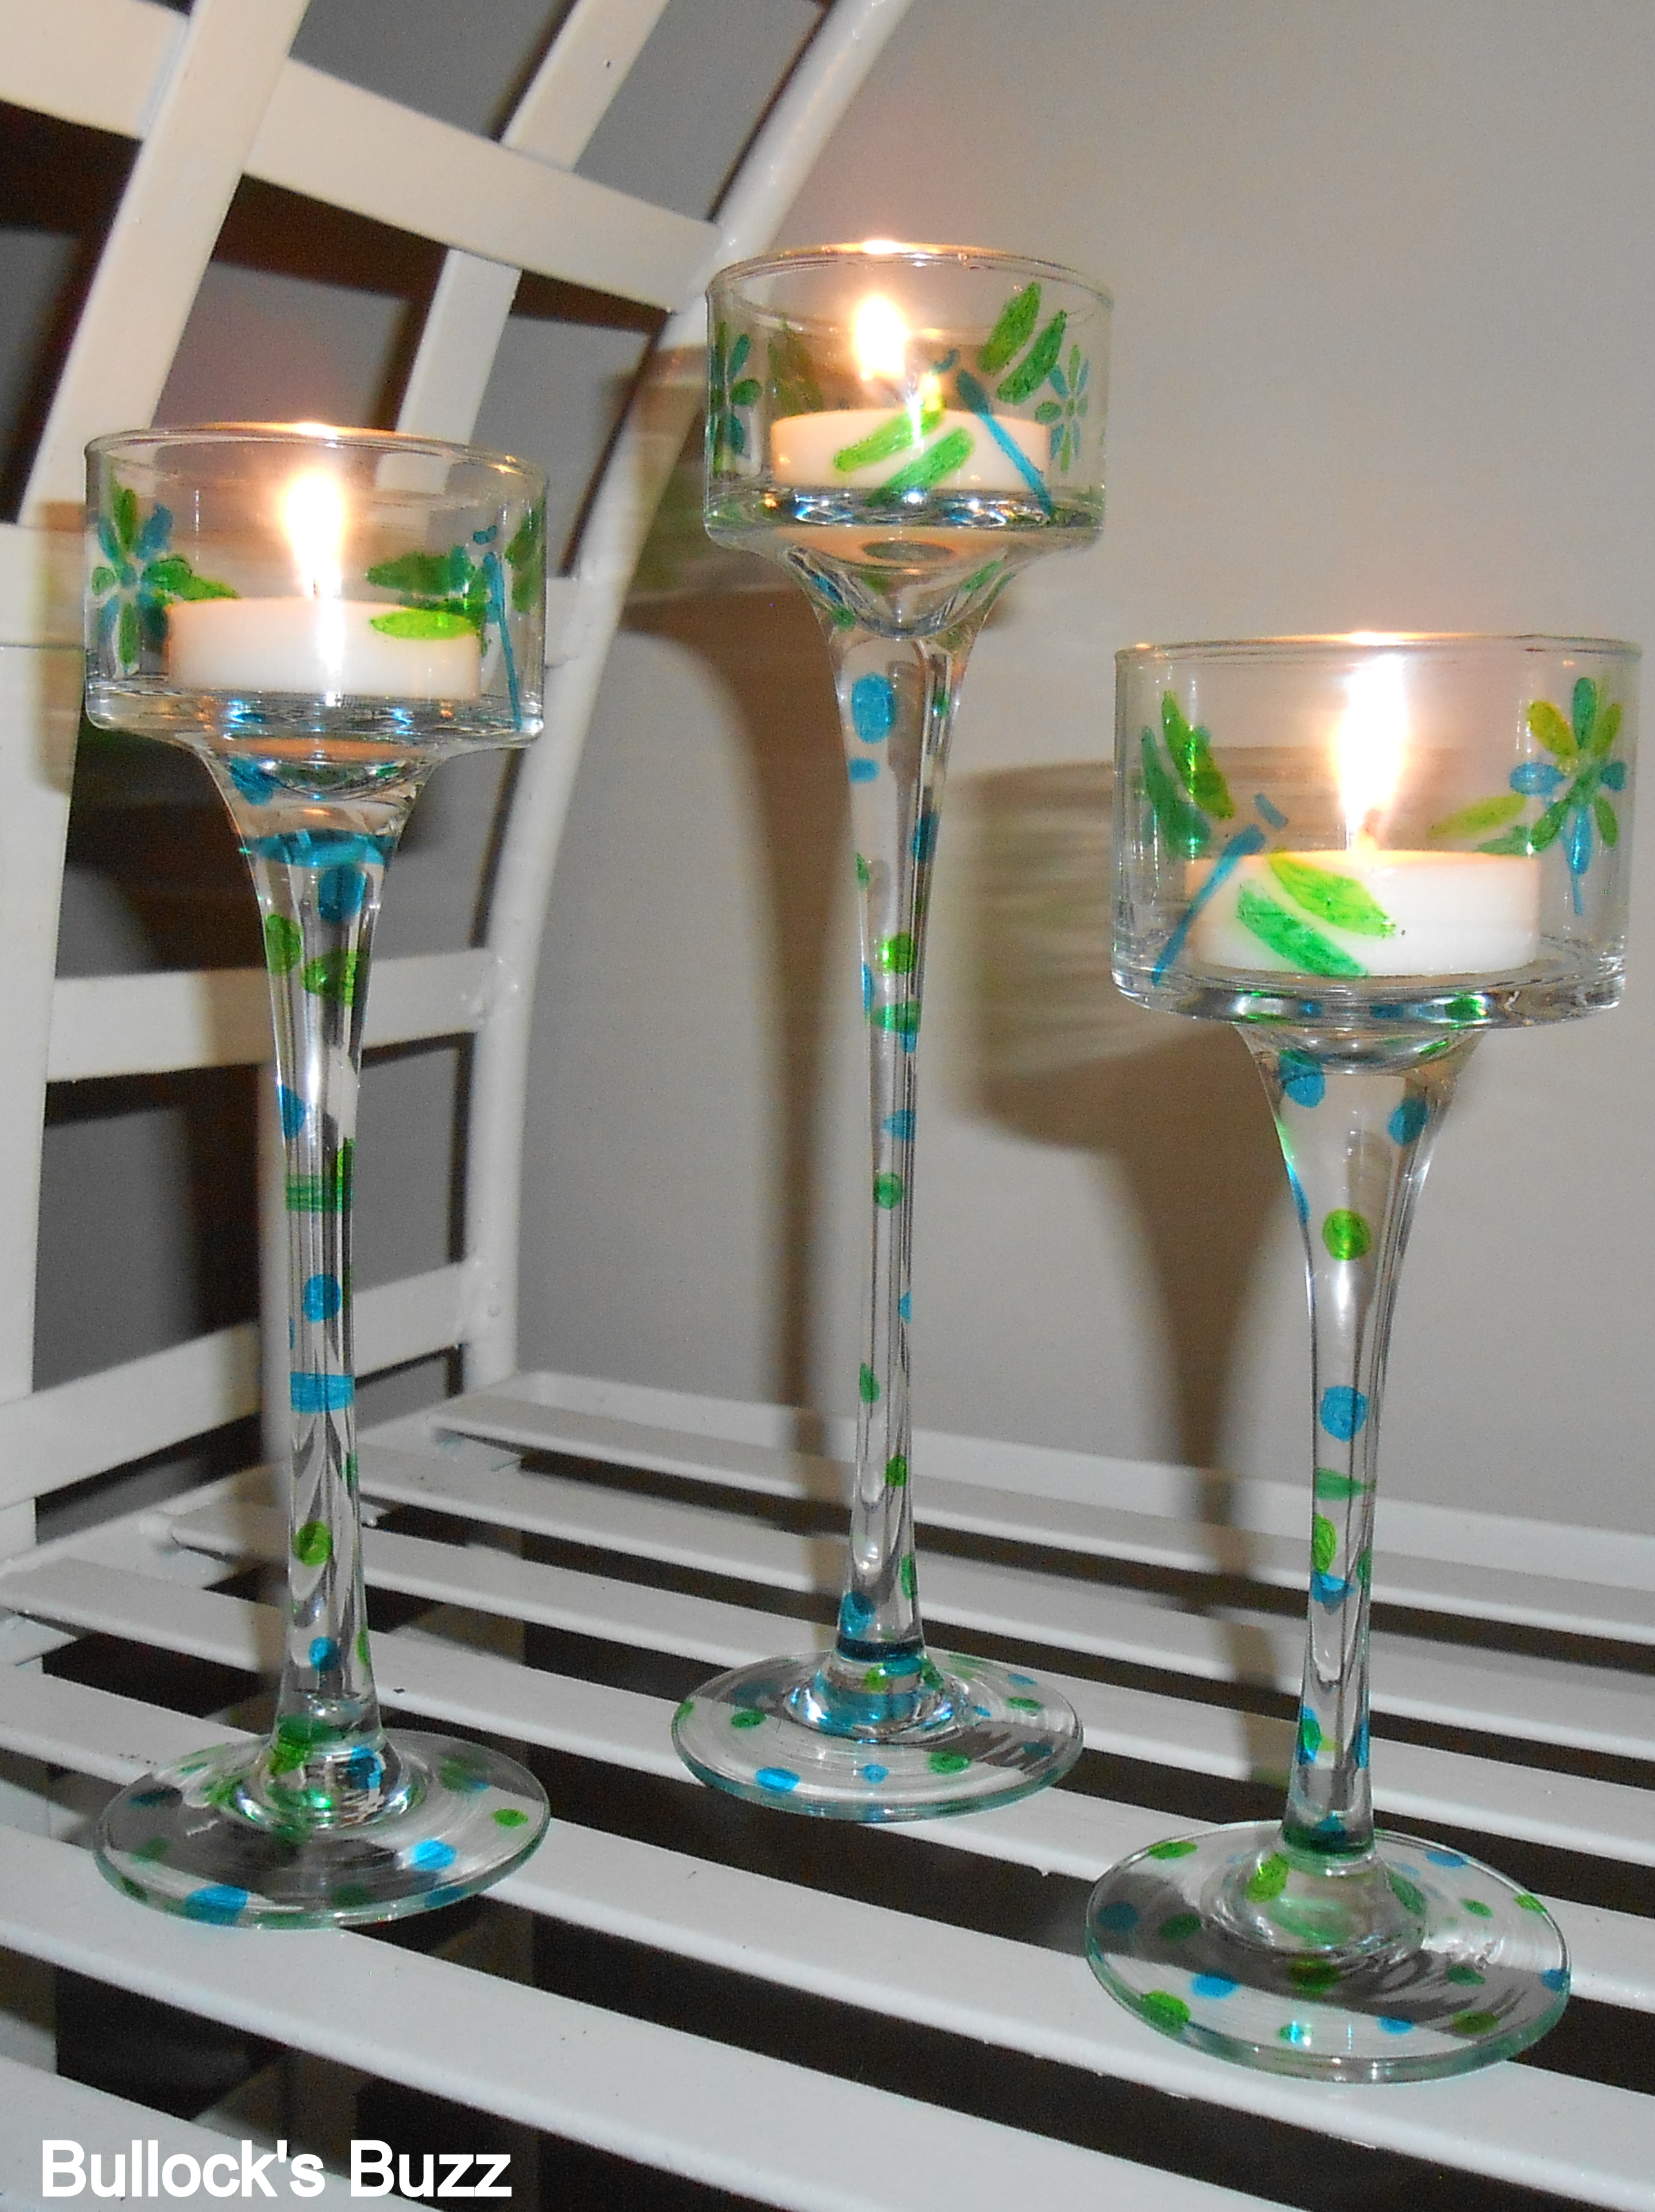
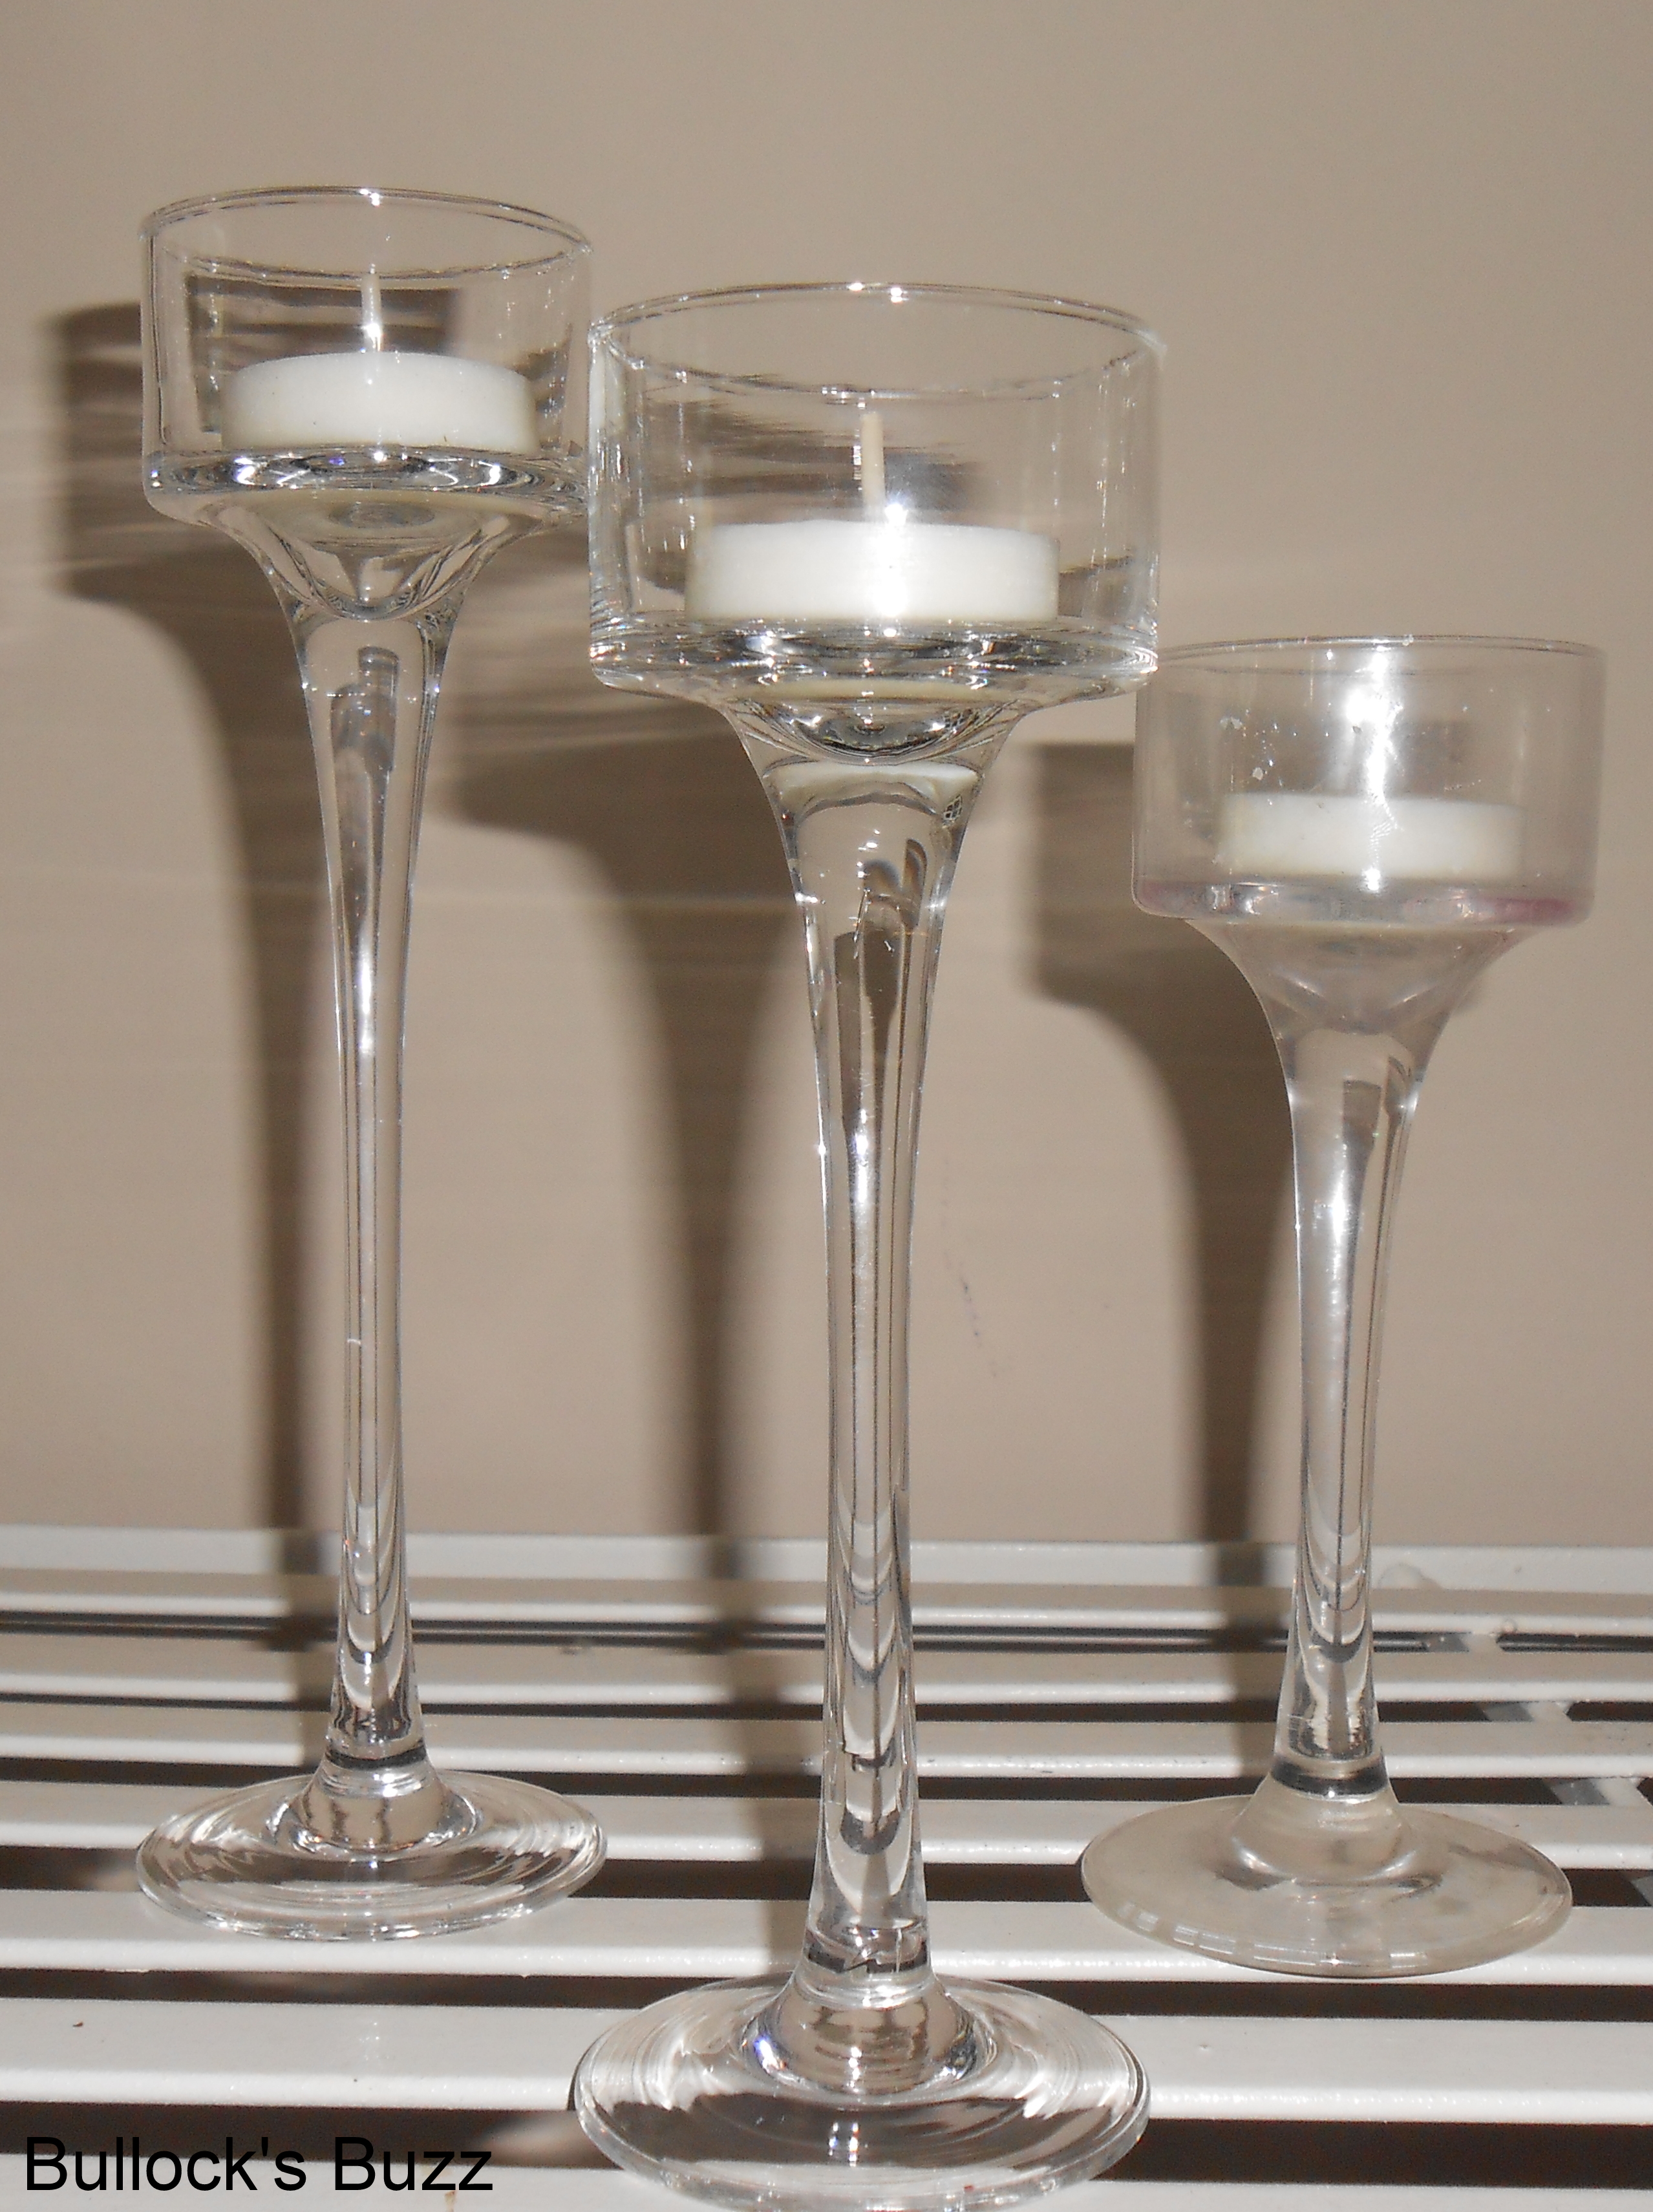
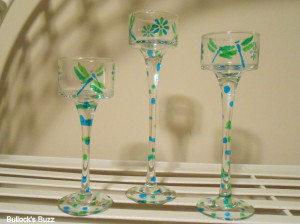
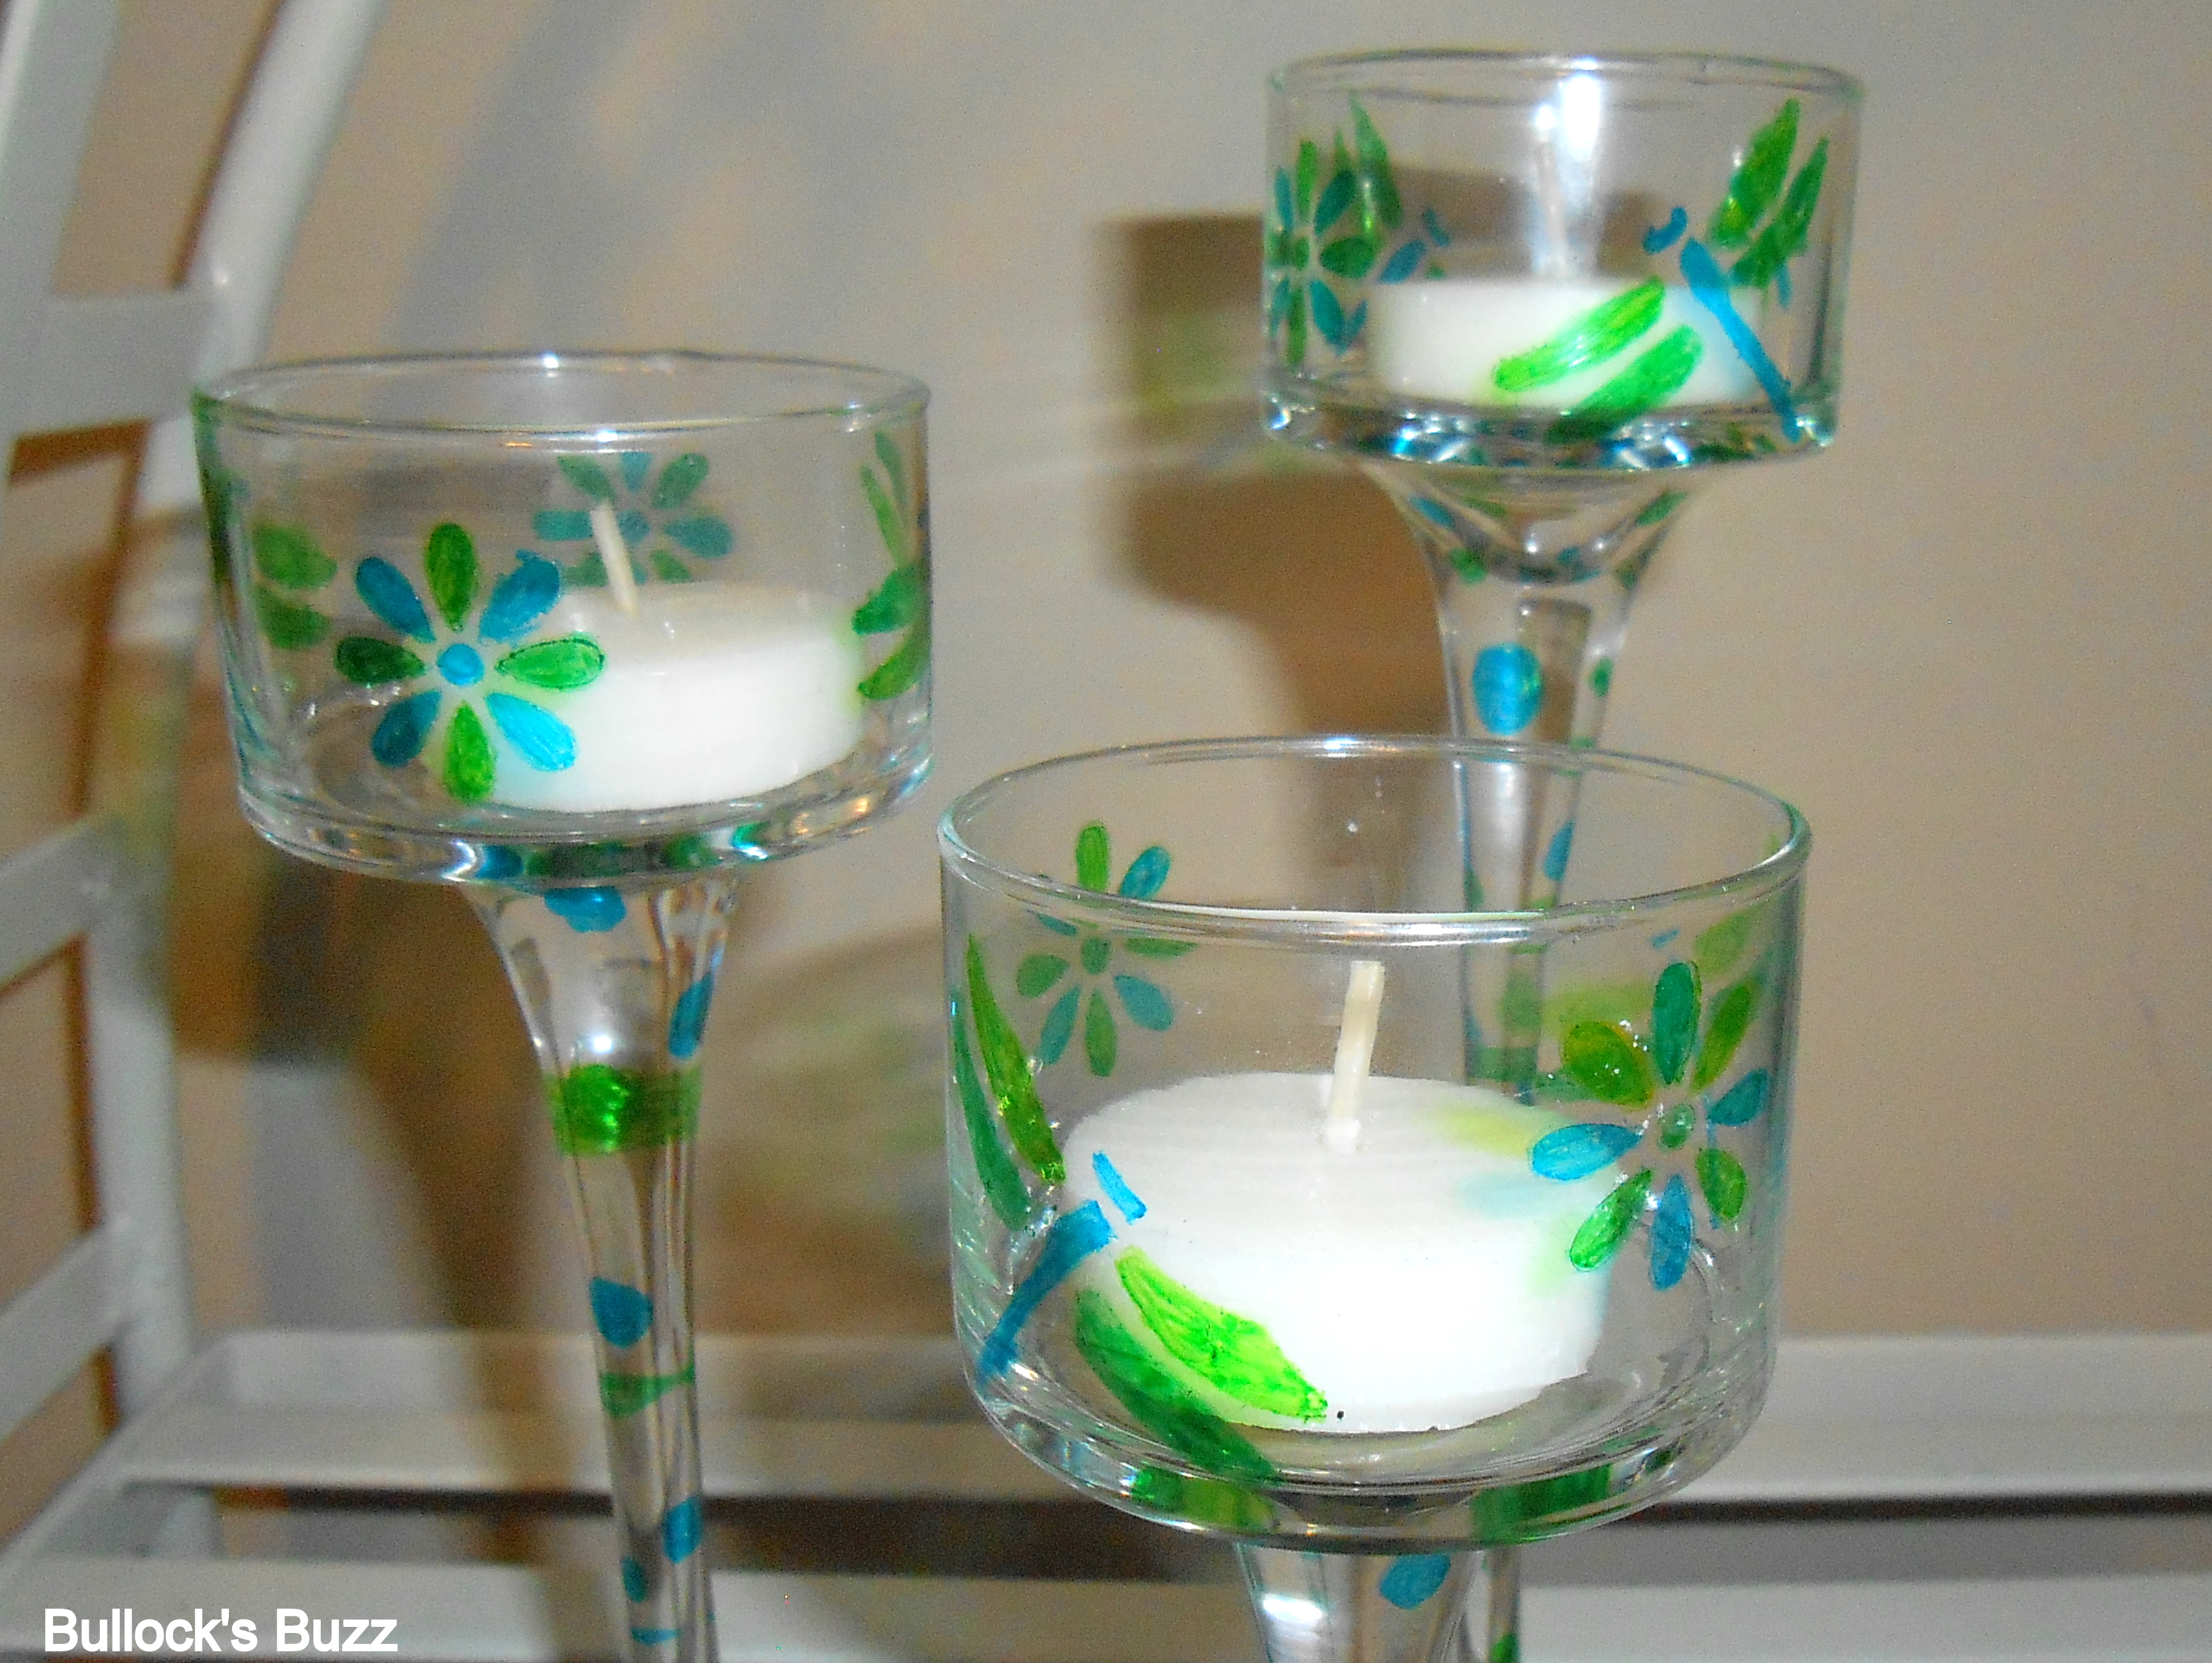
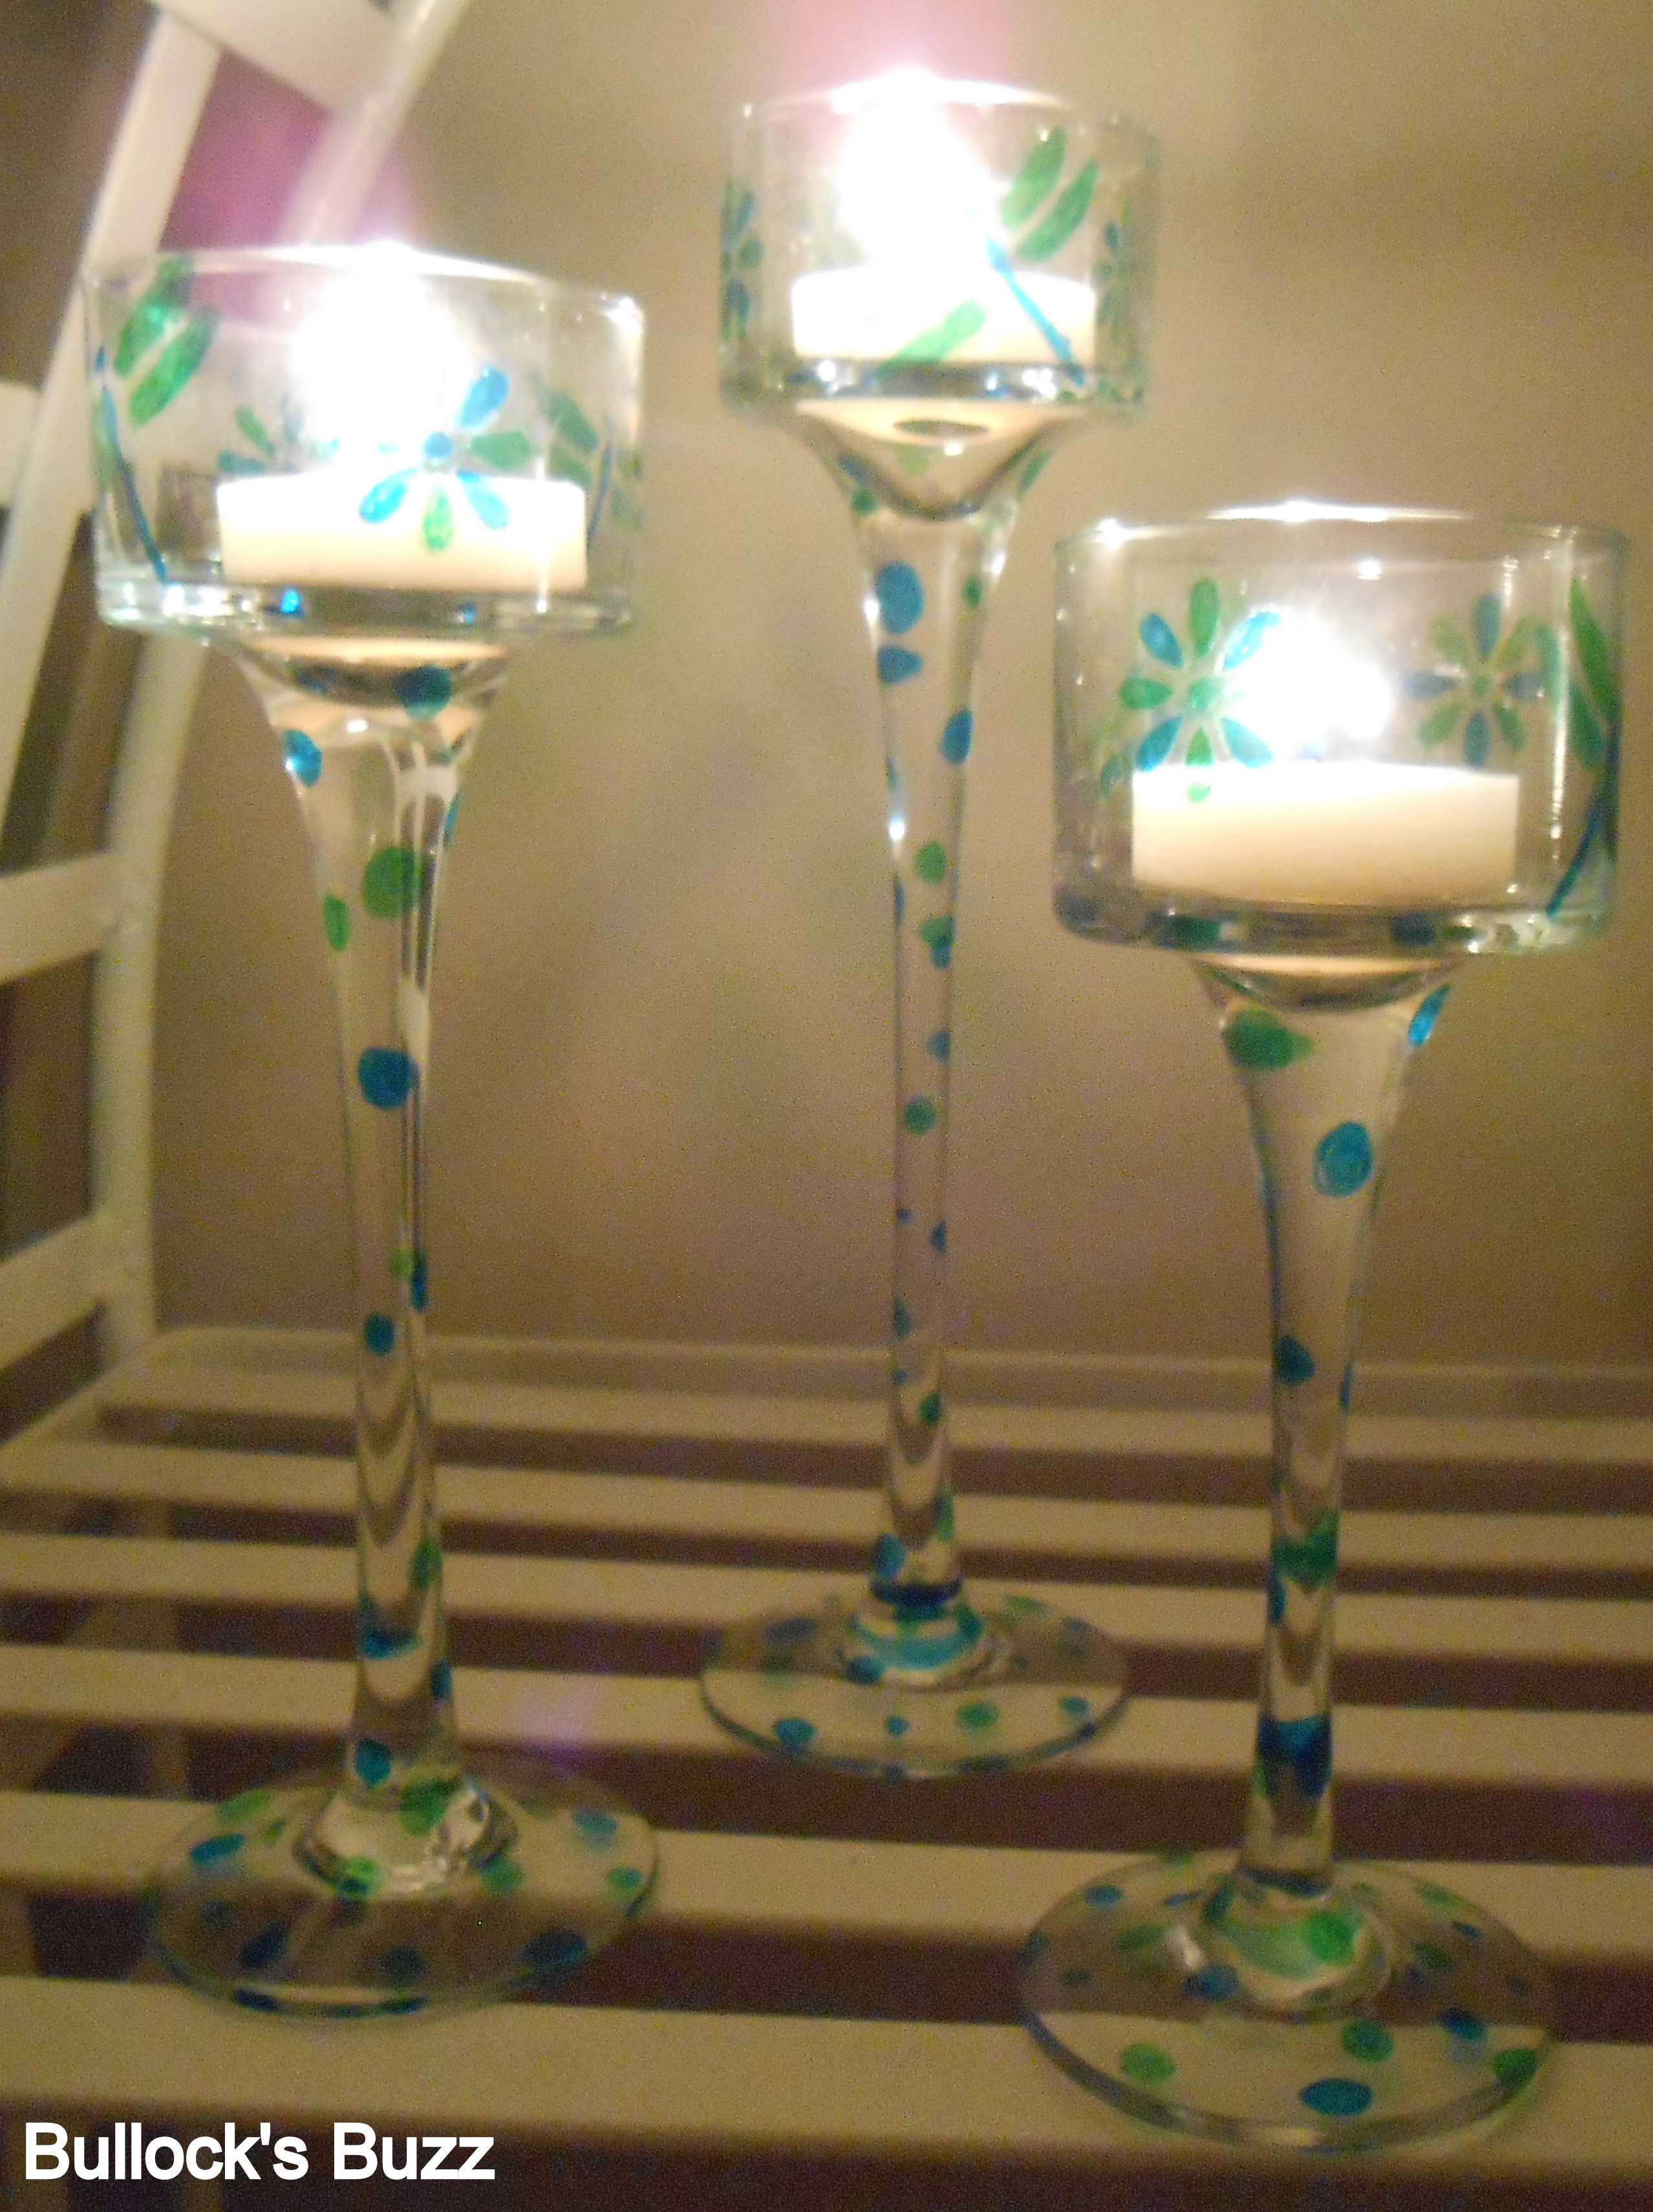
My latest creation was made using 3 glass tea-candle holders from a Dollar Store that I had used as part of a table decoration I had made for my wedding.
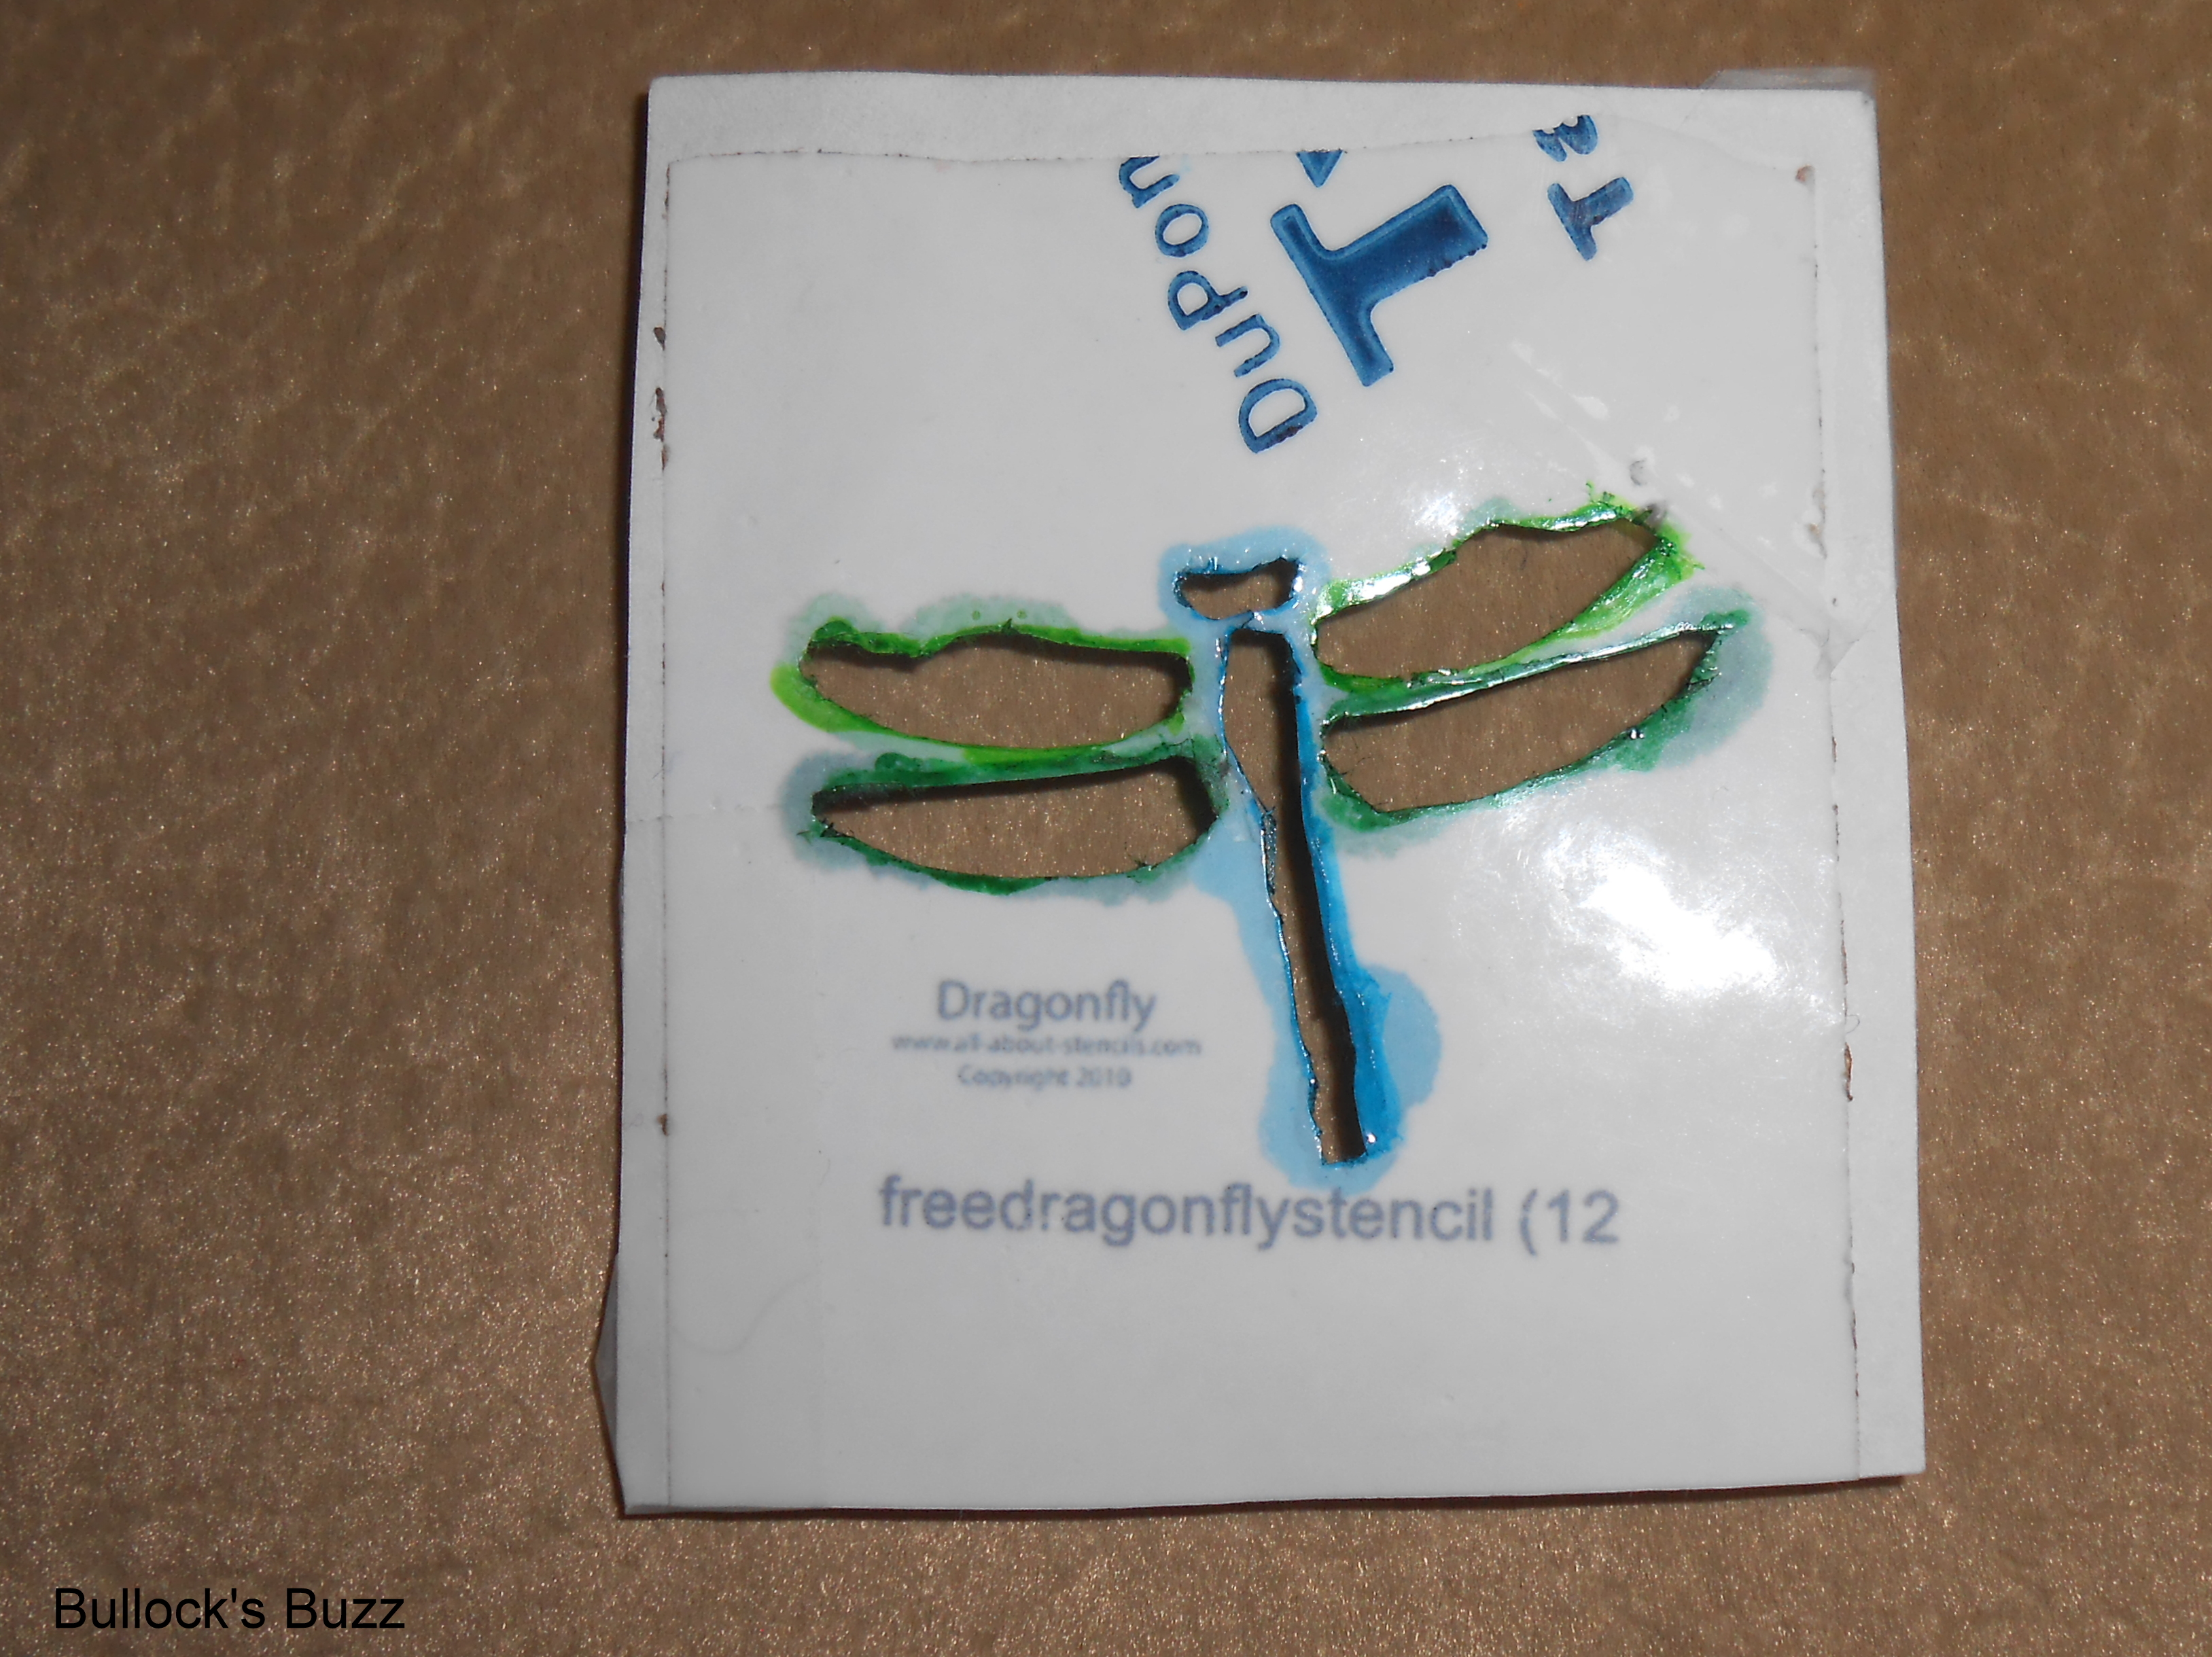
Using the markers, a dragonfly stencil I printed off the internet, and a flower stencil from Michael’s, I turned a set of plain and boring tea-candle holders into a set of pretty, summery and colorful tea-candle holders!
Cost: $6 and some tax!
Time: 30 minutes.
Materials for DIY Candle Holders:
3 glass tea-candle holders in decreasing size
BIC Mark-It Permanent Markers
Dragonfly stencil
Flower stencil
Tape
Tip: if you want to save some money, search for free stencils on the internet. When you find one you like, print it up, then trim the paper down to a workable sized square (with the shape in the very middle). Next cover the entire square with some sturdy, waterproof tape (I found it works best to cover both sides to make it more durable). Next, using an X-acto knife, cut out the design (the outside lines of it, so you have the actual shape left to color inside of). This part takes some time and patience! Once finished, you will have a sturdy stencil that cost you nothing but a few minutes of time, some ink, tape and paper.
Instructions to make DIY Candle Holders:
1. Clean the candle holders thoroughly.
2. Decide where you want the dragonfly’s to go.
3. Attach the stencil to the glass with tape so it will not move while you are coloring.
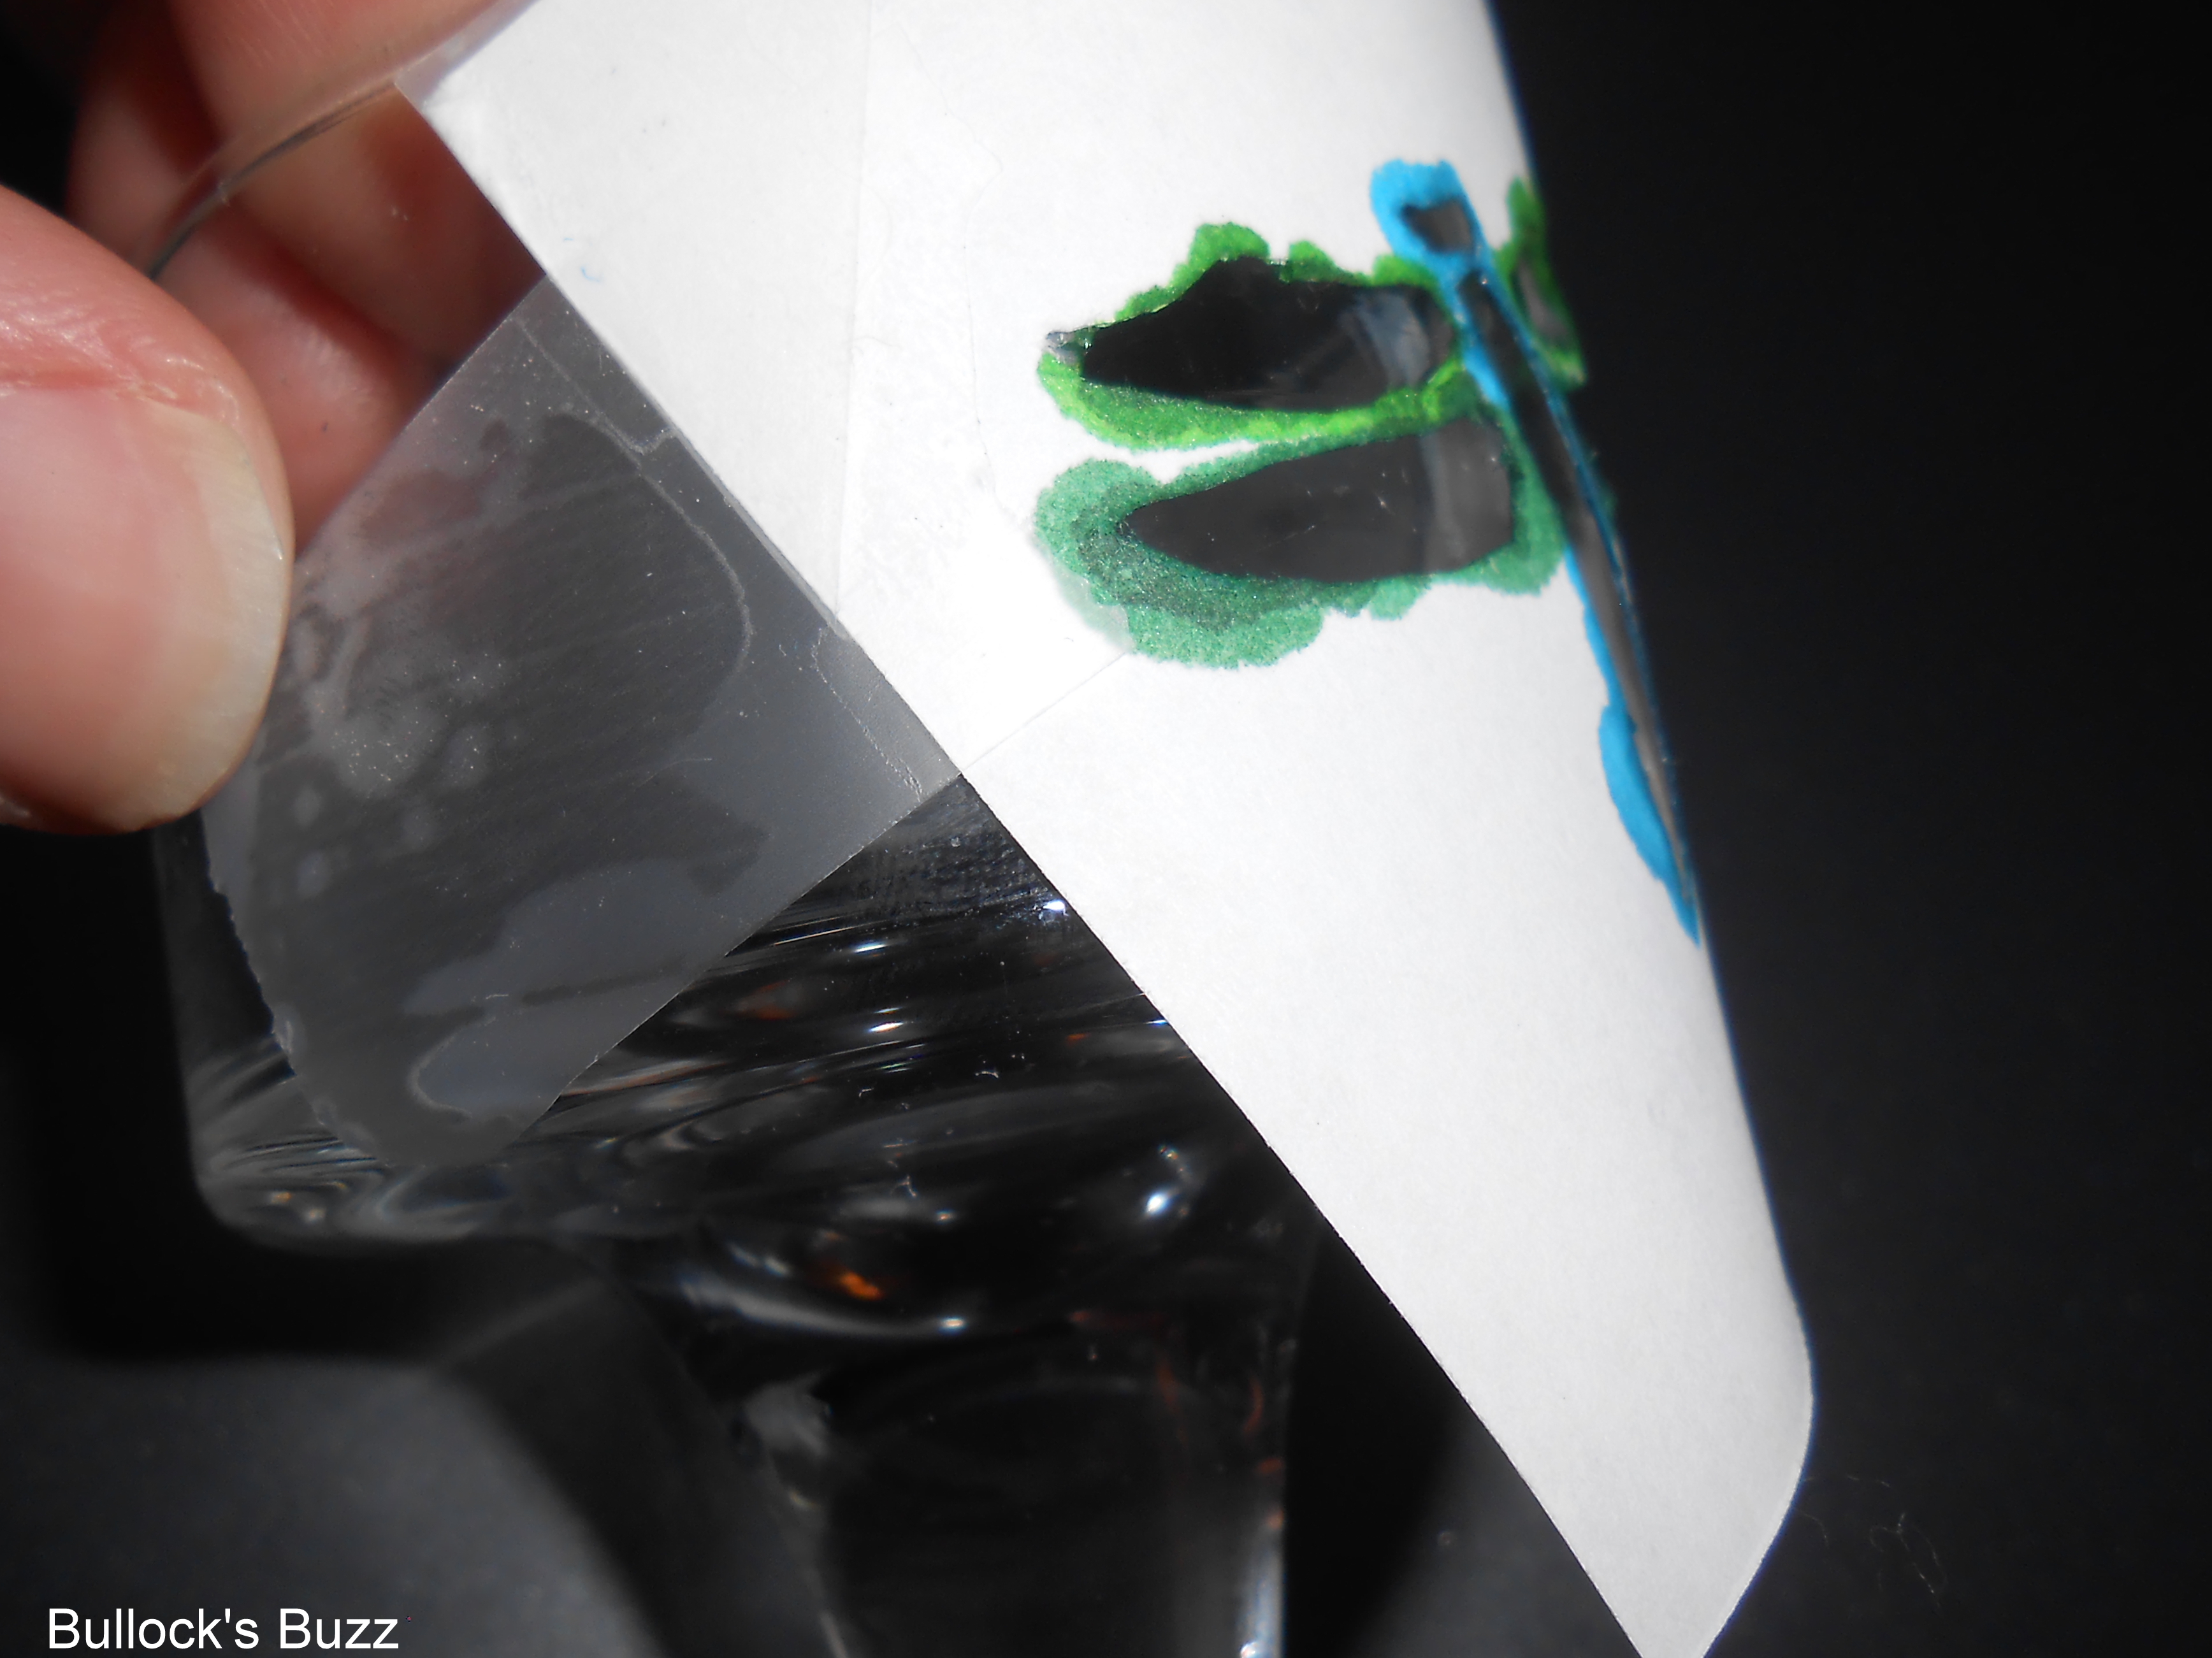
4. Using your choice of colors, color one dragonfly at a time around the outside of the candle holder. Repeat until you have a total of 3 dragonflies. Let dry.
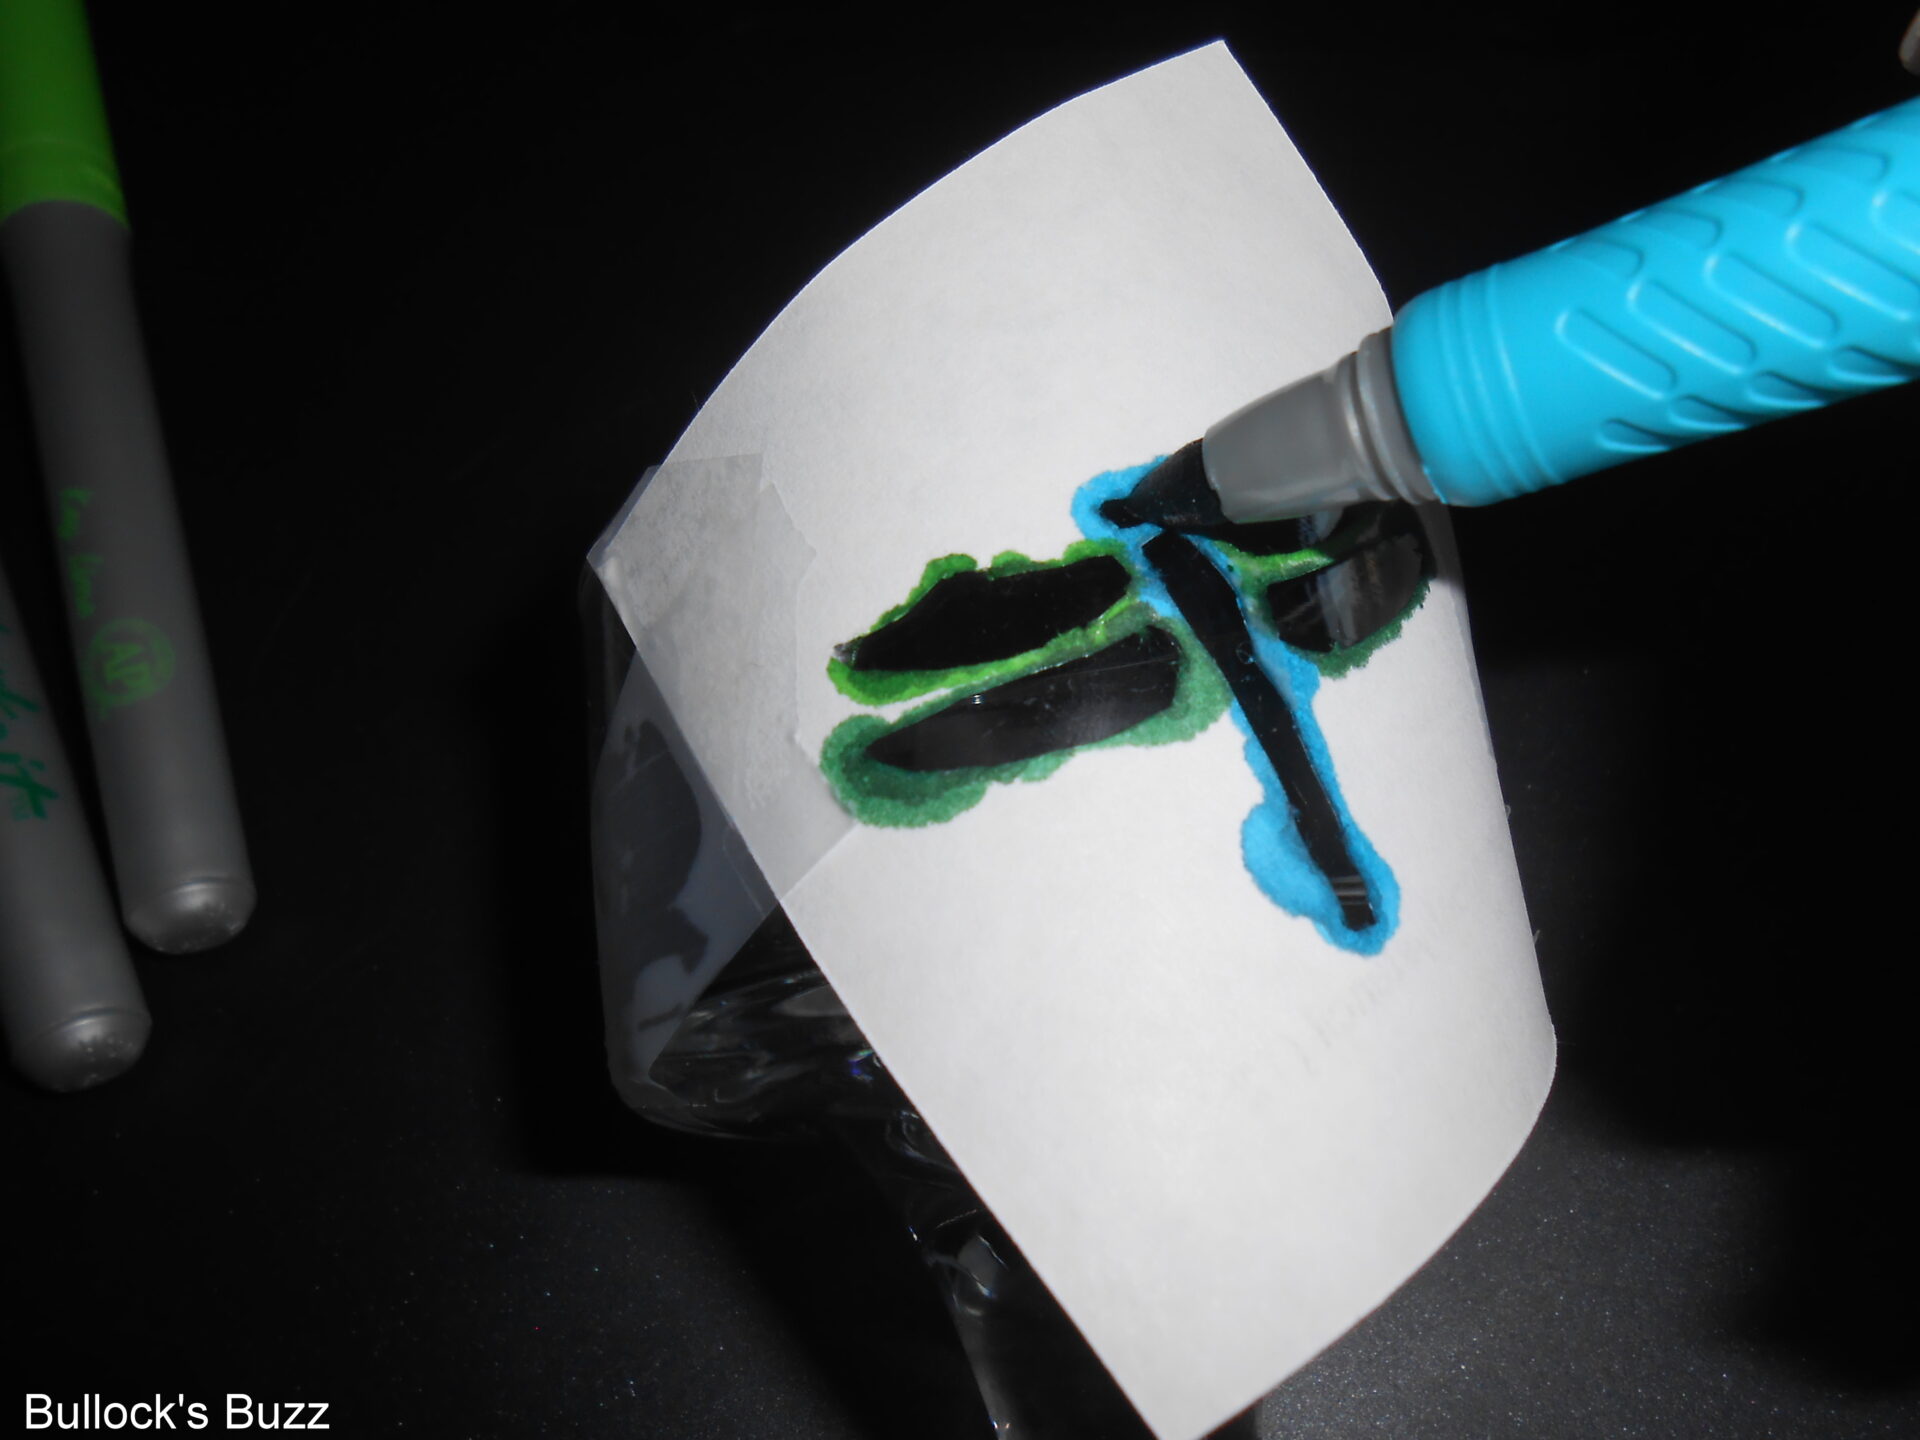
5. Follow the same steps, this time using the flower stencil and the same colors you used for the dragonflies.

When finished you should have an alternating pattern of dragonfly and flower around the outside of the holder.

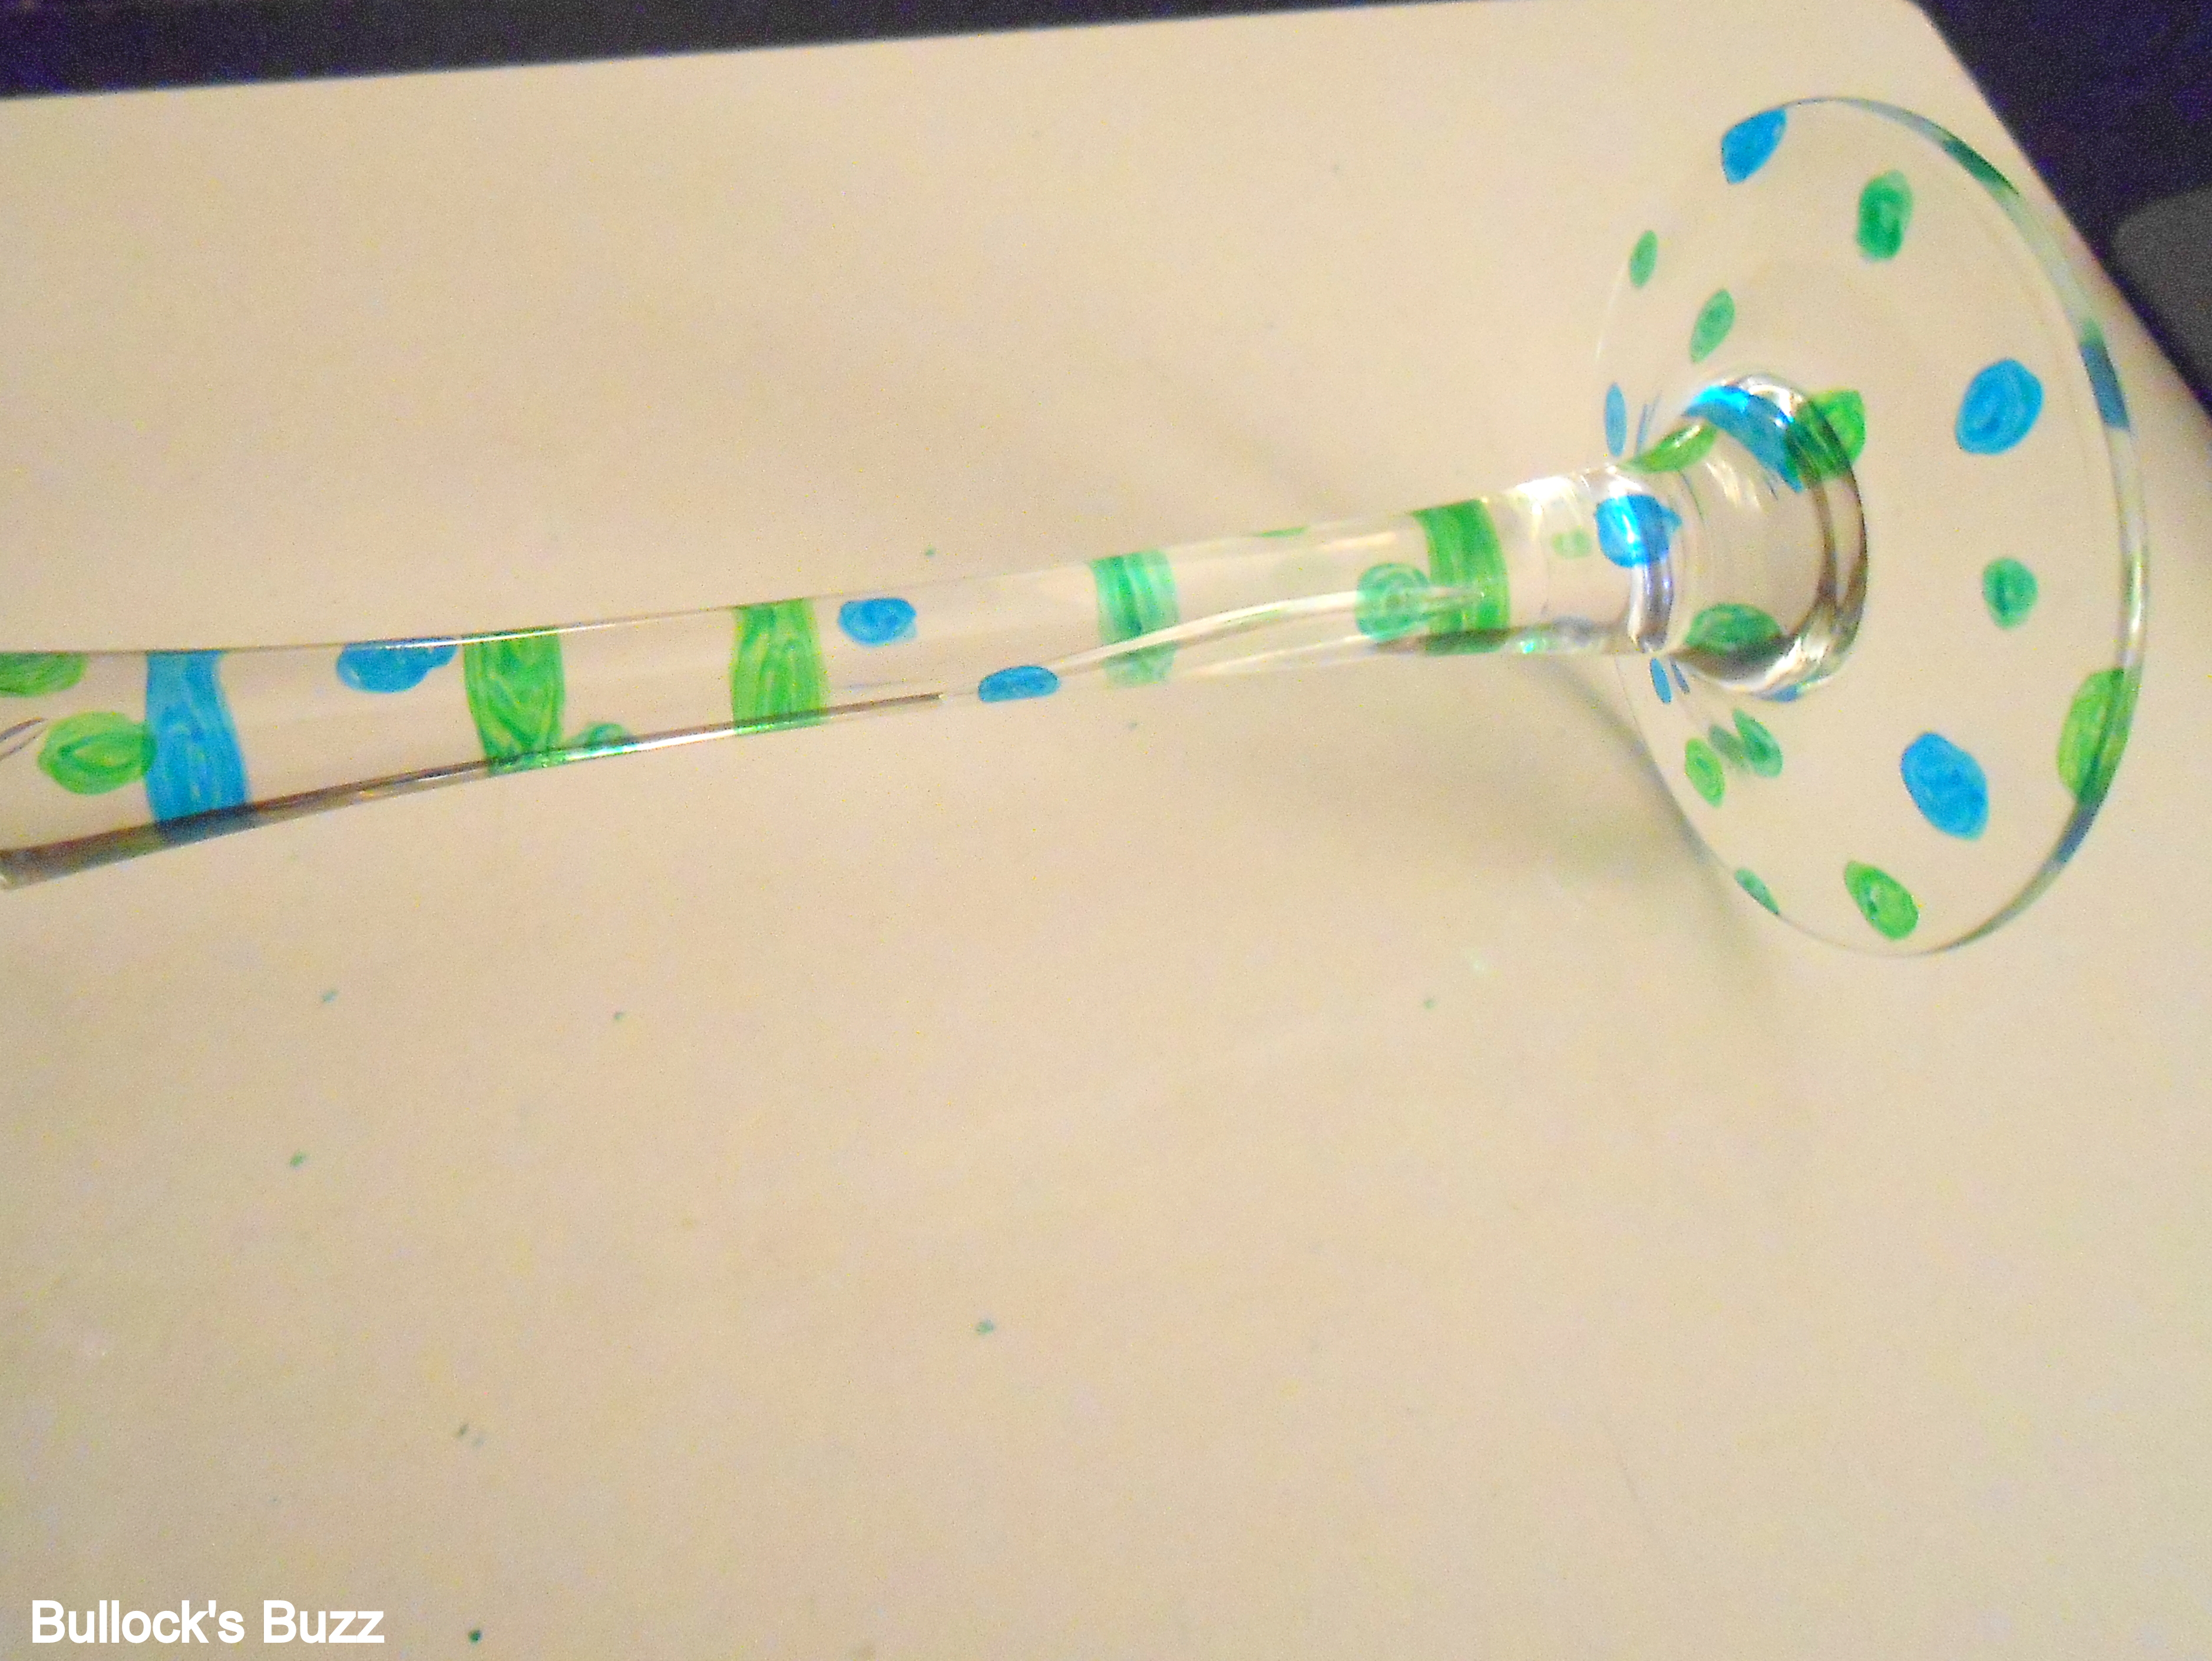
6. Using the same colors as before, free-hand different sized polka-dots around the base and stem of each candle holder. Let dry.

7. Insert tea candles.
Enjoy your creation!


Where to Buy Supplies
The BIC Mark-It Permanent Markers can be purchased at many stores both online and off including Staples.com, Walmart.com and Amazon.com.
Inexpensive glass candle holders like the ones I used can be found at many dollar stores, as well as at craft stores such as Michael’s. Also try looking online at sites like Etsy.com, Amazon.com and maybe even eBay.
Jason B.
Friday 20th of March 2015
The candle holders were nicer before the stenciling
AlainaBullock1
Saturday 21st of March 2015
You think so? I got tired of looking at the plain candles holders that everyone else has, so I figured I'd give it a try. To each his own! :)
Anni
Saturday 8th of February 2014
Cute idea. I'd probably use them over and over by cleaning off the permanent marker with nail polish remover and drawing on new designs for different occasions.
Maggie May's Gifts
Monday 28th of October 2013
Adorable! I LOVE all the different kinds of markers they have out now! Those are really cute. I'm visiting from our bloggy girls facebook group. Glad to have come across your blog! Jill www.maggiemaysgifts.com
Keisha Talley
Sunday 22nd of September 2013
This is so cute this will make a wonderful Christmas present
Pamela R
Sunday 16th of June 2013
these are so cute! Good job!