This post may contain affiliate links. I only recommend products I use and love. Read the full disclosure here
Updated on: February 5, 2026
Originally published on: December 27, 2024
In the world of do-it-yourself (DIY) crafting, laser engraving and cutting have emerged as powerful tools for turning creative ideas into tangible creations. Whether you’re a novice maker or a seasoned DIY enthusiast, the world of laser technology offers endless possibilities for bringing your designs to life with precision and flair.
In this comprehensive guide, I will walk you through the process of DIY laser engraving and cutting, from understanding the basics of laser technology to selecting materials, creating designs, and executing your projects with confidence and creativity.

Ready to get started on this journey from idea to reality and explore the exciting world of DIY laser crafting for beginners? Let’s go!
Understanding Laser Technology
Laser technology utilizes focused beams of light to engrave or cut materials with exceptional precision and detail. By harnessing the power of lasers, DIY enthusiasts can create intricate designs, custom patterns, and personalized items on a variety of surfaces, including wood, acrylic, leather, and more.
Understanding the basics of laser technology is essential for beginners looking to explore the possibilities of DIY laser engraving and cutting:
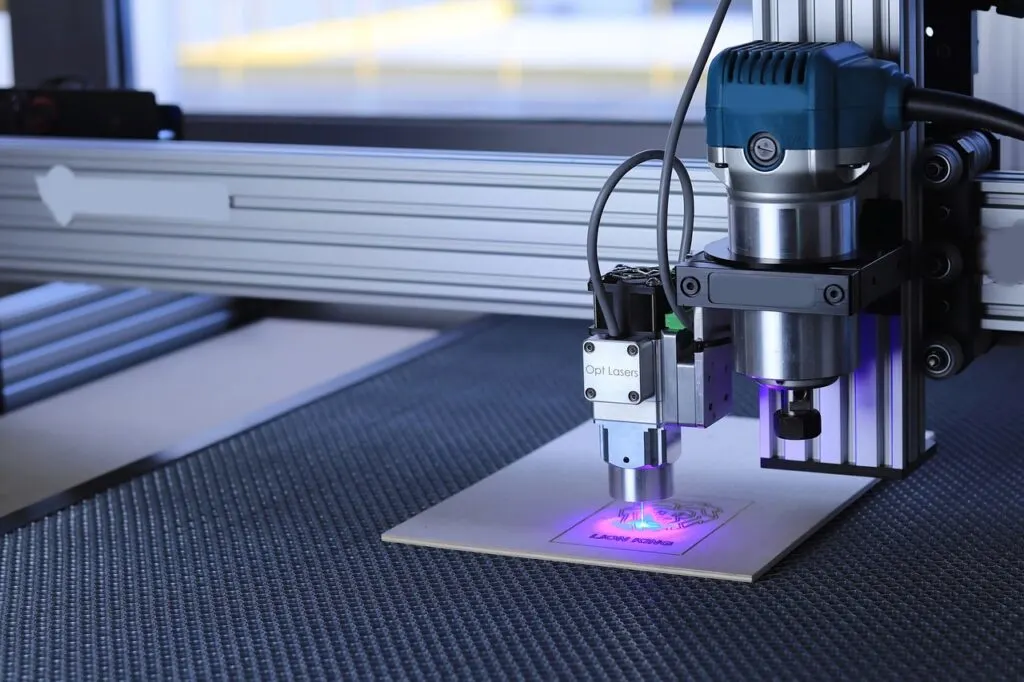
Laser Engraving: In laser engraving, the laser beam removes material from the surface of the workpiece to create a permanent mark or design. The intensity and focus of the laser beam determine the depth and detail of the engraving, allowing for precise customization of surfaces.
Laser Cutting: Laser cutting involves using a high-powered laser beam to cut through materials along a predetermined path. By controlling the intensity, speed, and focus of the laser beam, DIY enthusiasts can achieve clean and precise cuts on various materials for crafting projects.
Safety Considerations: When working with laser technology, it is crucial to prioritize safety by wearing appropriate eye protection, ensuring proper ventilation in the workspace, and following manufacturer guidelines for equipment usage. Safety should always be a top priority when engaging in DIY laser engraving and cutting projects.
Essential Tools and Equipment
Before getting into DIY laser engraving and cutting projects, it’s important to gather the essential tools and equipment needed to get started. Here are some key items you’ll need for your DIY laser crafting endeavors:
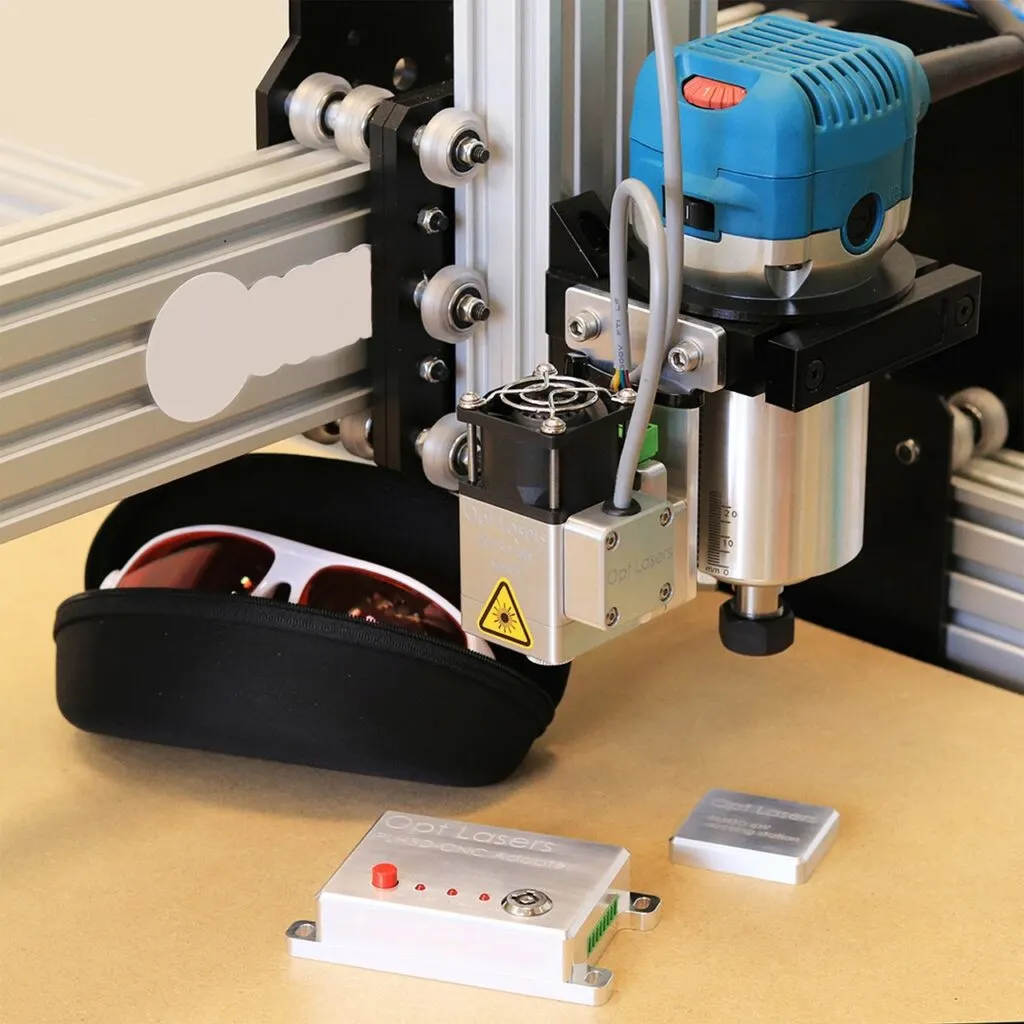
Laser Engraver/Cutter: Invest in a desktop laser engraving and cutting machine that suits your budget and project requirements. Choose a trustworthy brand. Entry-level laser machines are available for beginners and offer a range of features for creating designs on various materials.
Computer and Design Software: A computer with design software, such as Adobe Illustrator, CorelDRAW, or specialized laser engraving software, is essential for creating and preparing your designs for laser processing. Familiarize yourself with the software tools and functions to optimize your design workflow.
Materials: Stock up on a variety of materials suitable for laser engraving and cutting, including wood, acrylic, leather, paper, cardboard, and fabric. Experiment with different materials to understand their laser processing capabilities and create diverse projects.
Safety Gear: Ensure you have proper safety gear, including laser safety glasses, to protect your eyes from the intense light emitted by the laser machine. Safety goggles designed for laser work are essential for preventing eye injuries during laser engraving and cutting processes.
Ventilation System: Maintain good ventilation in your workspace to remove fumes and particles generated during laser processing. A ventilation system or exhaust fan helps to keep the air clean and safe for prolonged laser crafting sessions.

Designing Your Projects
The creative process begins with designing your projects and translating your ideas into digital files that can be engraved or cut using a laser machine. Here are some tips for designing your projects for DIY laser engraving and cutting:
Start Simple: As a beginner, begin with simple designs and patterns to familiarize yourself with the capabilities of your laser machine. Practice engraving basic shapes, text, or line art to build confidence in your design skills.
Vector Graphics: Use vector graphics software or online tools such as Creative Fabrica’s Studio to create your designs, as vector files are ideal for laser processing. Vector graphics allow for scalable and editable designs that maintain clarity and precision when engraved or cut with a laser.
Consider Material Properties: When designing your projects, consider the properties of the materials you plan to work with. Different materials react differently to laser processing, so adjust your design parameters accordingly to achieve the desired results.
Experiment and Iterate: Don’t be afraid to experiment with different design ideas and techniques. Iterate on your designs, test various settings on scrap materials, and learn from each project to improve your skills and creativity.
Material Selection and Preparation
Selecting the right materials for your DIY laser engraving and cutting projects is essential for achieving high-quality results and ensuring compatibility with your laser machine. Consider the following factors when choosing materials for your projects:
Material Compatibility: Ensure that the materials you select are suitable for laser processing. Common materials for laser engraving and cutting include wood, acrylic, leather, paper, cardboard, and certain types of fabric.
Thickness and Density: Different materials come in varying thicknesses and densities, which can affect the laser processing results. Choose materials that are within the recommended thickness range for your laser machine to ensure optimal engraving and cutting performance.
Surface Finish: Consider the surface finish of the materials, as smooth and flat surfaces yield better engraving and cutting results. Avoid materials with uneven textures or coatings that may interfere with the laser processing.
Safety Precautions: Some materials may emit fumes or odors when subjected to laser processing. Ensure that you are aware of the safety guidelines for each material and take necessary precautions to protect yourself and maintain a safe workspace.
Executing Laser Engraving and Cutting Projects
With your designs finalized and materials prepared, it’s time to execute your DIY laser engraving and cutting projects. Follow these steps to bring your ideas to reality with precision and creativity:
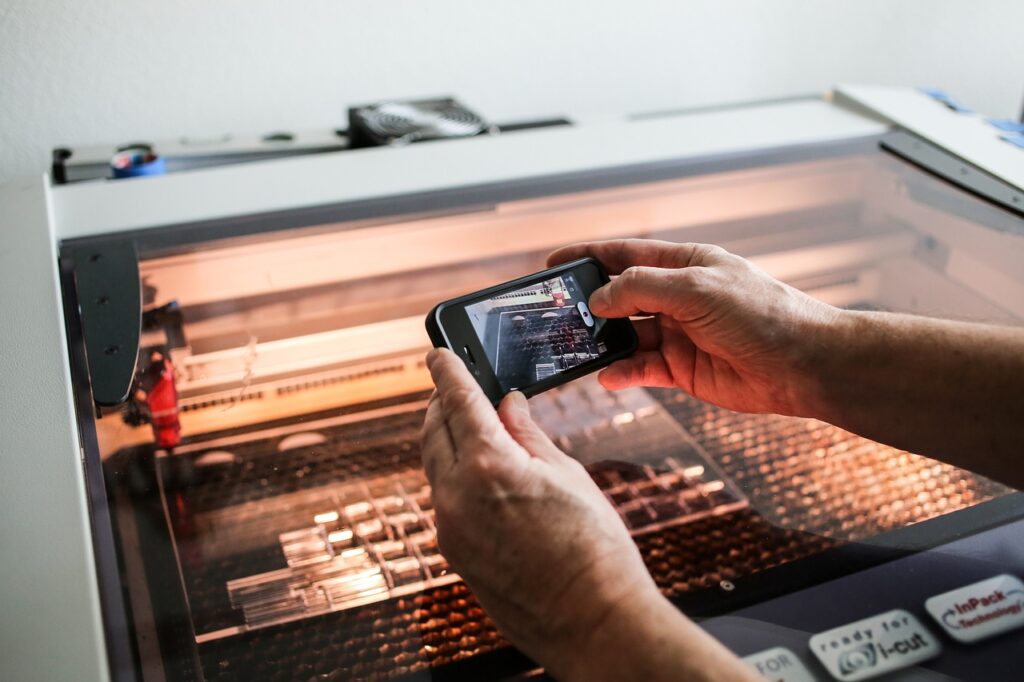
Prepare the Workspace: Set up your laser machine in a well-ventilated and well-lit workspace. Ensure that the machine is properly calibrated and aligned for accurate engraving and cutting.
Load the Design File: Import your design file into the laser software and adjust the settings, such as laser power, speed, and focus, based on the material and design complexity. Preview the design to ensure it aligns correctly on the material.
Test on Scrap Material: Before engraving or cutting the final piece, perform a test run on a scrap piece of the same material to verify the settings and make any necessary adjustments. This step helps prevent errors and ensures optimal results on the actual project.
Execute the Job: Once you are satisfied with the test results, proceed to engrave or cut the final project on the selected material. Monitor the laser machine during the process to ensure that the design is being executed accurately and with precision.
Finishing Touches: After the engraving or cutting is complete, carefully remove the finished piece from the laser machine. Clean the material surface if needed and inspect the quality of the engraving or cutting to ensure it meets your expectations.


Project Ideas for Beginners
As a beginner in DIY laser engraving and cutting, consider starting with simple projects that allow you to practice your skills and explore the capabilities of your laser machine. Here are a few project ideas to inspire your creativity:
Customized Keychains: Create personalized keychains by laser engraving names, initials, or designs on wooden or acrylic keychain blanks.
Coasters: Design and cut custom coasters from cork, wood, or acrylic materials, adding intricate patterns or geometric shapes for a decorative touch.
Signage: Make laser-engraved signs for home decor, such as welcome signs, inspirational quotes, or room labels, using wood or acrylic as the base material.
Jewelry: Craft laser-cut jewelry pieces, such as earrings, pendants, or bracelets, from lightweight materials like leather or acrylic for a stylish accessory.
Gifts and Gift Tags: Create unique gifts or gift tags by laser engraving festive designs or messages on paper or cardstock, adding a personalized touch to gifts and packages.
Troubleshooting and Maintenance
As you delve into DIY laser engraving and cutting projects, you may encounter challenges or issues along the way. Here are some common troubleshooting tips and maintenance practices to keep your laser machine running smoothly:
Cleaning and Maintenance: Regularly clean the lens, mirrors, and cutting bed of your laser machine to remove debris and residue that can affect engraving and cutting quality. Follow the manufacturer’s guidelines for maintenance and upkeep to prolong the life of your machine.
Calibration: Periodically calibrate your laser machine to ensure accurate engraving and cutting results. Check the alignment of the laser beam, focus point, and cutting bed to maintain precision in your projects.
Material Compatibility: If you experience issues with engraving or cutting a specific material, review the material compatibility guidelines for your laser machine and adjust the settings accordingly. Experiment with different parameters to find the optimal settings for each material.
Software Updates: Stay informed about software updates for your laser machine’s control software and design programs. Updating the software can introduce new features, improve performance, and enhance compatibility with various file formats.
Conclusion
In conclusion, DIY laser engraving and cutting offer a world of creative possibilities for beginners looking to explore the art of laser crafting. From designing personalized projects to executing precise engravings and cuts, the journey from idea to reality is filled with opportunities for learning, experimentation, and artistic expression.
By understanding the basics of laser technology, selecting suitable materials, honing your design skills, and practicing safe and efficient laser processing techniques, you can embark on a rewarding DIY crafting adventure that brings your ideas to life with precision and creativity.
Embrace the world of DIY laser engraving and cutting, unleash your imagination, and watch as your designs take shape with elegance and flair, making each project a reflection of your unique style and craftsmanship.