

This post may contain affiliate links. I only recommend products I use and love. Read the full disclosure here
Updated on: August 25, 2023
Originally published on: August 25, 2023
Halloween is right around the corner, and that means it’s time to start thinking about carving pumpkins! Whether you’re a seasoned pro or a first-timer, pumpkin carving is a fun and creative way to embrace the spooky spirit of the season. In this step-by-step guide on how to carve a pumpkin, I’ll show you how to turn a simple gourd into a frightfully fantastic masterpiece.
Get ready to bring your jack-o’-lantern game to the next level!


Carving Techniques
Before we get started on how to carve a pumpkin, here is a quick rundown of some of the most common carving techniques you can use. From traditional carving to intricate 3D creations, these various methods will make your jack-o’-lantern truly stand out.
Traditional Carving
This is when you use your serrated knife to carefully cut along the lines of your design, pushing the pieces out when you’re done. This can be done by freehand or by using a stencil.
Stenciled Designs
With a stenciled design, you simply tape your stencil to the pumpkin and trace the design using a poking tool to create dotted outlines. Then, you follow the dots as you carve. This is the technique we will use today.
3D Carving
3D carving enables you to create depth and dimension by carving different layers into your pumpkin, allowing light to shine through various sections.
Etching Patterns
Etching involves scraping off just the surface of the pumpkin’s skin which creates a unique shaded effect. It’s a great way to add a touch of sophistication to your design.


How to Carve a Pumpkin
Carving pumpkins into jack-o’-lanterns is one time-honored Halloween tradition that will never go out of style. The flickering glow of a jack-o’-lantern’s eerie grin adds a hauntingly enchanting touch to any creepy Halloween decor. Plus it’s a frightfully fun activity that families can do together!
So whether you are preparing for Halloween or simply in the mood for some creative Fall crafting, get ready to learn how to turn an ordinary pumpkin into a devilishly delightful jack-o’-lantern that will impress your neighbors and delight trick-or-treaters.
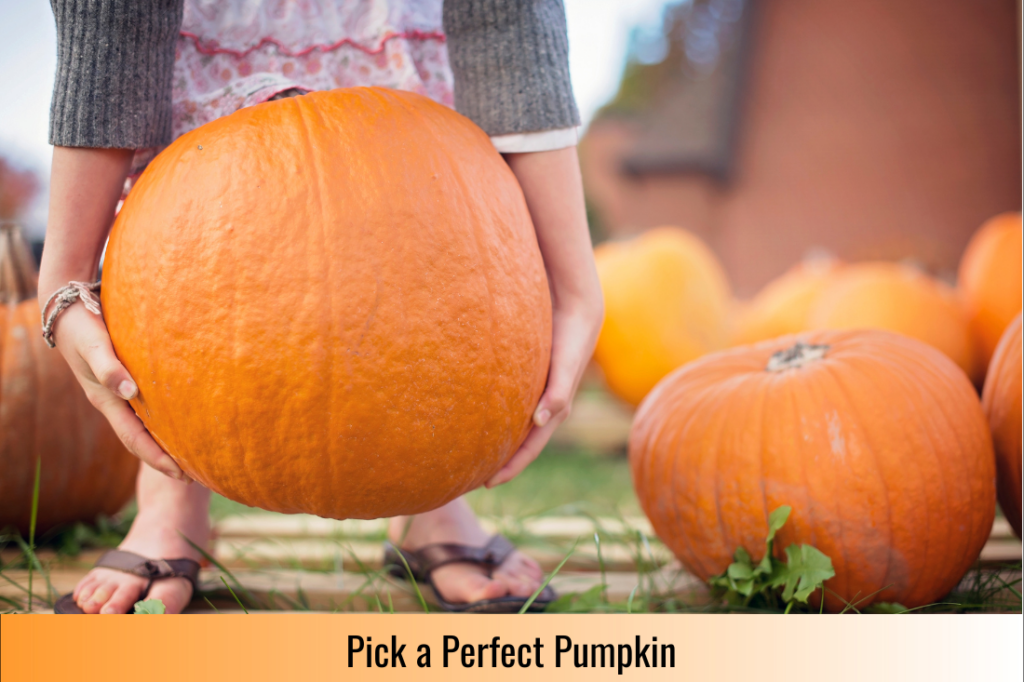

Step One: Picking the Perfect Pumpkin
The first step to pumpkin carving success is finding the right pumpkin. Knowing how to pick the perfect pumpkin will help ensure your jack-o-lantern turns out perfectly.
Look for a pumpkin with a flat bottom for stability and a sturdy stem for easy handling. Even better if the stem is still green as this indicates a younger pumpkin that will stay fresher longer.
You also want to make sure the color is uniform and that the surface is smooth and free from soft spots or major blemishes.
Don’t rule out an oddly shaped pumpkin, as they offer several advantages. These pumpkins are usually more oblong rather than round, giving you a larger and flatter surface to work with. It also allows you to be more creative in choosing your design even allowing for a more intricate one than you could do with a round pumpkin.


Step Two: Gathering Your Tools
Once you’ve found your ideal pumpkin, the next step in learning how to carve a pumpkin is to make sure you have all of the appropriate tools. These include:
- a sharp serrated knife or similar tool to cut through the pumpkin’s outer shell. While a pumpkin carving kit will have tools you can use, look for a quality set as many are often made cheaply.
- a scoop (an ice cream scoop works great) or spoon for cleaning the pumpkin out
- carving saws or drills for more intricate designs
- a skinny skewer, awl, T-pin, or other sharp tool – to prick holes to help transfer design if using a printed stencil
- templates or stencils
- a marker to outline your design on the pumpkin
- newspapers, a disposable tablecloth, or a drop cloth to contain the mess
- candle, battery-operated tea light, or a pumpkin light, optional but worth it!


Step Three: Setting Up Your Carving Space
Carving a pumpkin is a messy business so be sure to set up a carving space before you begin. Lay down some newspaper, a disposable tablecloth, or a drop cloth to catch the mess so cleanup will be a breeze. Make sure you have plenty of light, too.
While pumpkin carving is fun, make sure you prioritize safety. Always use the appropriate tools, work in a well-lit area, and supervise children. Keep sharp objects away from your body and out of little hands, and use caution to prevent injuries.
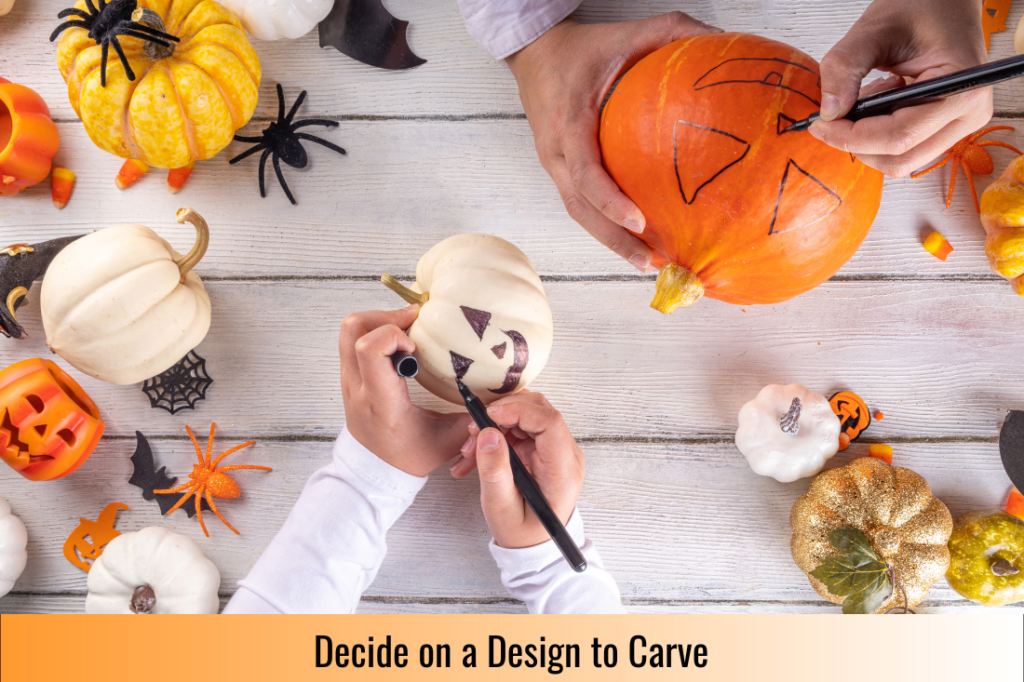

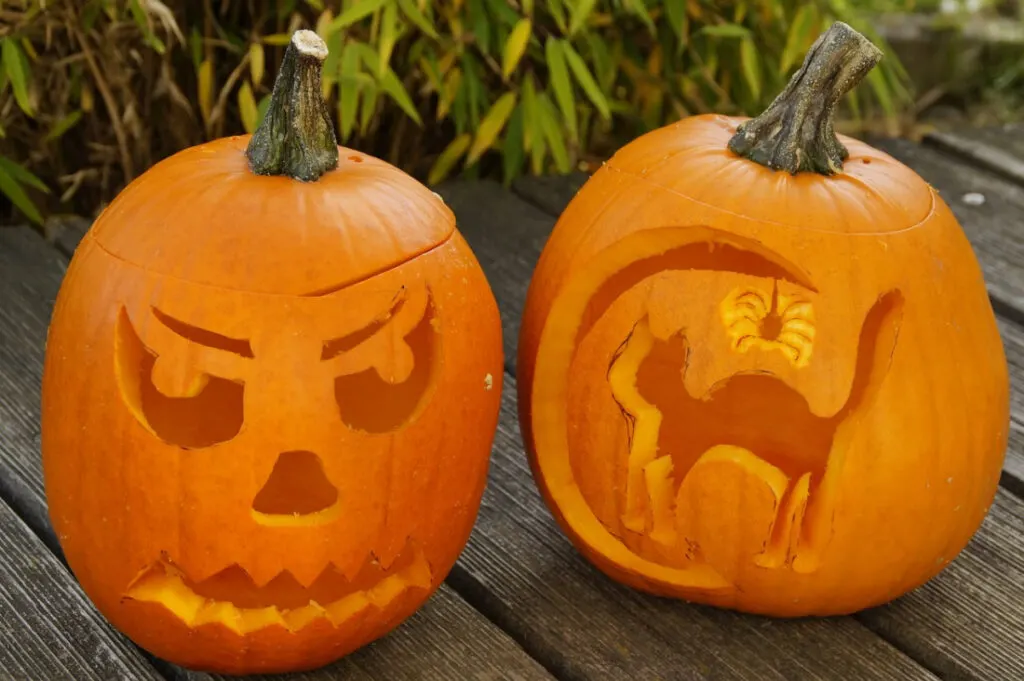
Step Four: Choosing a Design
Whether it’s a classic spooky face or a more intricate pattern, decide on your design. You can draw it freehand, look online for free jack-o-lantern templates, or purchase a pumpkin carving kit and use one of its designs.
If you are using a template you found online, make sure you print it to full size, then set it to the side for a few.


Step Five: Cutting Out A Lid from Your Pumpkin
The next step in learning how to carve a pumpkin involves cutting off the top of the pumpkin so you can clean it out and have a lid for your jack-o-lantern. Be sure that the hole is large enough to be able to add a candle or LED pumpkin light.
Using the serrated knife, start carving by carefully cutting out the lid of the pumpkin around the stem. Do not hold the knife straight down as you are cutting as this can cause your lid to fall in. Instead, cut the circle while holding the knife at a slight angle to create a groove that will prevent the lid from falling inside the pumpkin.

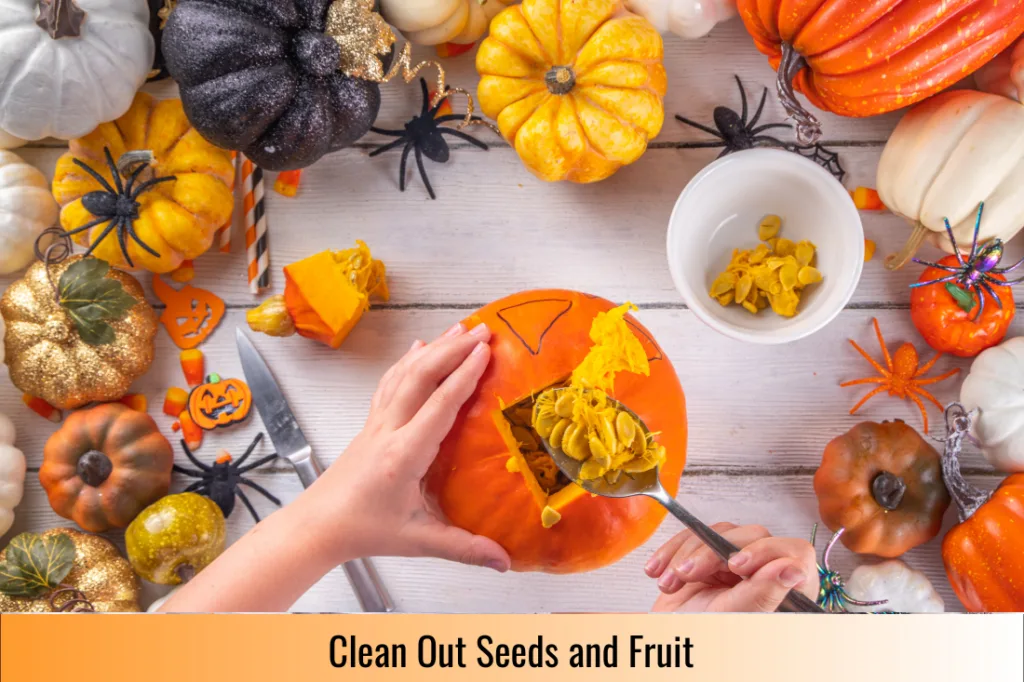
Step Six: Clean Out Seeds and Fruit
Next, scoop out the seeds, fruit, and stringy flesh using an ice cream scoop, spoon, or your hands. Be sure to scrape down the inside walls to remove any remaining strings or large chunks of flesh. You also want to thin it out a bit, especially around the area where you will be carving the face or other design.
Pro Tip
Carefully thin out the inner wall of the “face” area to be around 1¼-inch thick, to make it easier to pierce the shell for carving.
Don’t throw away the seeds! Clean them, season them, and toss them in the oven to make Toasted Pumpkin Seeds, a delicious and nutritious snack.
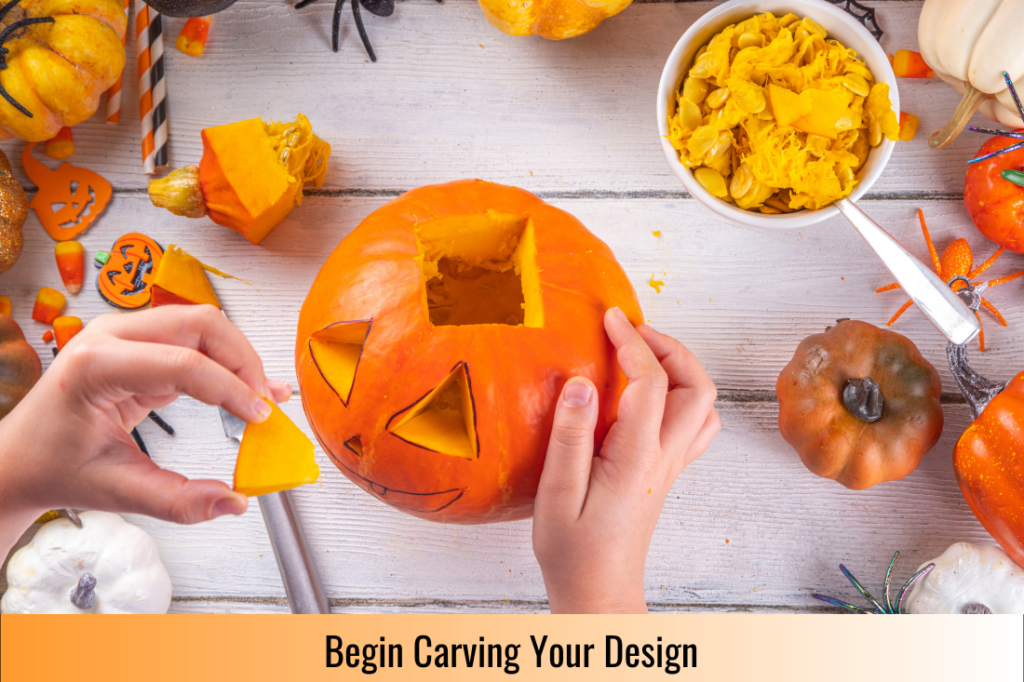

Step Seven: Begin Carving
Here comes the best part! Carving your pumpkin!
When learning how to carve a pumpkin, keep in mind that all it really takes is some patience and a bit of practice.
If you are using a design that you printed or a template, your next step is to tape the template to your pumpkin (skip this part if you drew a design on the pumpkin). It helps to cut slits around the template and overlap them so the template conforms to the roundness of the pumpkin.
Then, using a needle tool, awl, or T-pin, prick a hole every 1/4 inch to 1/2 inch along the outlines of the template. Remove the template and keep it nearby for reference. Finally, if needed, use the marker or pen to connect the pinpricks so you can better see the design for carving.


Once you are ready to start carving, hold the pumpkin steady with one hand and use a small serrated knife or carving tool to slowly and carefully follow the lines of your design. Take your time, work slowly, and use controlled motions. Also, remember to always cut away from yourself to avoid any accidents.
Pro Tip
Consider adding depth and dimension to your pumpkin by carving varying depths into your pumpkin’s flesh. Doing so will allow different amounts of light to shine through, creating a spooky and enchanting effect.

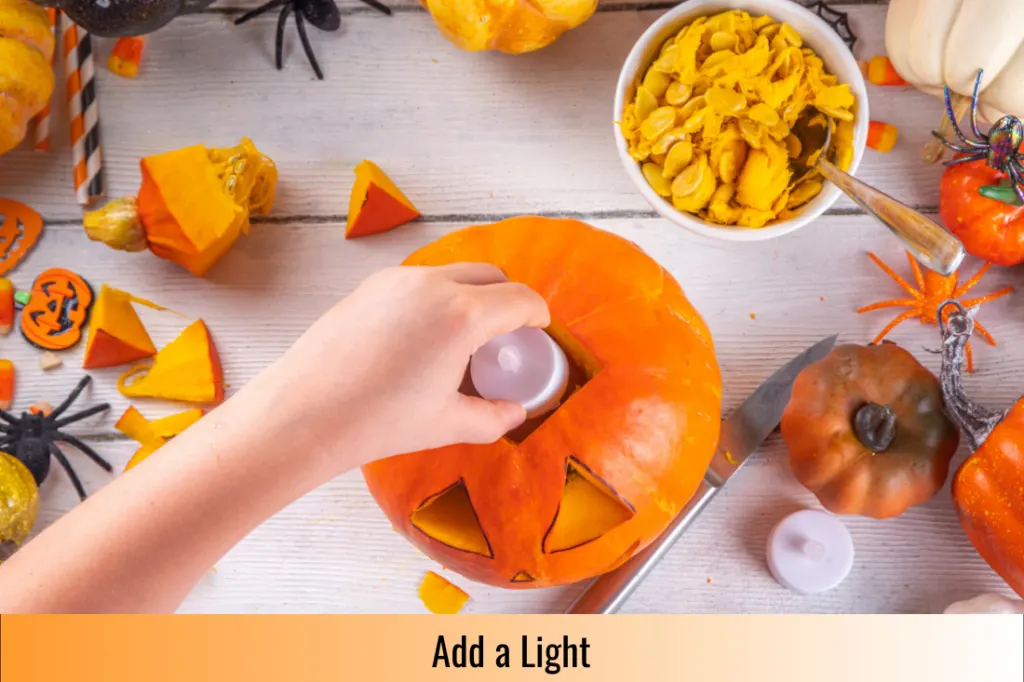
Step Eight: Light It Up!
Once you’ve finished carving, and the sun has begun to set, illuminate your creation by placing an LED candle, a pumpkin light, or even a small string of fairy lights inside the pumpkin and secure the lid back on top. You could also use a small tea or votive candle but make sure it is in a glass votive for safety. The pretty glow will bring your pumpkin masterpiece to life for everyone to enjoy.


Finally, find the perfect spot to display your creation so everybody can see it!
FAQ on How to Carve A Pumpkin
Got questions about pumpkin carving? I’ve got answers! Check out some of the most frequently asked questions and find the answers to help make your pumpkin carving experience a breeze.
Can I use any type of pumpkin for carving?
While you can carve various types of pumpkins, I’ve always found it best to select at least a medium-sized pumpkin with a smooth surface for easier carving.
Can I use a regular kitchen knife for carving?
You can use a regular kitchen knife, but a serrated knife (and especially one specifically designed for pumpkin carving) will make the process much easier, smoother, and safer.
Can I carve my pumpkin ahead of time?
Most carved pumpkins will rot within 10 days of being carved. Therefore it is best to carve it closer to Halloween for optimal freshness and longevity. I usually aim between 3 to 5 days before Halloween. Sometimes a bit longer if the weather is going to be cool.

What happens if a piece breaks off my pumpkin?
Don’t get upset if a piece breaks off of your design while you are carving. Most pieces can easily be reattached by using toothpicks. If not, be creative and try to find a way to work it into your overall design.
How long will a carved pumpkin last?
Typically, a carved pumpkin can last around 5 to 10 days. A lot depends on the age of the pumpkin you selected, outdoor conditions, and whether or not you used proper preservation techniques to extend its lifespan.
How can I make my pumpkin last longer?
There are several ways to extend the life of your jack-o’-lantern. First of all, keep it in a cool, dry place when not on display. Avoid leaving it out in direct sunlight. Alternatively, you can refrigerate it or place it in a bucket of water.
You can also try moisturizing it regularly by rubbing a small amount of petroleum jelly or cooking spray on the cut edges to prevent them from drying out too quickly and shriveling.
What can I do with leftover pumpkin flesh?
Don’t throw away that leftover pumpkin! Leftover pumpkin flesh can be used to make delicious pies, Pumpkin Snickerdoodle Cookies, soups, Pumpkin Gingerbread, Pumpkin Spice Bars, ice cream, and even smoothies!


Creative alternatives to traditional pumpkin carving
If carving a pumpkin isn’t your thing, or you want young children to participate, there are lots of creative alternatives. Try painting your pumpkin, or attaching accessories like googly eyes, ribbons, sunglasses, or hats. You can also use stickers and decals to create a unique look without the mess. Use your imagination and have fun!
Conclusion
Carving a pumpkin into a jack-o-lantern is a frightfully fun Halloween tradition that allows you to express your creativity while embracing the spooky season. With the right tools, careful planning, a little patience, and these tips, you can quickly learn how to carve a pumpkin into a captivating masterpiece!