This post may contain affiliate links. I only recommend products I use and love. Read the full disclosure here
Updated on: April 15, 2022
Originally published on: April 12, 2022
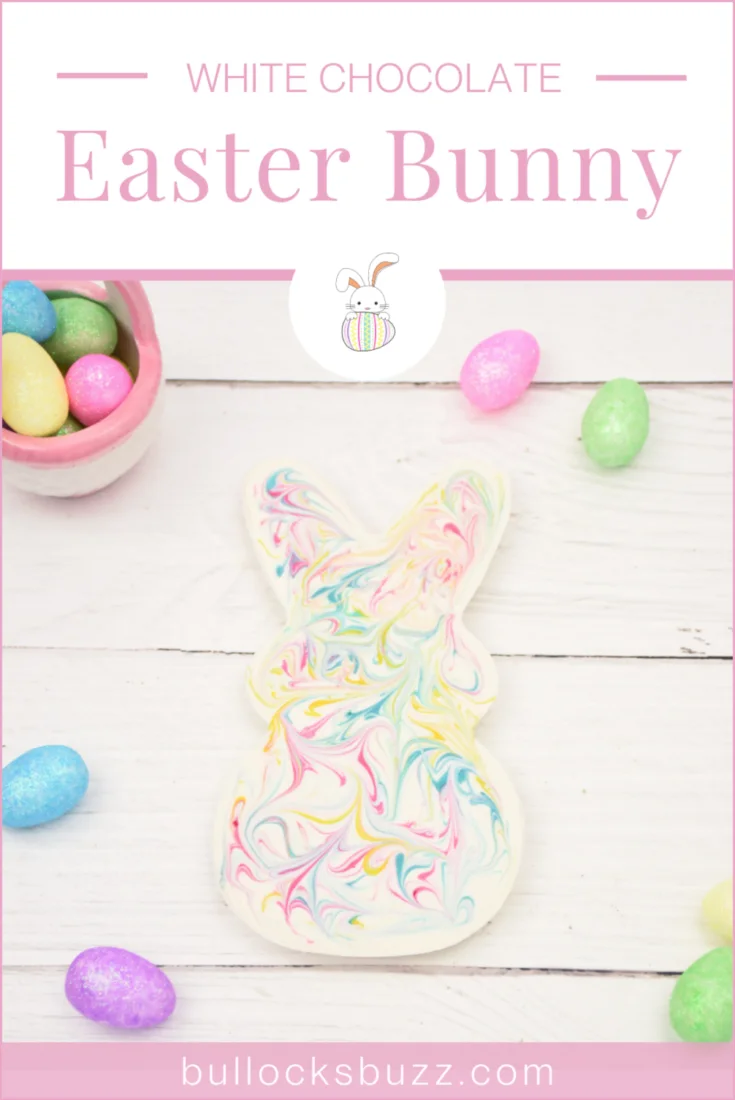
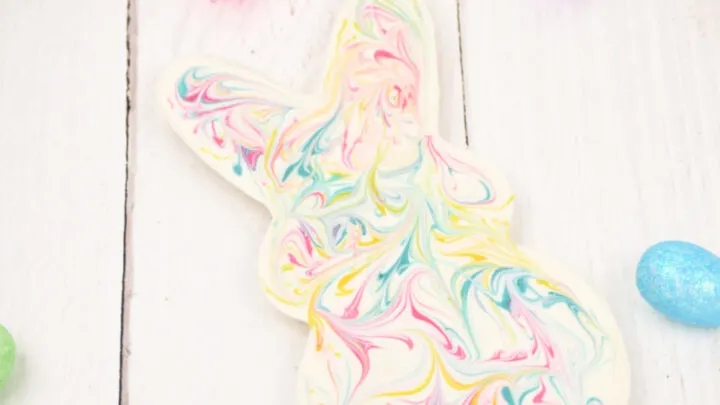
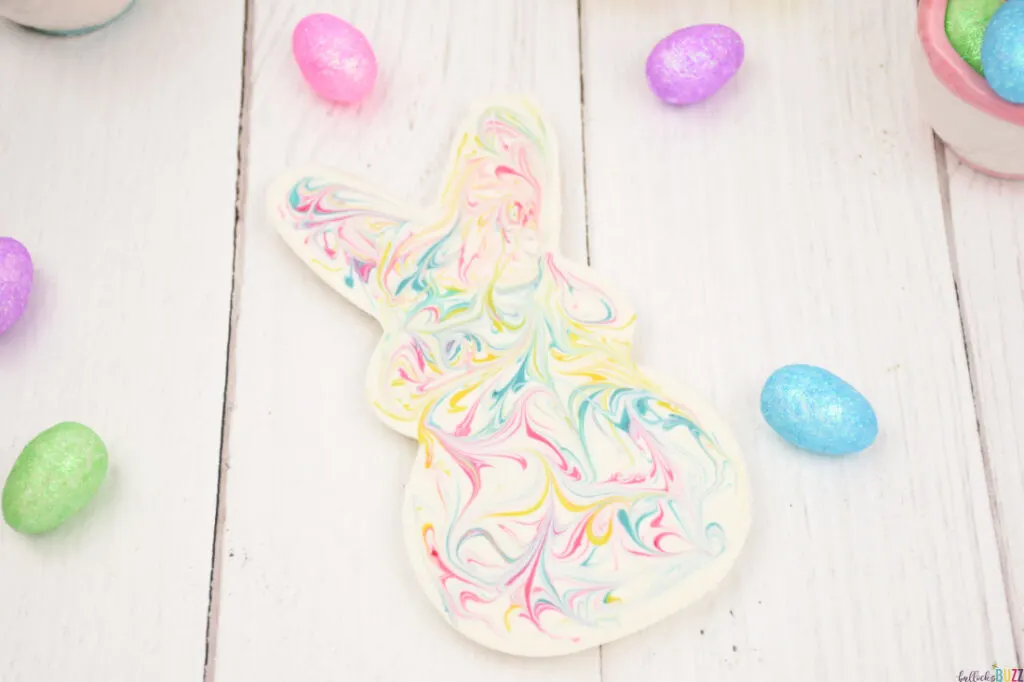
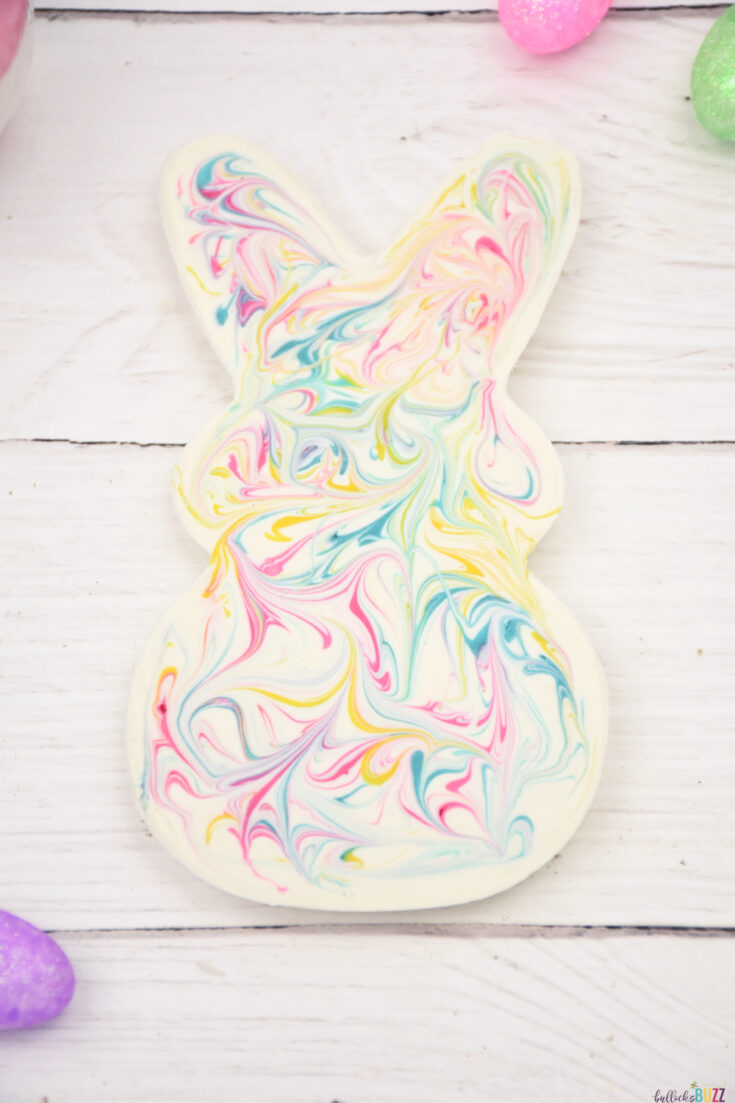
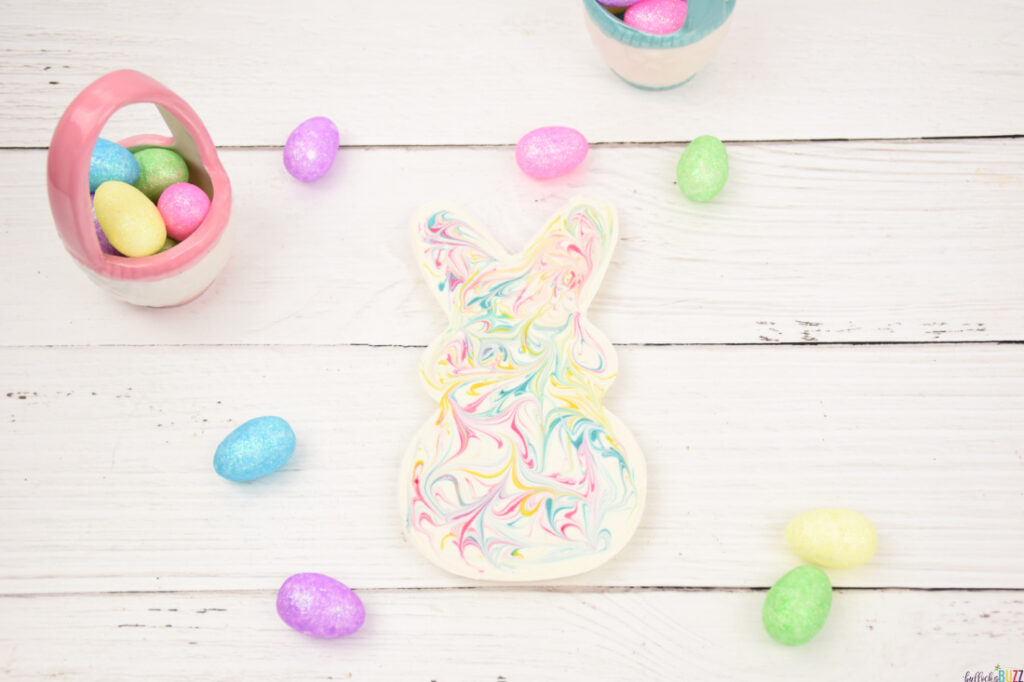
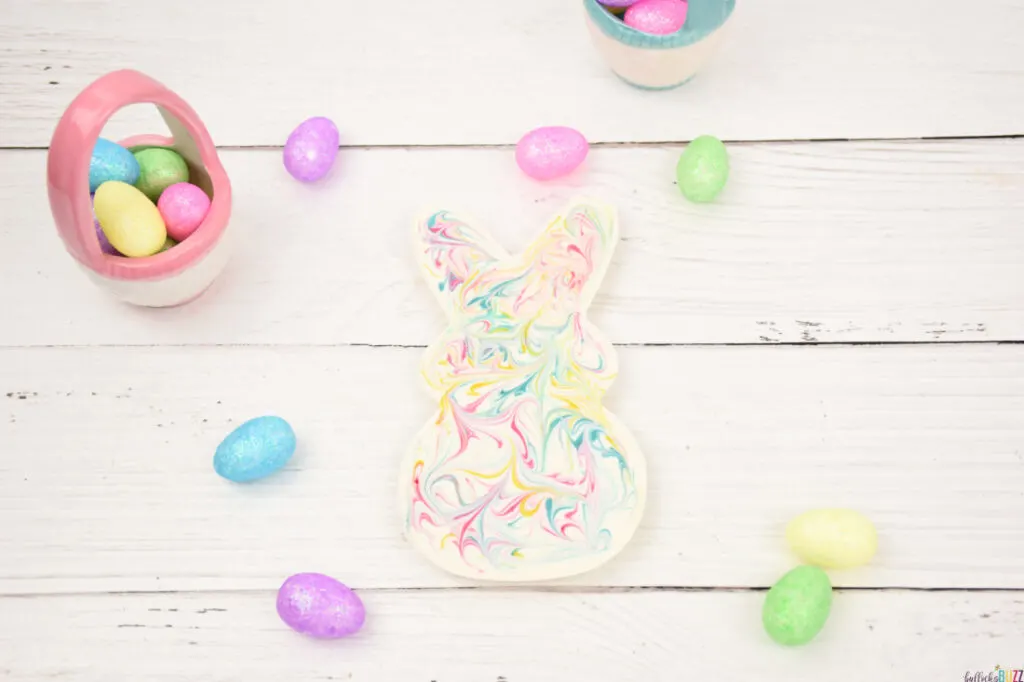
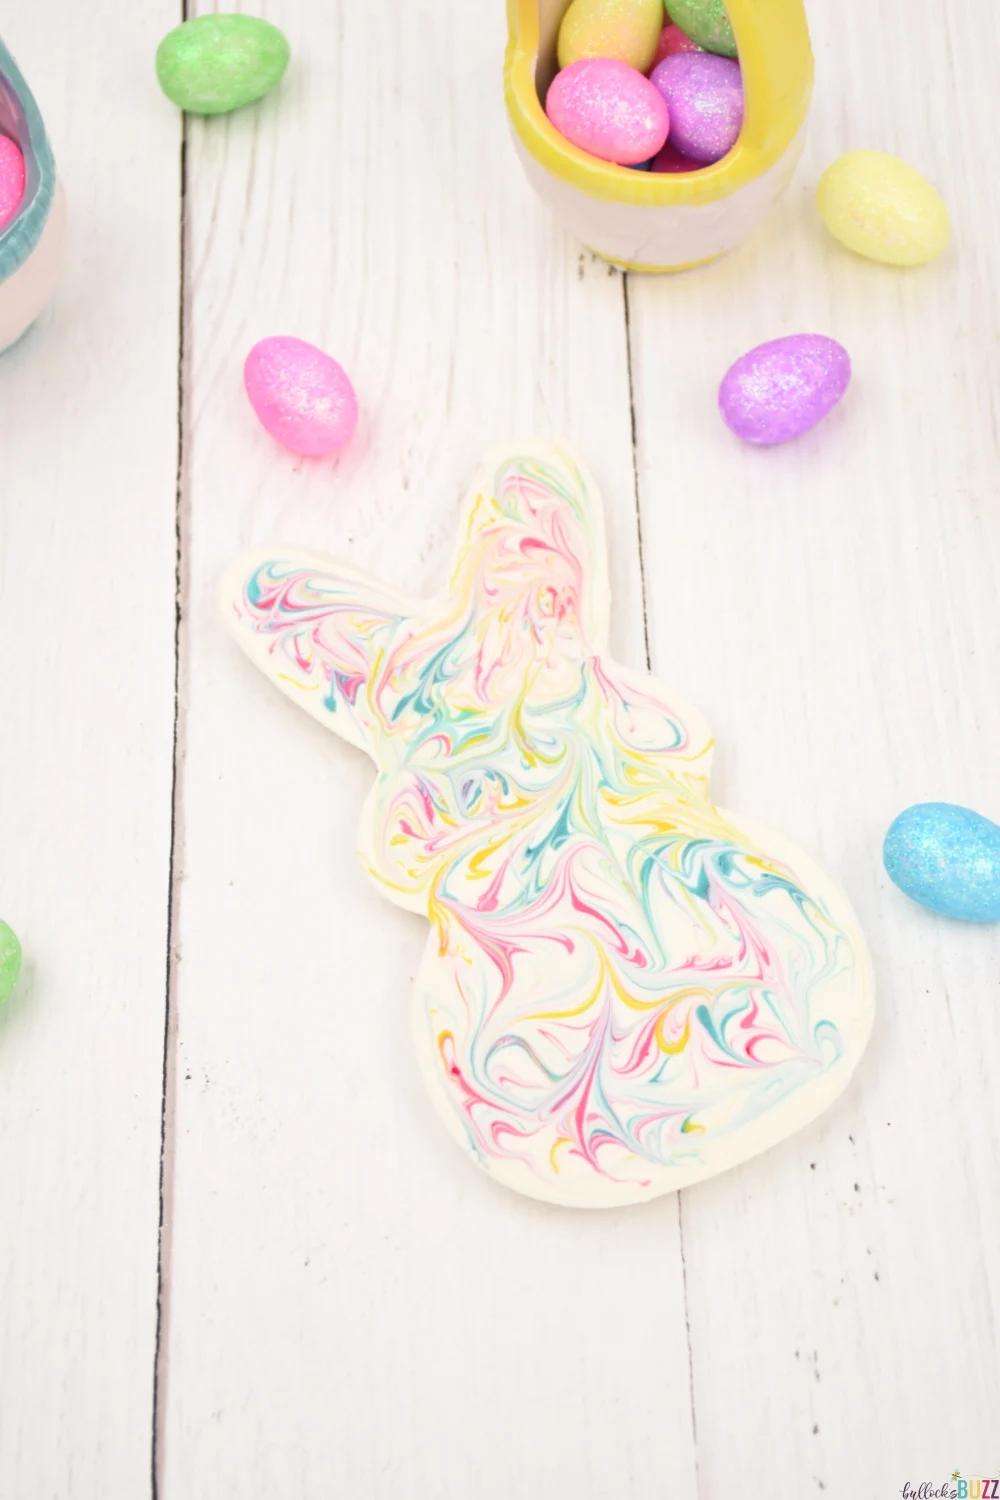
Pastel colors are swirled throughout white chocolate to make this homemade White Chocolate Easter Bunny! Bright and cheerful, this solid white chocolate Easter bunny is a delicious and colorful way to add a festive touch to your Easter celebration.
Easter is just around the corner so now’s the time to get hoppin’ and start planning your Easter. And since Easter just wouldn’t be the same without some adorable sweets, today I’m sharing a unique twist on the classic Easter treat, the chocolate Easter bunny!

Making adorable homemade desserts or cute food art is one of my favorite things to do. Especially when they are holiday or season related. For example, I’ve made this super cute Beach Ball Cake for summer, this Surprise Inside Christmas Gift Box Piñata Cake, for Christmas, and these spooktacular Frankenstein Twinkies for Halloween.
Last year I made these super sweet No-Bake Easter Bunny Donuts, but this year I wanted to do something a little more traditional. Enter my Homemade Swirled White Chocolate Easter Bunny.
SOLID CHOCOLATE EASTER BUNNY
No Easter would be complete without a chocolate bunny, and this White Chocolate Easter Bunny with colorful swirls is sure to satisfy any sweet tooth while adding a fun and festive flair to your Easter celebration.
It’s quick and simple, it looks adorable, and it tastes amazing!


HOW TO MAKE HOMEMADE WHITE CHOCOLATE EASTER BUNNIES
Kids will love finding this colorful homemade chocolate Easter treat in their Easter Baskets! And the best thing is, you only need a few ingredients to create these adorable melt-in-your-mouth Chocolate Easter Bunnies!
You will find the full ingredients and directions in the free printable recipe card at the end of this post.
Here’s what you’ll need:

HELPFUL KITCHEN TOOLS YOU MAY NEED
Disclosure: This blog post contains affiliate links for products or services I think you’ll like. This means if you make a purchase from one of these links, I may make a small commission at no additional cost to you. I only recommend items I use and love.
- Easter Bunny chocolate mold – I used this Peeps Pancake Mix and Skillet Set
- wooden skewer or butter knife
- microwave, double boiler, or candy melting pot
- small bowls – 1 for each color
INGREDIENTS YOU WILL NEED TO MAKE WHITE CHOCOLATE EASTER BUNNY
This homemade white chocolate Easter bunny is way better than whatever the Easter Bunny may put in your basket. And you only need a few ingredients to make it!
White Chocolate Easter Bunny ingredients include the following:
- Ghirardelli White Chocolate Chips or bright white candy melts
- Hot Pink candy melts
- Yellow candy melts
- Turquoise candy melts

INSTRUCTIONS TO MAKE HOMEMADE WHITE CHOCOLATE EASTER BUNNY
You’ll love how simple this solid chocolate Easter Bunny is to make! Follow along with my easy step by step tutorial on how to make this swirled white chocolate Easter Bunny.
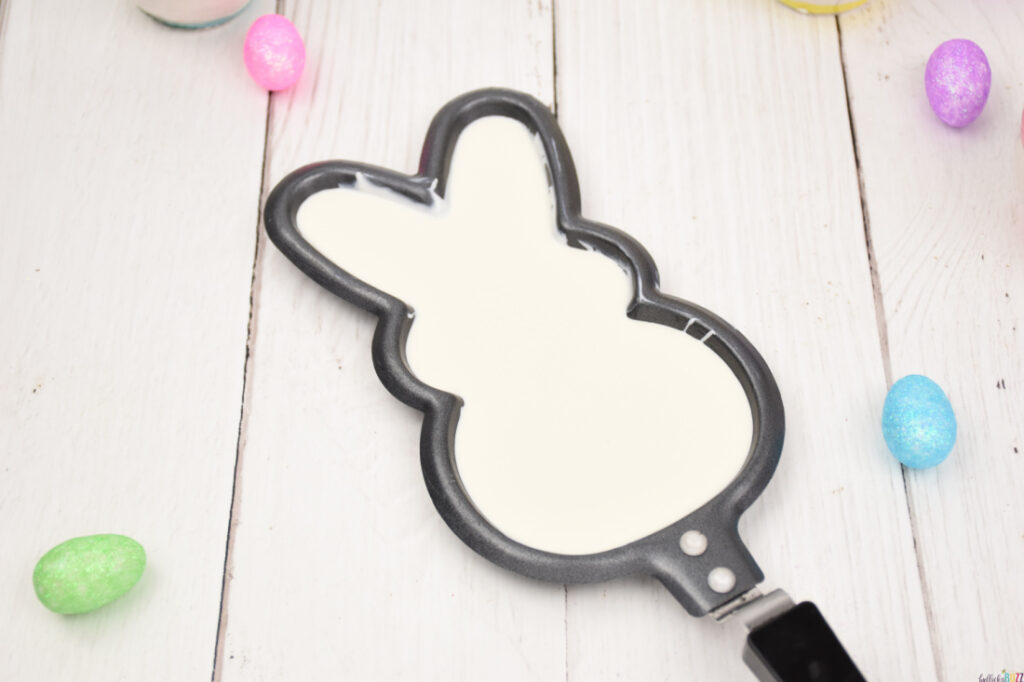
Pro Tip: before you start, lightly grease the mold with some Crisco to help it release the chocolate rabbit easily.
Step One: Melt Chocolates
- Melt the white chocolate and the pink, yellow, and turquoise candy melts in individual bowls.
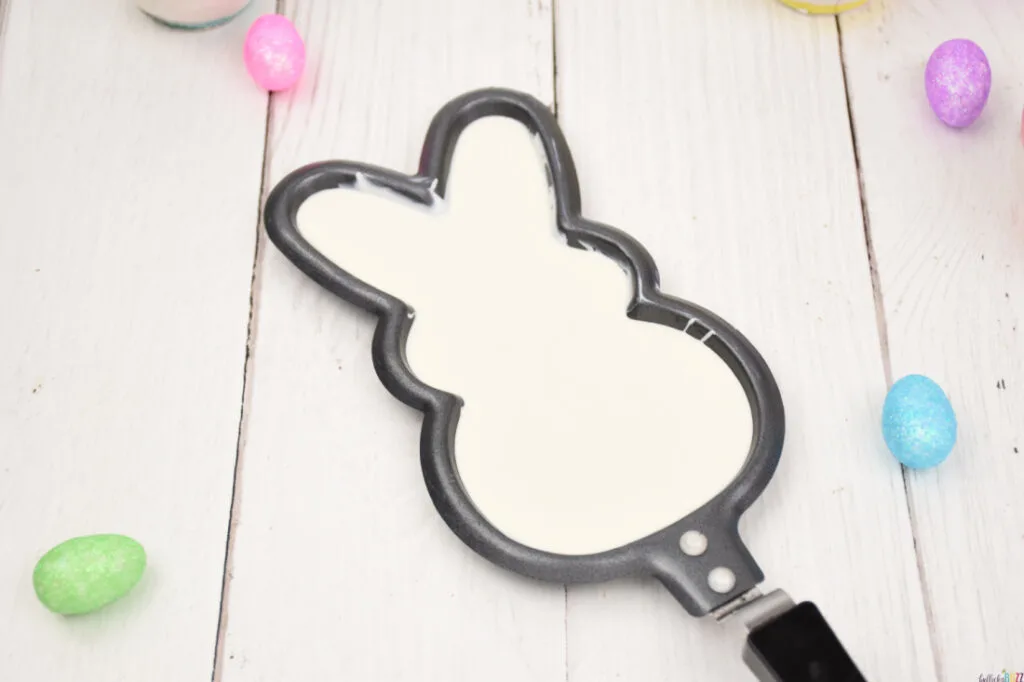
Step Two: Fill Mold
- Next, add the melted white chocolate to the bunny mold and fill it to the top.
- Gently tap the mold against the countertop to remove any bubbles. Use the tip of a skewer for any stubborn bubbles that remain.
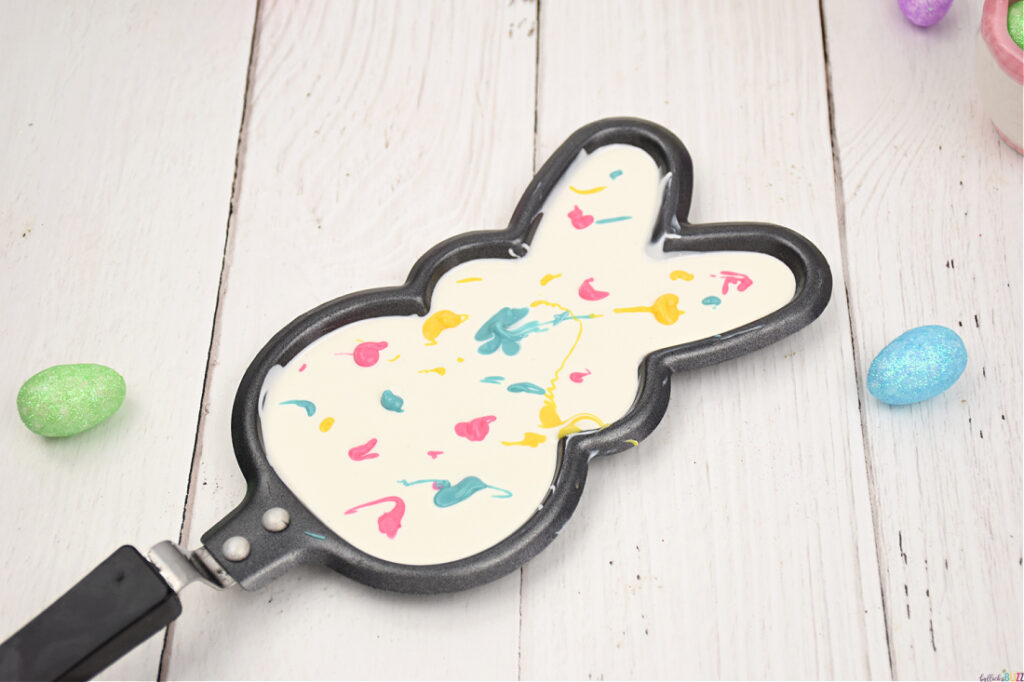
Step Three: Add Colors
- Drop small amounts of the pink, yellow and turquoise chocolate randomly over the white chocolate.

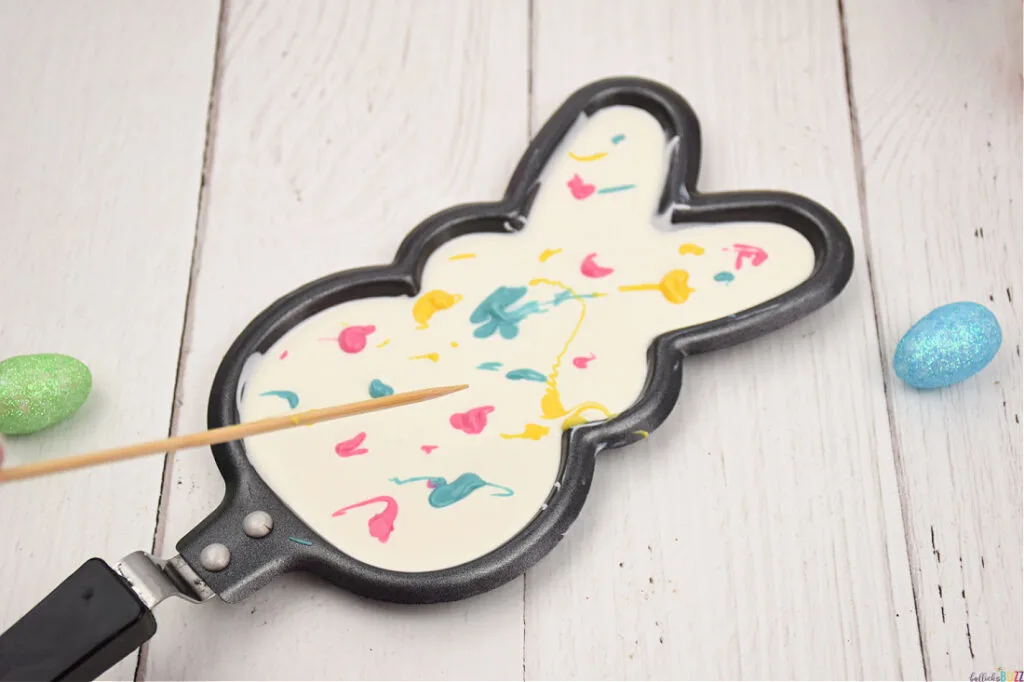
Step Four: Swirl
- Then use a wooden skewer or the tip of a knife to swirl the colors around.
Pro Tip: Be careful not to over-swirl as this can cause the colors to look muddy.

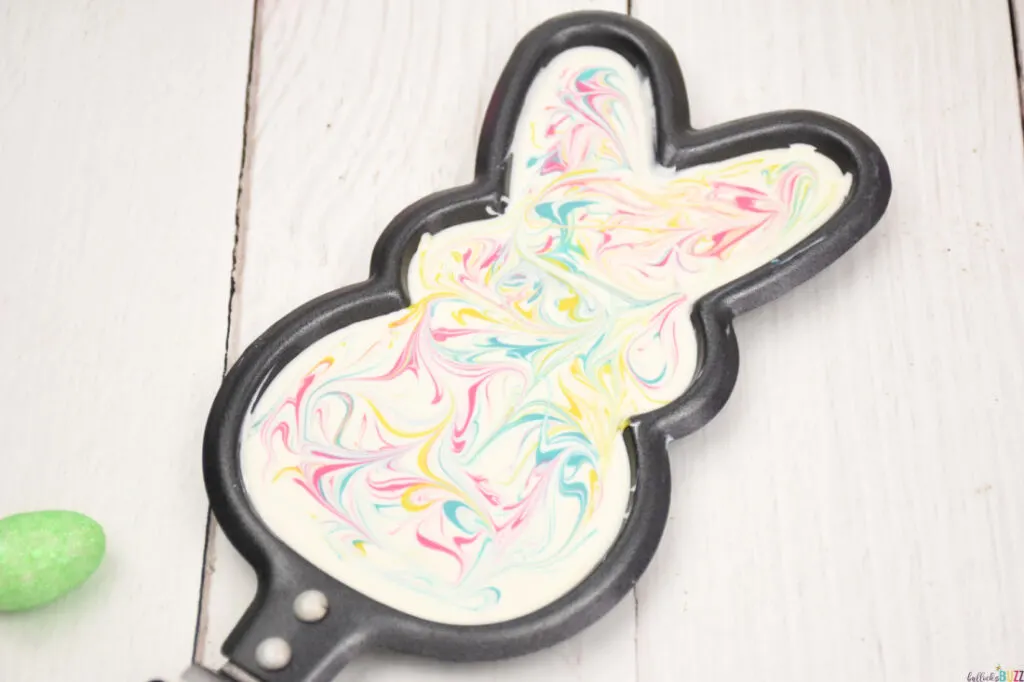
Step Five: Allow to Set
- Allow the chocolate to set completely. This takes about an hour, although you can speed up the process by placing it in the fridge.

Step Six: Unmold
- Once the chocolate Easter bunny has set, gently remove it from the mold. I carefully, slightly, sort of twisted the mold side to side (top towards the left, bottom towards the right) to release it and it popped right out.

OTHER EASTER RECIPES YOU WILL LOVE
If you’re looking for more ideas on how to create Easter dessert recipes that will put a smile on everyone’s face, check these out!

LIKE IT? LOVE IT? PLS SHARE THIS CHOCOLATE EASTER BUNNY RECIPE!
Did you make this easy White Chocolate Easter Bunny recipe? If so, I’d love to see how it turned out! I absolutely adore seeing your take on my recipes.
So please be sure to tag me on Instagram @bullocksbuzz or using #bullocksbuzz and share a photo of your tasty creations!
Don’t forget to save it either by clicking on that little heart over there to your right or by pinning it on Pinterest. And then share with your friends and family by clicking the share buttons above the post title, too!
And, if you really liked this Easter treat recipe, comment and leave me a ⭐⭐⭐⭐⭐ rating on the printable recipe card below!
And finally, don’t forget to follow us on Pinterest, Facebook, and Instagram!
WHITE CHOCOLATE EASTER BUNNY PRINTABLE RECIPE CARD
Here is the free printable recipe card so you can easily keep up with this Easter chocolate bunny dessert idea!
White Chocolate Easter Bunny

Bright and cheerful, this solid white chocolate Easter bunny is a delicious and colorful way to add a festive touch to your Easter celebration.
Ingredients
- 1 cup Ghirardelli White Chocolate Chips or Bright White candy melts
- ¼ cup hot pink candy melts
- ¼ cup yellow candy melts
- ¼ cup turquoise candy melts
Instructions
- Melt the white chocolate and the yellow, pink, and turquoise candy melts in individual bowls. Lightly grease the mold.
- Next, add the melted white chocolate to the bunny mold filling it to the top. Remove any bubbles by lightly tapping the filled mold on the countertop. Use the tip of a skewer for any stubborn bubbles that remain.
- Drop small blobs of the pink, yellow and turquoise chocolate randomly over the white chocolate.
- Using a skewer or the tip of a knife, gently swirl the colors together. Be careful not to over-swirl.
- Allow the chocolate to set completely. This usually takes about an hour, although you can speed up the process by placing the mold in the fridge.
- Once the white chocolate Easter bunny has set, gently remove it from the mold. You may need to gently twist the mold to get the bunny to pop out.
Nutrition Information:
Yield:
1Serving Size:
1Amount Per Serving: Calories: 2159Total Fat: 85gSaturated Fat: 50gTrans Fat: 0gUnsaturated Fat: 28gCholesterol: 27mgSodium: 159mgCarbohydrates: 336gFiber: 16gSugar: 244gProtein: 14g
Nutritional information is automatically calculated with ingredients and serving size and may not be accurate. Please always double check with your own nutritional apps as well.