

This post may contain affiliate links. I only recommend products I use and love. Read the full disclosure here
Updated on: December 12, 2023
Originally published on: December 12, 2023
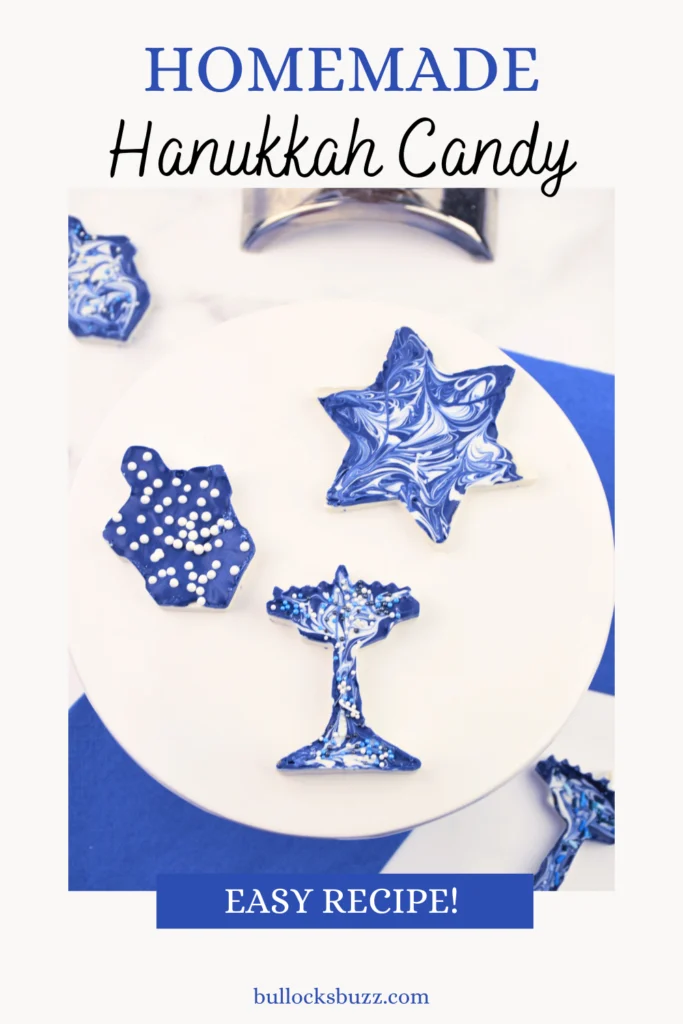
Homemade Hanukkah Candy is as delightful to make as it is to devour! Velvety layers of blue and white chocolate are crafted into festive shapes and topped off with a dusting of sprinkles in this delicious homemade candy recipe for Hanukkah.

Hanukkah just got a whole lot sweeter! Bring on the festiveness with my Homemade Hanukkah Candy recipe – a delightful swirl of blue and white chocolate magic sprinkled with holiday joy!
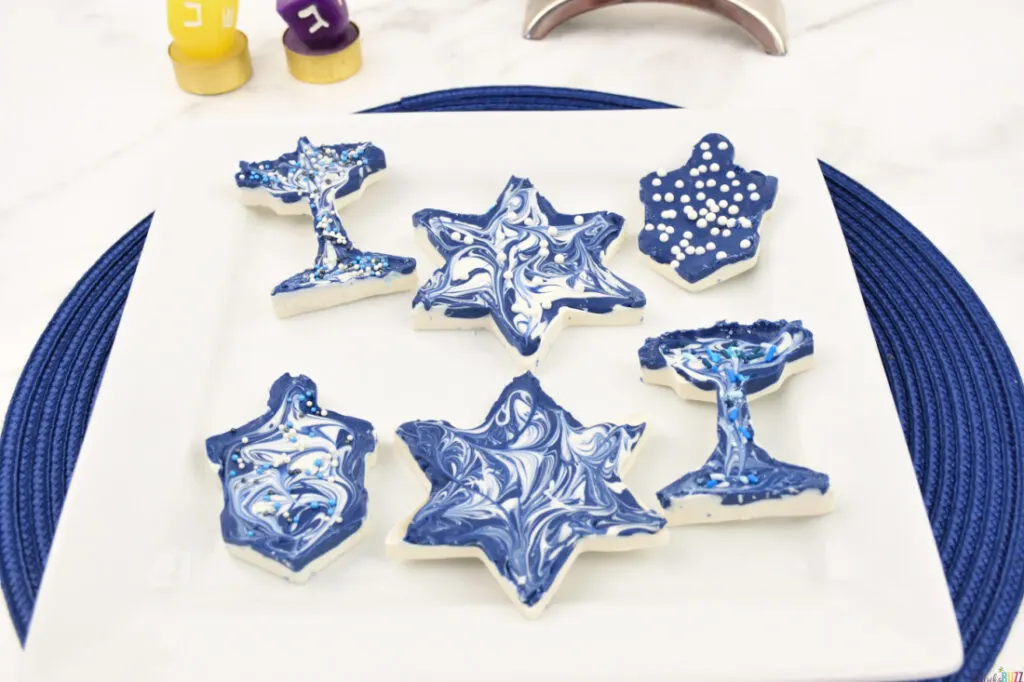
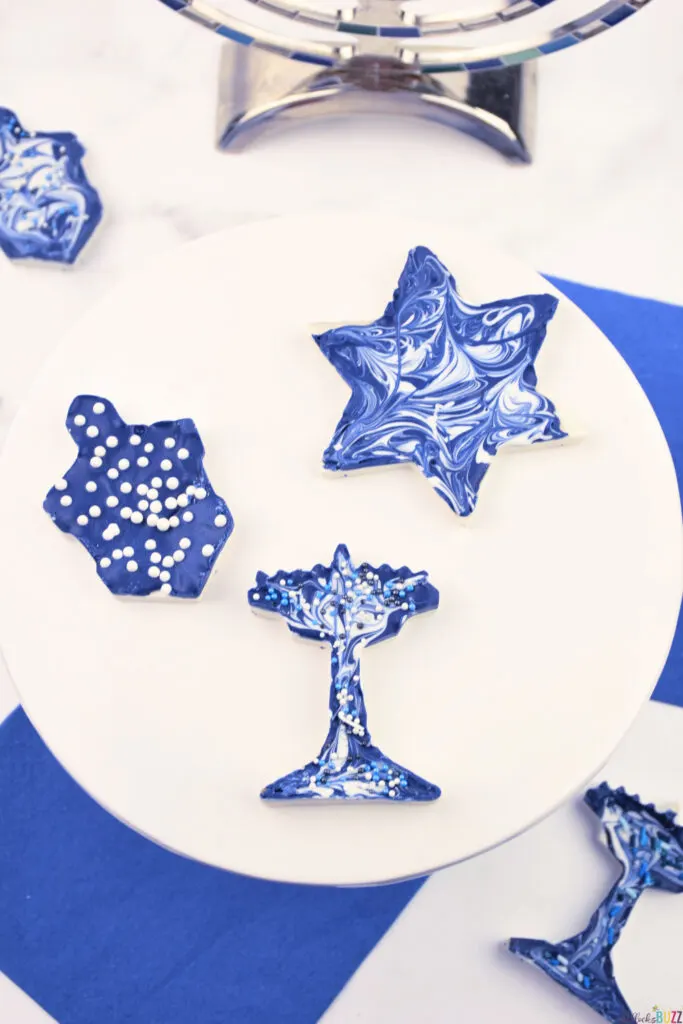
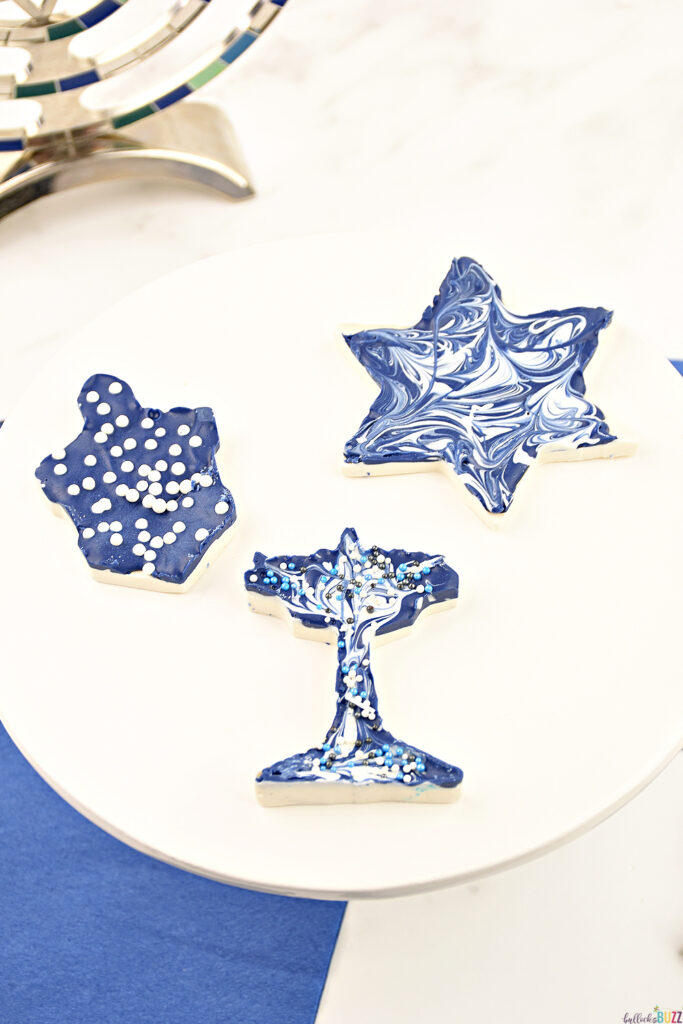
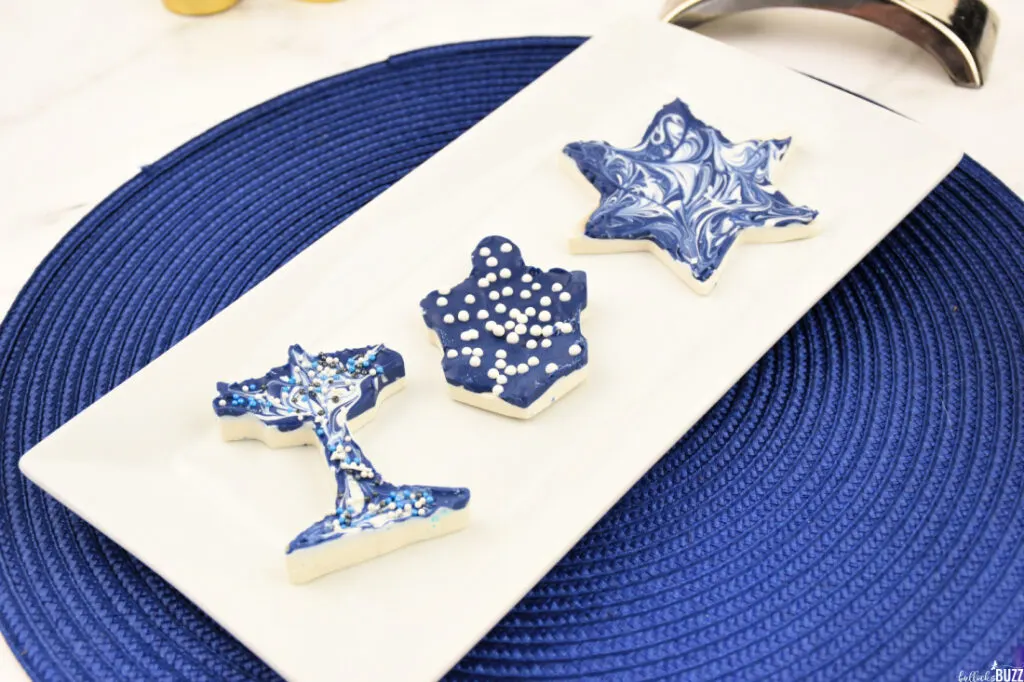
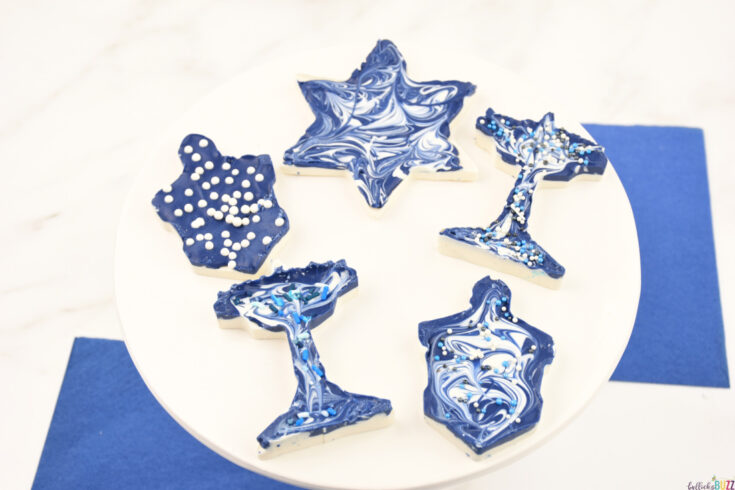
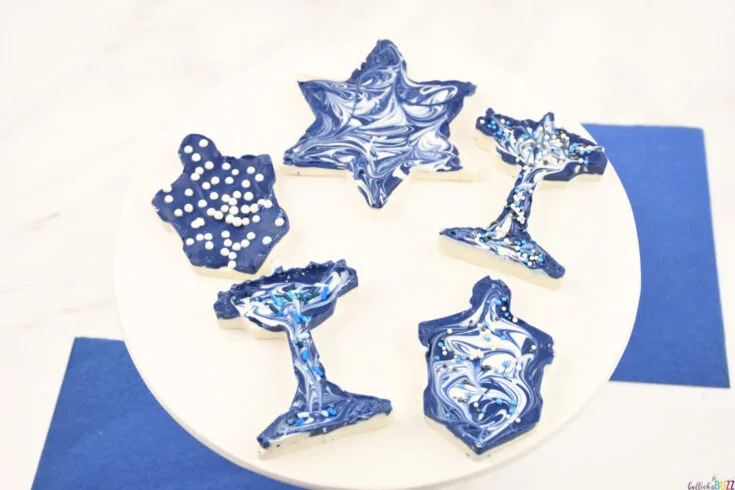
Crafted into festive shapes, including the Star of David, Hanukkiah (Hanukkah menorah), and dreidel, this easy-to-make Hanukkah candy recipe is the perfect treat to brighten your celebrations!
This delightful Chanukah treat not only brings a burst of festive colors and flavors to your celebrations but it is also incredibly easy to make!

Pair it with your favorite Hanukkah treats like these Star of David Hanukkah Piñata Cookies or the sweet and salty flavors of White Chocolate-Covered Hanukkah Pretzels. It would look amazing on a Hanukkah Candy Board, too, creating a mouthwatering array of holiday delights that’ll leave everyone craving more.
Why You Will Love This Hanukkah Candy Recipe
This delightful homemade chocolate candy for Hanukkah is perfect for adding a sweet touch to your Hanukkah celebrations in so many ways. Because creating it is such an easy and fun activity, it is perfect for the kids to join in, making it an ideal family holiday project.
Plus, the minimal effort required means more time for you to spend enjoying the holiday festivities and sharing these scrumptious treats with loved ones.
But that’s not all! This recipe is a creative canvas, allowing you to customize shapes and colors, ensuring each piece is a unique masterpiece. And it is also perfect for gifting.
Whether you’re looking for a charming gift or simply want to bask in the holiday spirit, this easy and delightful Homemade Hanukkah Candy is set to become a cherished part of your Hanukkah traditions.
So, grab your apron, gather the family, and let the sweet magic of Hanukkah begin!

How to Make Homemade Hanukkah Candy Menorahs, Dreidels, and Stars of David
Get ready to elevate your Hanukkah celebrations with the magic of homemade candy! Discover how to craft your own Hanukkah candy by finding all the details, including exact measurements, and instructions in our free printable recipe card tucked at the end of this post.
Below, I’ve listed the ingredients and step-by-step instructions complete with images to help guide you through creating this candy masterpiece. So, gather your tools and ingredients from the list below, and let’s make these Hanukkah treats that are bound to light up your celebration!
Kitchen Tools You Will Need
Get ready to turn your kitchen into a festive candy-making haven! Before creating these Hanukkah candies, let’s quickly round up the essential kitchen tools that will make this sweet adventure a breeze.
- candy melting pot, microwave, or double boiler to melt the candy melts
- toothpick, skewer, spoon, or fork for swirling
- cookie sheet
- parchment paper or non-stick baking mat
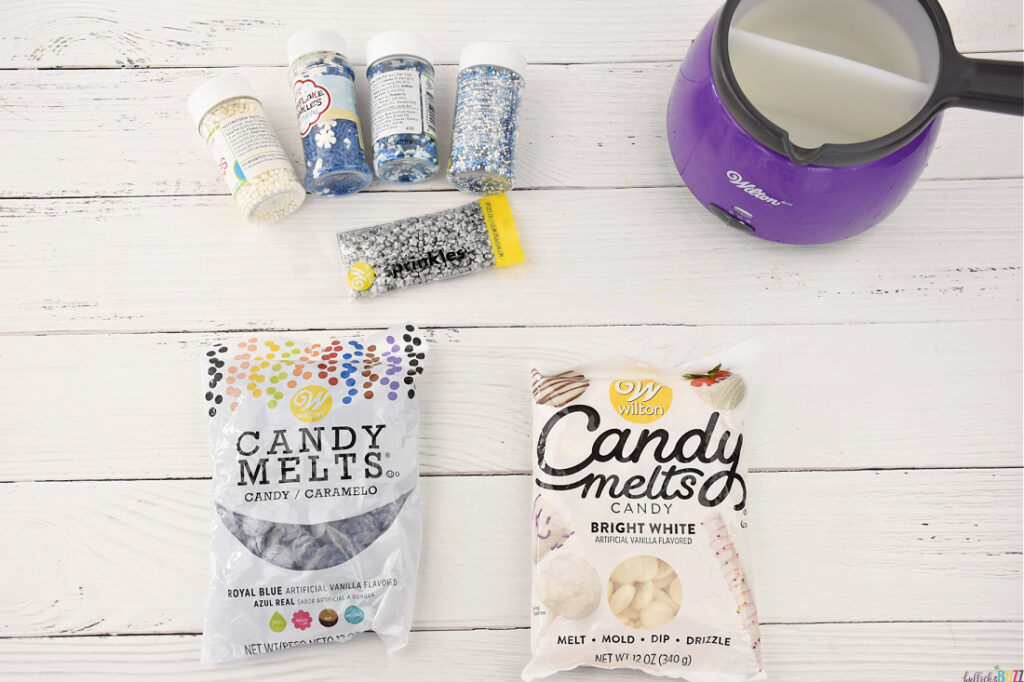

Ingredients You Will Need
Let’s gather the essentials for our candy-making fiesta! From the rich palette of blue and white candy melts to the playful addition of festive sprinkles, these ingredients are the key to whipping up your very own batch of delightful Hanukkah candies.
- Bright White candy melts – make sure you get the bright white and not plain white to avoid a yellowish cast to your candy
- Royal Blue candy melts
- Blue and White sprinkles – I used Wilton Blue Nonpareils Sprinkles Mix, Blue and White Jimmies Sprinkles, White Sugar Pearls, and silver stars
Instructions to Make Homemade Hanukkah Chocolate Candy
Ready to turn your kitchen into a sweet workshop? With a simple process that involves nothing more than melting chocolate candy melts, pouring them into festive cookie cutters, and finishing with a cheerful dusting of Hanukkah sprinkles, this recipe is a joy for both experienced bakers and kitchen newcomers.
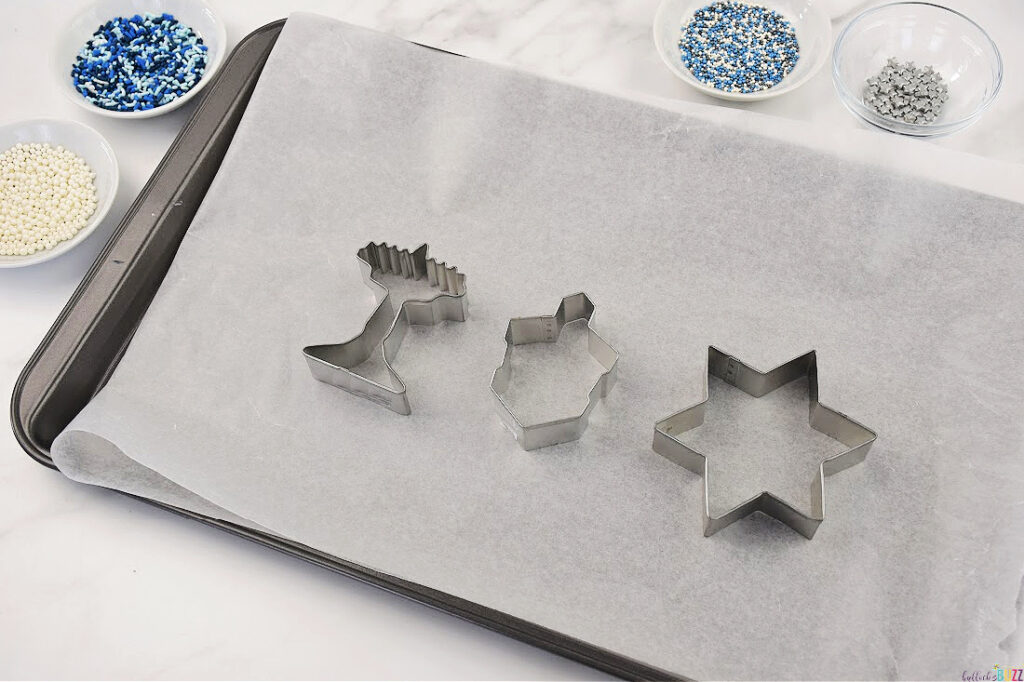
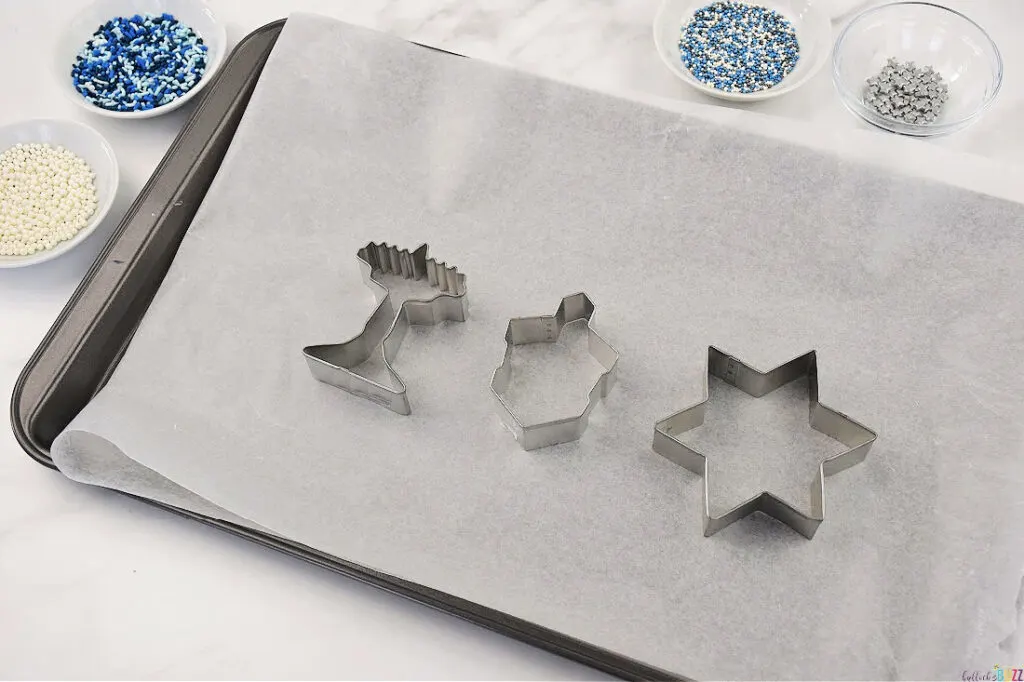
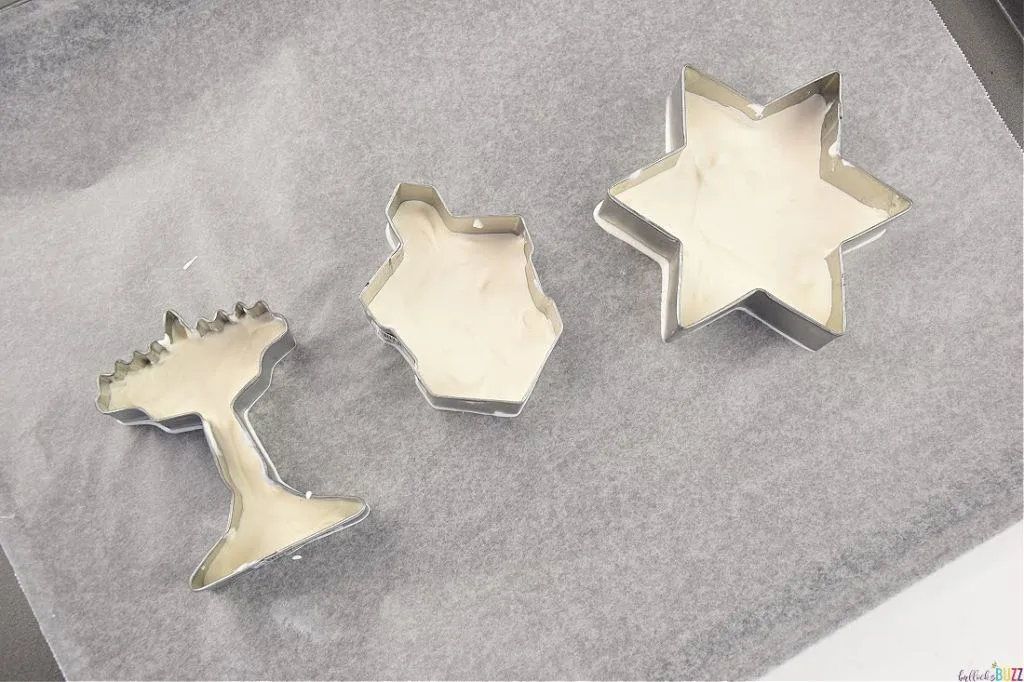
Step One: Set Up Your Sweet Canvas
- Begin the candy-making extravaganza by preparing a cookie sheet and lining it with parchment paper or a non-stick mat.
- Then, to guarantee an easy candy release, lightly grease the inside of the cookie cutters with oil, Crisco, or butter. Place them on the prepared cookie sheet.
Step Two: Melt the Candy
- Using a candy melting pot, double boiler, or microwave, melt the bright white and royal blue candy melts separately. Follow the package instructions to ensure a smooth and creamy consistency.


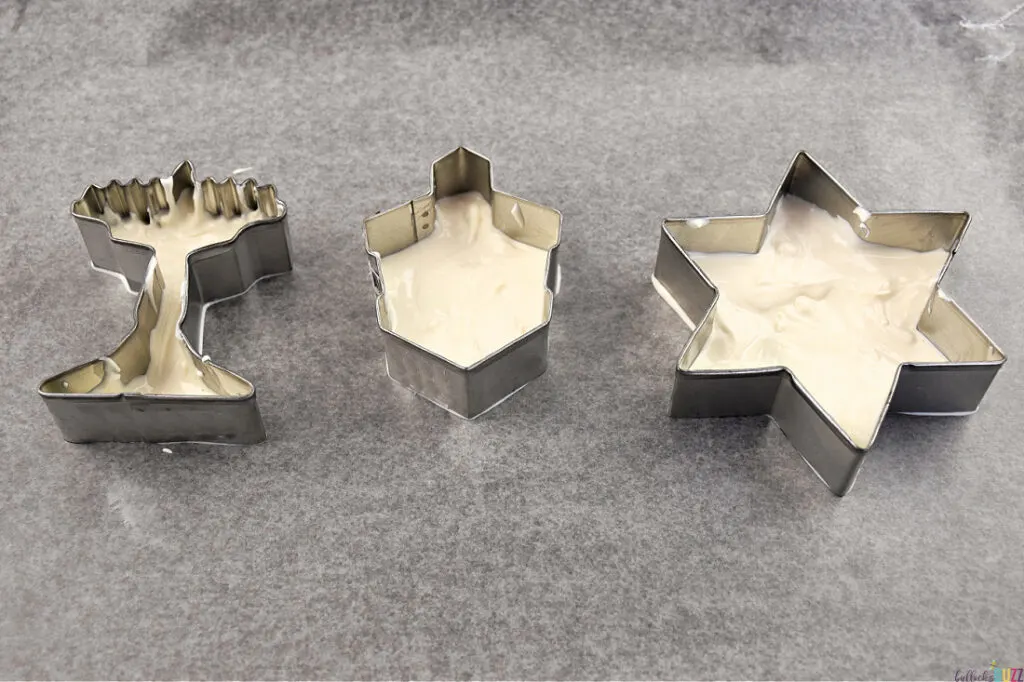
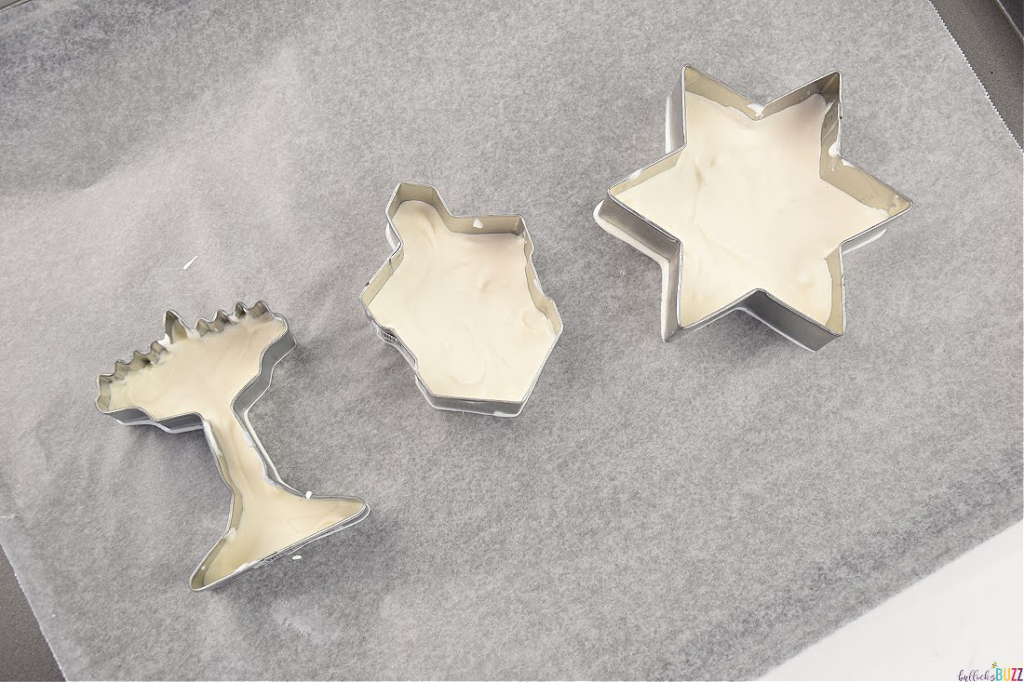
Step Three: Add the Melted Chocolates
- Using a spoon, add the melted white candy to each cookie cutter, filling them with a thin layer. I made mine about 1/8 of an inch. Keep it sweet but not overly thick.
- Use a toothpick, skewer, spoon, or butter knife to push the melted chocolate into any nooks, crannies, and corners.

Step Four: Chill
- Gently slide the sheet into the fridge, ensuring it’s perfectly level. Allow the white chocolate to set until solid—typically around 15 minutes in the fridge or a bit less in the freezer.
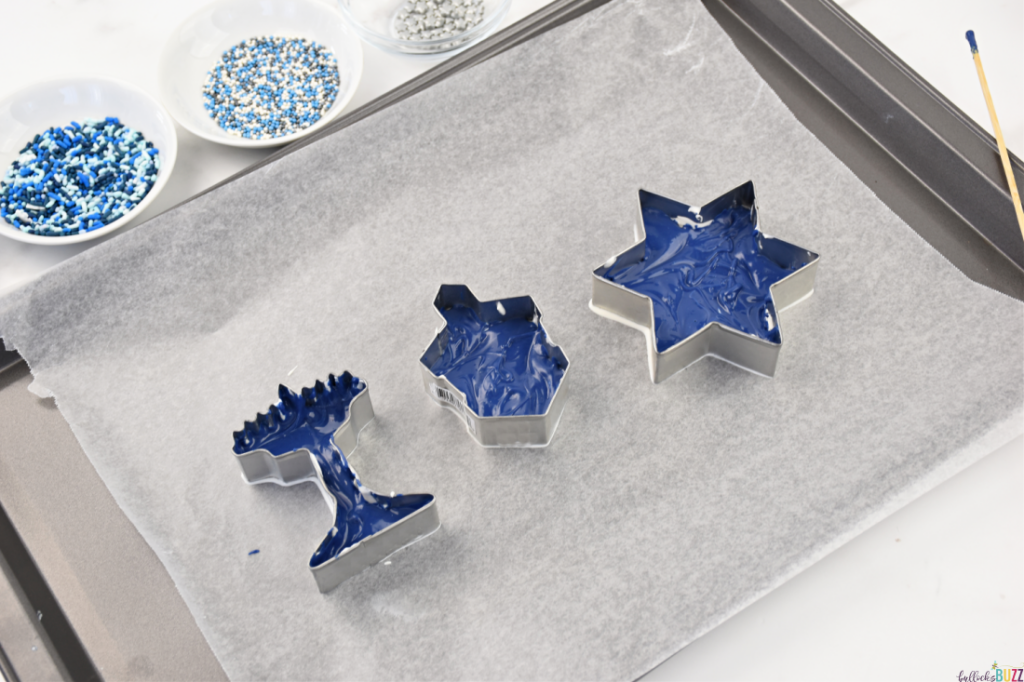
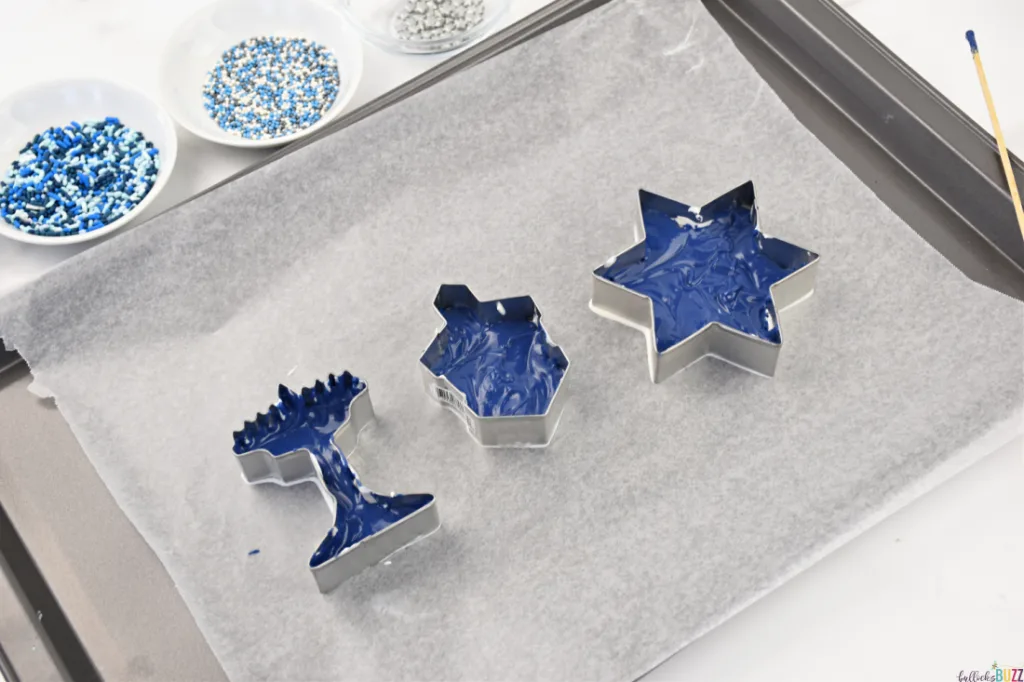
Step Five: Adding the Blue Candy Melts
- Once the white chocolate is set, add a thin layer of melted royal blue chocolate on top of the pristine white.
- Again use something to ensure the candy gets into all of the nooks and crannies.
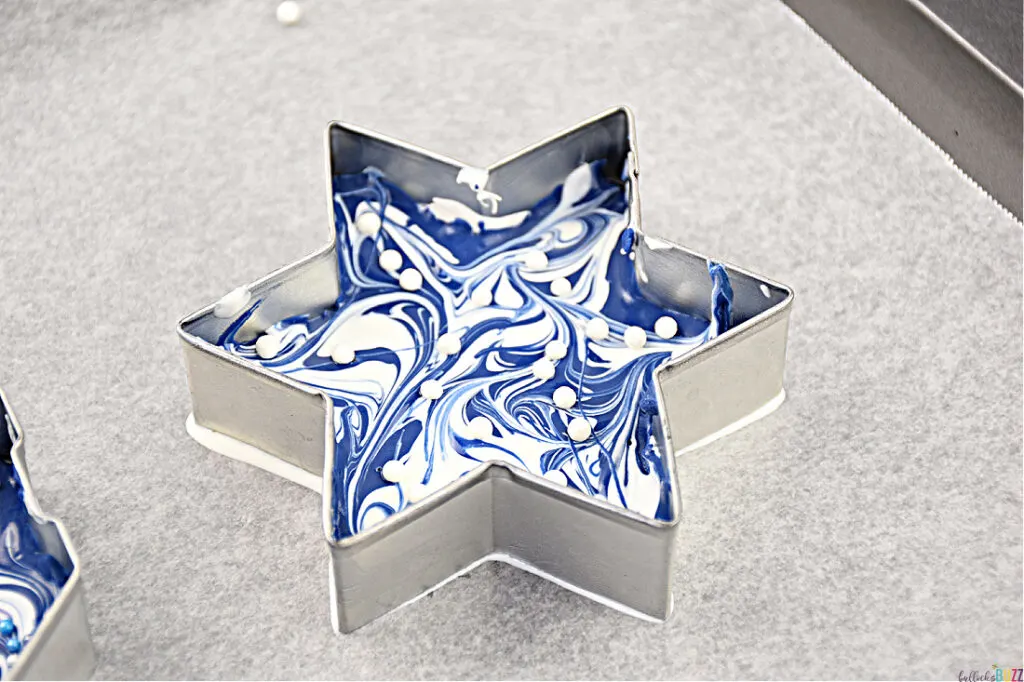
Step Six: Swirl and Decorate
- This is where your candy creativity takes center stage! Choose your style – swirl some and top with sprinkles, or simply add sprinkles to others. It’s totally up to you!
- To swirl: add a few drops of melted white chocolate to the fresh blue layer. Then, take the end of a toothpick, skewer, or spoon and gently drag it through the melted chocolates, creating a mesmerizing swirl effect. Add sprinkles if you’re feeling extra festive.


Pro Tip
Take care when adding the hot blue chocolate as it will melt a tiny bit of the already-set white chocolate layer. Be careful not to push too hard (go too deep) while swirling the colors or you could mess up the bottom layer.
Step Seven: Back in the Fridge It Goes
- Return your Homemade Hanukkah Candy creation to the fridge, letting the chocolate set to perfection to ensure flawless Hanukkah masterpieces.

Step Eight: Unveil the Sweet Shapes
- Once the chocolate has solidified, carefully free your Hanukkah-shaped candies from the cookie cutters. You should be able to gently push down from the top side and pop them right out. Work swiftly – the heat from your fingers might melt some of the chocolate.
- If the candy does not release easily, first remove any excess candy that may have spilled over the edges of the cookie cutter. Then, alternate pushing first from the top and then from the bottom, slowly working the candy up and down until it releases from the cookie cutter.
Pro Tip
You may have some excess candy built up around the edges of the shapes. To remove, use a small but sharp knife to carefully slice the excess off. Take your time so you do not break the candy.
And just like that, your festive candy is ready to be enjoyed! Now, bask in the festive glory of your Hanukkah candies – each piece is a sweet celebration waiting to be shared!

So, gather your loved ones, share the sweetness, and let the joy of Hanukkah brighten every bite! Happy indulging!
Variations, Additions, and Substitutions:
Feel free to unleash your creativity and customize this Homemade Hanukkah Candy recipe to suit your taste! Here are some delightful variations to consider:
- Colorful Layers: Experiment with different layering options! Whether it’s a candy with a single color, two layers, three layers, or even more, each variation adds a touch of charm to your festive treats.
- Swirls and Sprinkles: Make your candy uniquely yours by swirling the top layer or leaving it a solid color. The choice is yours! Add a sprinkle of Hanukkah-colored delights for that extra festive touch.
- Flavor Fusion: Infuse your candies with different flavors by adding a few drops of oil-based extracts. Peppermint, vanilla, or almond extract can add an unexpected burst of flavor to your sweet creations.
- Unique Additions: Try incorporating crushed peppermint, nuts, or other candies into the melted chocolate.
- Colorful Hanukkah Palette: Experiment with a palette of colors to match your Hanukkah theme. Different shades of blue, silver, or even gold can add a delightful twist to your candy creations. Create a stunning display with candy in all shades of blue, or mix it up with blue and gold, blue and silver, or any combination that reflects the spirit of the holiday.
- Dazzling Decor: Elevate your candy presentation by experimenting with different edible decorations. Try edible glitter, gold or silver drizzle, or even a drizzle of contrasting-colored chocolate.
- Tantalizing Toppers: Take your Hanukkah candy to another level by trying different toppings such as mini marshmallows, dried fruit, or even crushed nuts.
The possibilities are as endless as your imagination, so have fun and make these Hanukkah candies uniquely yours!


Frequently Asked Questions (FAQs) About Homemade Hanukkah Candy
Below are some of the most common questions I get with this Homemade Hanukkah Candy recipe. If you have a question I did not answer below, feel free to leave it in the comments and I will answer as quickly as possible.
Q: How Thick Should I Pour Each Layer?
A: The thickness of each layer is entirely up to your personal preference and desired candy thickness. However, a popular choice is pouring each layer to achieve a final candy thickness of a little less than half an inch. Experiment and find the thickness that suits your taste and style best.
Q: How Long Does it Take for the Chocolate to Set?
A: The setting time can vary, but typically, the chocolate takes around 15 minutes in the fridge. For a faster setting, you can place the sheet in the freezer.
Q: How Do I Store the Finished Homemade Hanukkah Candy?
A: Store your finished Hanukkah candies in an airtight container at room temperature. Avoid direct sunlight or exposure to heat, as chocolate can melt. Enjoy within a week for the best taste and texture.
Q: Can I Add Flavors to the Chocolate?
A: Certainly! Most candy melts are flavored vanilla but feel free to experiment with flavor extracts like peppermint for a refreshing twist. Add a few drops to the white chocolate before pouring for a delightful burst of flavor in every bite. Just be sure to use oil-based so the chocolate does not seize.


Versatility at its Sweetest
Embrace the versatility of this delightful homemade Hanukkah candy recipe! Beyond its festive charm for the Festival of Lights, you can easily adapt it to suit any holiday or occasion. Simply swap out the colors and cookie cutter shapes to match the theme of your celebration—reds and greens for Christmas gifts and trees, pastels for Easter bunnies and Easter eggs, or even vibrant hues for birthday cakes and balloons.
And don’t forget to customize the sprinkles for an extra layer of personalization, too.
With its adaptability, this candy recipe becomes a sweet canvas ready to be transformed into a delectable masterpiece for every festive moment. Enjoy the creative journey and share the joy with your loved ones!
MORE HANUKKAH RECIPES
Looking for more tasty and easy Hanukkah recipes like this Homemade Hanukkah Candy? Check out some of my other favorite Hanukkah-themed treats that you won’t want to miss!


Like It? Love It? Share It!
Did you enjoy making and indulging in this Homemade Hanukkah Candy? I’d love to hear about your experience! Leave a comment below and share a photo on Instagram or Facebook by tagging @bullocksbuzz and #bullocksbuzz. Your Hanukkah creations are sure to bring even more joy to the Festival of Lights!
Be sure to save this post either by clicking on that little heart over there to your right or by pinning it on Pinterest. Then share with your friends and family by clicking the share buttons above the post title, too!
And, if you really liked this holiday recipe, comment and leave me a ⭐⭐⭐⭐⭐ rating on the printable recipe card below!
And finally, don’t forget to follow us on Pinterest, Facebook, and Instagram!
Happy candy-making! 🕎

Printable Recipe Card for Hanukkah Candy
Homemade Hanukkah Candy Recipe: Easy Hanukkah Chocolate Treat
Discover the sweet magic of homemade candy delights for Hanukkah with these fun Star of David, Menorah, and Dreidel-shaped homemade chocolate candies.
Ingredients
- 1 cup Bright White Candy Melts
- 1 cup Royal Blue Candy Melts
- Blue and white sprinkles of your choice
Instructions
- Begin by preparing a cookie sheet and lining it with parchment paper or a non-stick mat. Then, to ensure easy release, lightly grease the inside of the cookie cutters with oil, Crisco, or butter. Place the cookie cutters on the prepared cookie sheet.
- Using a candy melting pot, double boiler, or microwave, melt the bright white and royal blue candy melts separately. Follow the package instructions to ensure a smooth and creamy consistency.
- Use a spoon to add scoops of the melted candy to each cookie cutter, filling them with a thin layer. I made mine about 1/8 to 1/4 inch thick. Use a toothpick, skewer, or spoon to push the melted chocolate into all of the nooks and crannies.
- Carefully put the cookie cutters, still on the cookie sheet, into the fridge, ensuring it's level. Allow the white chocolate to set until solid.
- Once the white chocolate is set, add a thin layer of melted royal blue chocolate on top of the white, again using something to ensure the candy goes into all nooks and crannies.
- At this point, you can either swirl the candies and top with sprinkles or simply add sprinkles.
To swirl: add a few drops of melted white chocolate to the fresh blue layer. Then, take the end of a toothpick, skewer, or spoon and gently drag it through the melted chocolates to create a swirl effect. - Return the candy to the fridge, and let the chocolate set completely.
- Once it has solidified, carefully free the candies from the cookie cutters.
- Serve and enjoy!
Nutrition Information:
Yield:
6Serving Size:
1Amount Per Serving: Calories: 301Total Fat: 0gSaturated Fat: 0gTrans Fat: 0gUnsaturated Fat: 0gCholesterol: 0mgSodium: 29mgCarbohydrates: 75gFiber: 0gSugar: 48gProtein: 0g
Nutritional information is automatically calculated with ingredients and serving size and may not be accurate. Please always double check with your own nutritional apps as well.