

This post may contain affiliate links. I only recommend products I use and love. Read the full disclosure here
Updated on: November 2, 2024
Originally published on: December 5, 2022
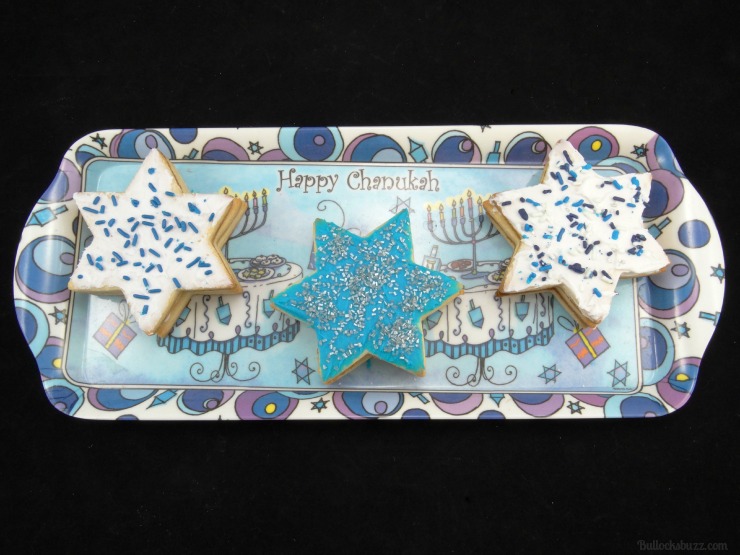
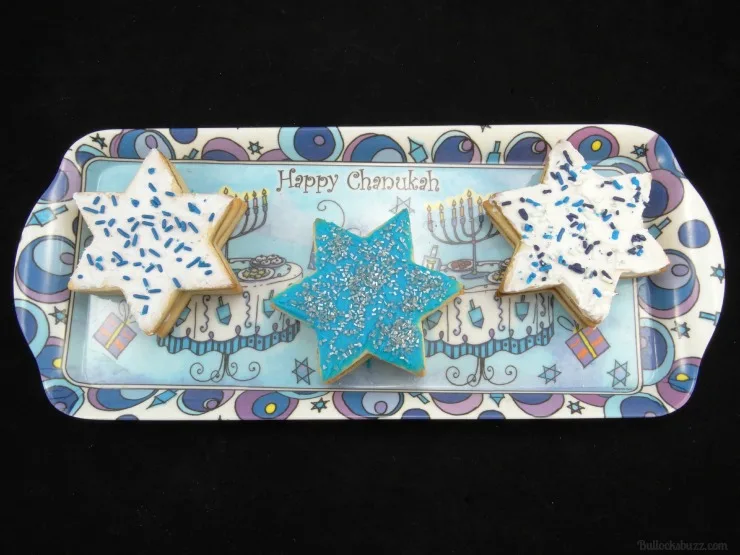
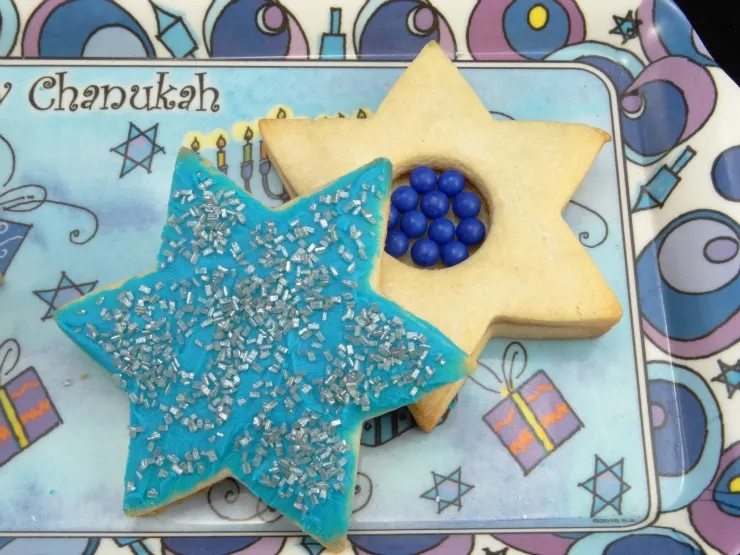
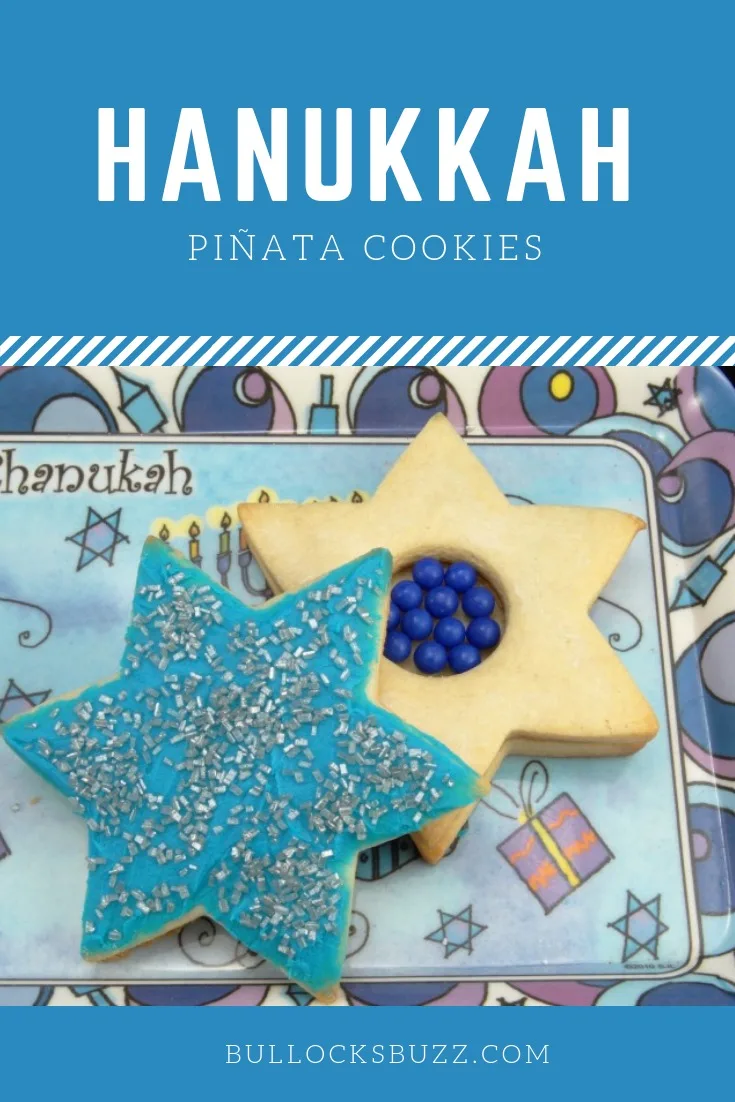
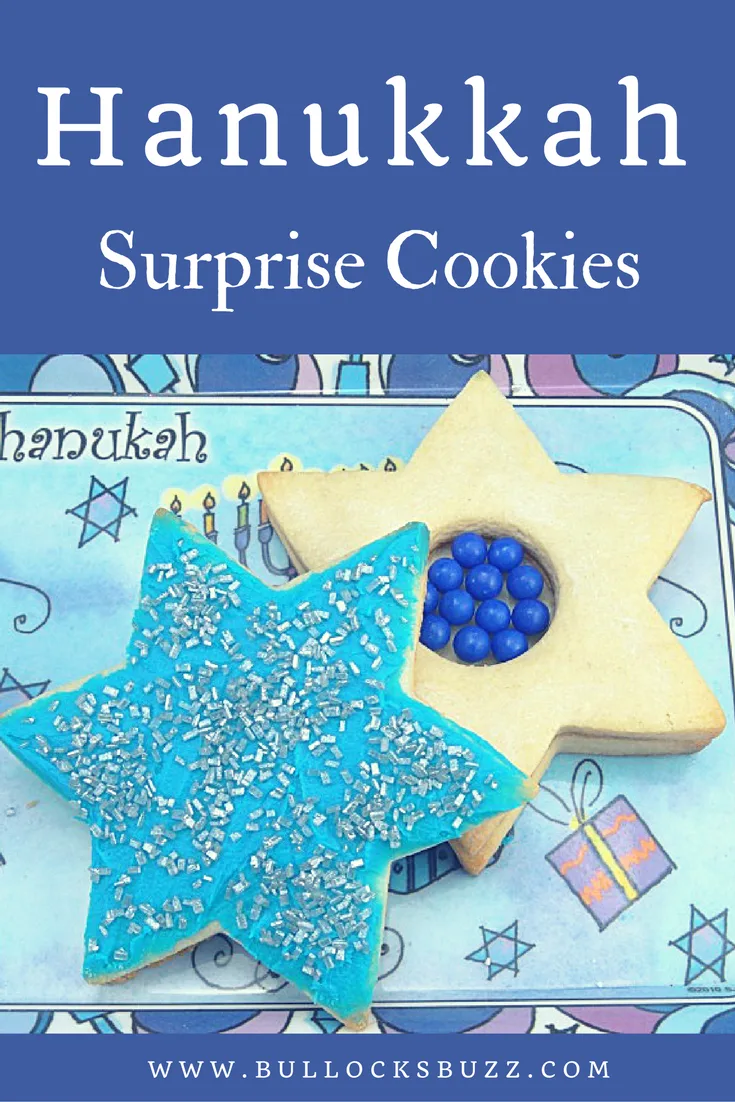
These made-from-scratch sugar cookies are cut in the shape of the Star of David then filled with a sweet surprise. Hanukkah Piñata Cookies not only taste great, but they look great, too. It’s a Hanukkah cookie recipe the whole family will love!
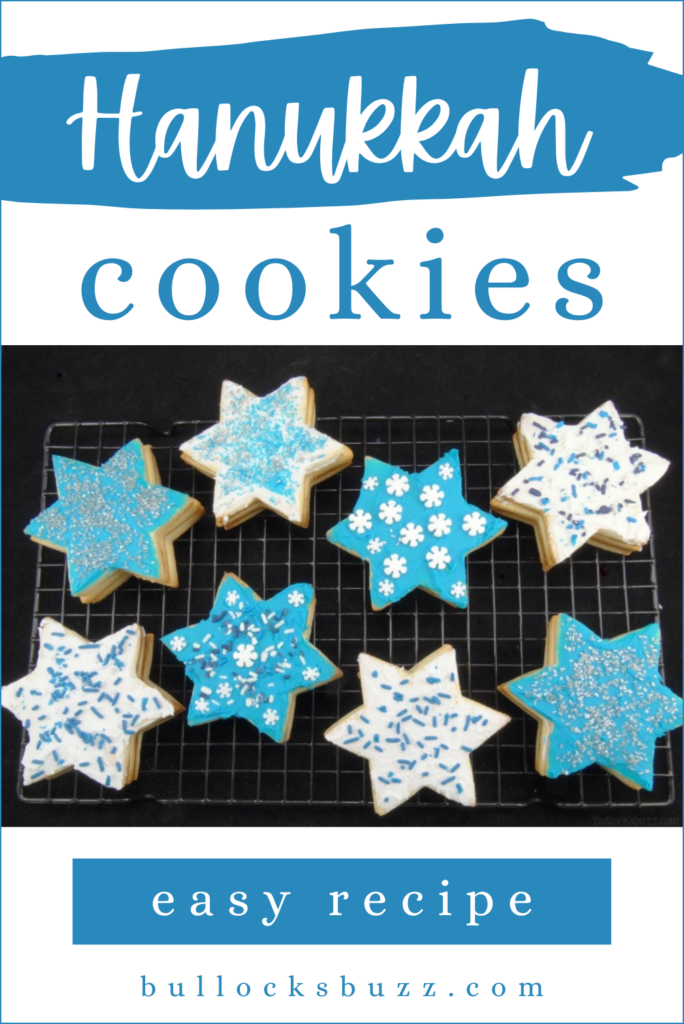
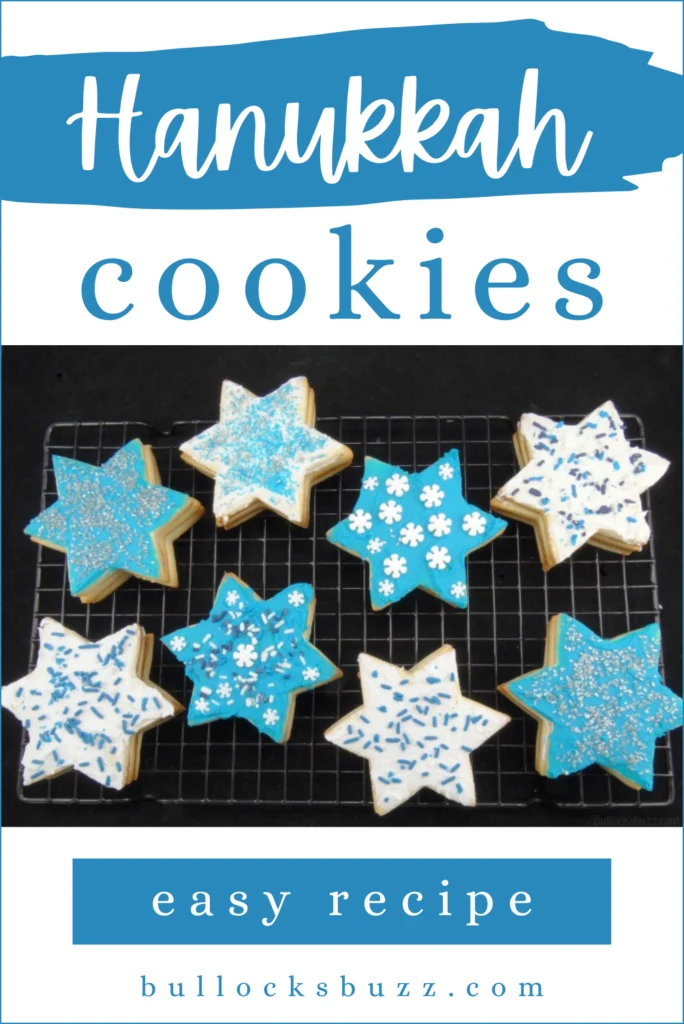
Every year I like to make a special Hanukkah cookie recipe for the holiday. And while I knew I wanted to bake some Star of David cookies, I wanted to make something a bit more unique than your typical cutout sugar cookie. Enter my Hanukkah Piñata Cookies!
Easy Hannukah Cookie Recipe
Everybody loves cookies and everybody loves a surprise – and these Hanukkah Piñata Cookies are the best of both worlds!
While these holiday cookies look great and taste delicious, what really makes them stand out is the candy surprise inside.
Each Star of David Hanukkah cookie comes with a hollow center that you can fill with a secret stash of your favorite candies. Break open or bite into these festive Hanukkah treats and you’ll be greeted with a sweet surprise inside.
I bet I know what you are thinking – these Star of David cookies look way too time consuming and difficult to make. The holidays are busy enough as is!
I promise you that these holiday cookies are not nearly as hard to make as they look, and they don’t take as much time as you think, either.
Ready to see how to make these easy Hannukah cookies?
How to Make Hanukkah Piñata Cookies
Just a few things to keep in mind before you get started.
First of all, be sure to use a no-spread cookie dough recipe because you need the cookies to be as close in size as possible. I’m sharing my favorite sugar cookie dough recipe although you are welcome to use your favorite! along with the exact ingredients and step-by-step instructions in the printable recipe card.
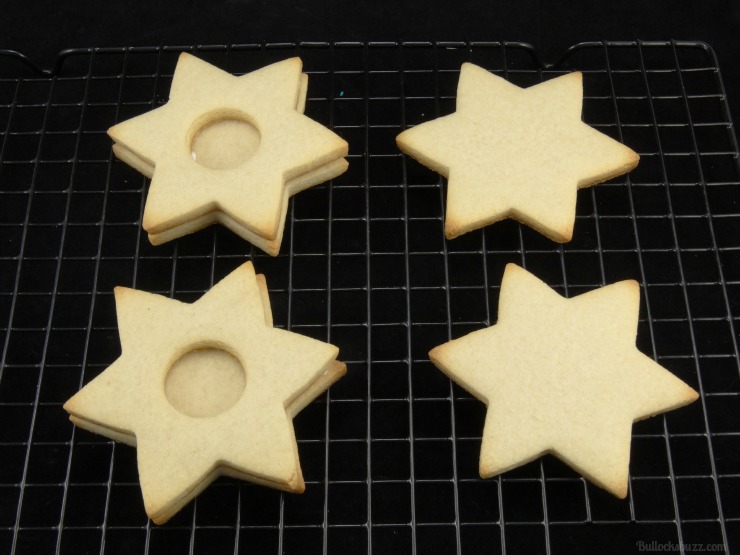
Secondly, each cookie is made up of three individual cookies: one for the top, one for the middle —-which will have a cut-out center for the candy —- and one for the bottom. Keep this in mind as you buy your ingredients and as you make the dough so you will have enough.
Lastly, while I made my Hanukkah cookies in the shape of a Star of David, you can make them in pretty much any shape you’d like and for any holiday you’d like. I think dreidle cookies would be adorable, as would Santa or reindeer cookies for Christmas!
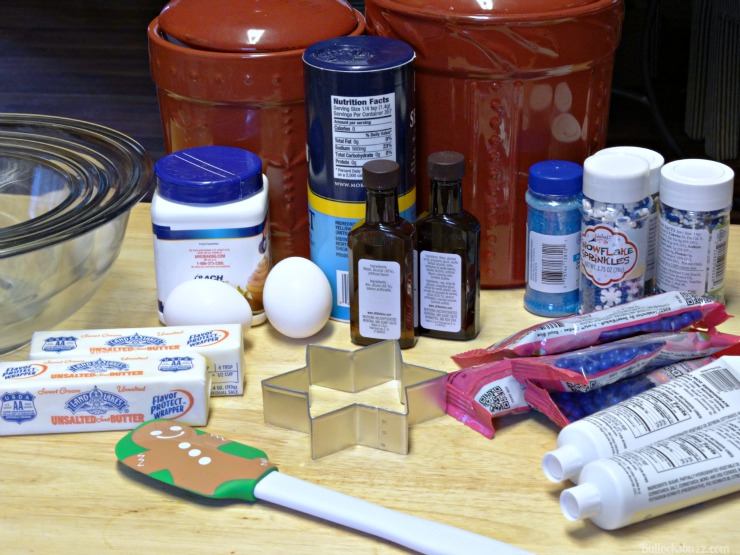
Kitchen Tools You May Need
For years I put off making piñata cookies because they looked so intricate and complicated. I wish I hadn’t waited because it is SO easy to make them! If you can make regular cookies, then you will have no problem making these Hanukkah Star of David cookies. Promise!
You will find the complete cookie recipe and instructions in the free printable recipe card below.
Disclosure: This blog post contains affiliate links for products or services I think you’ll like. This means if you make a purchase from one of these links, I may make a small commission at no additional cost to you. I only recommend items I use and love.
- wax paper or a silicone baking mat
- large baking sheet
- medium mixing bowl
- rubber spatula
- tablespoon or cookie scoop
- Star of David cookie cutter (I used one that was about 4-inches)
- small circle cookie cutter (I used a 1-inch)
- Rolling pin
- cooling rack

Ingredients to Make Hanukkah Cookies
This no-spread sugar cookie recipe is sweet and crunchy and calls for very basic ingredients. Best of all, it’s quick and easy to make!
- cups all-purpose flour
- baking powder
- salt
- sugar
- butter
- large eggs
- vanilla extract
- almond extract
- small candies for inside the cookies (I prefer to use Sixlets)
- cookie icing in blue and white
- sprinkles and colored sugar of your choice – for decorating
Instructions to Make Hanukkah Piñata Cookies
As I mentioned above, these cookies may look intricate and time-consuming, but in reality they are quite easy to make. Plus, what takes the longest is the chilling of the dough!
STEP ONE: PREP
- Preheat your oven to 375°.
- Gather all of the needed ingredients (I find it makes it easier to have everything in easy reach)
STEP TWO: MAKE COOKIE DOUGH
- Begin by mixing the flour, salt, and baking powder together in a bowl and set aside.
- In another large bowl, cream the butter and sugar until it is light and fluffy.
- Add in the eggs, vanilla and almond extract, mixing until well combined.
- Now slowly add the dry ingredients to the wet, a bit at a time, stirring as you go until ingredients are just combined.
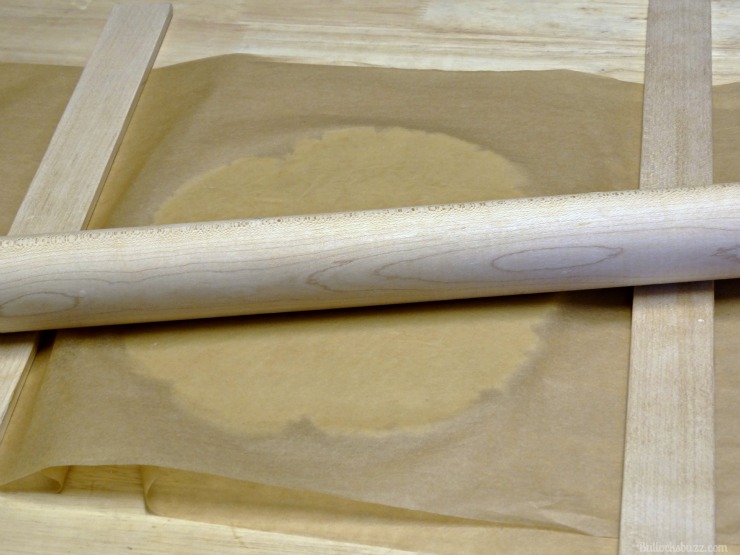
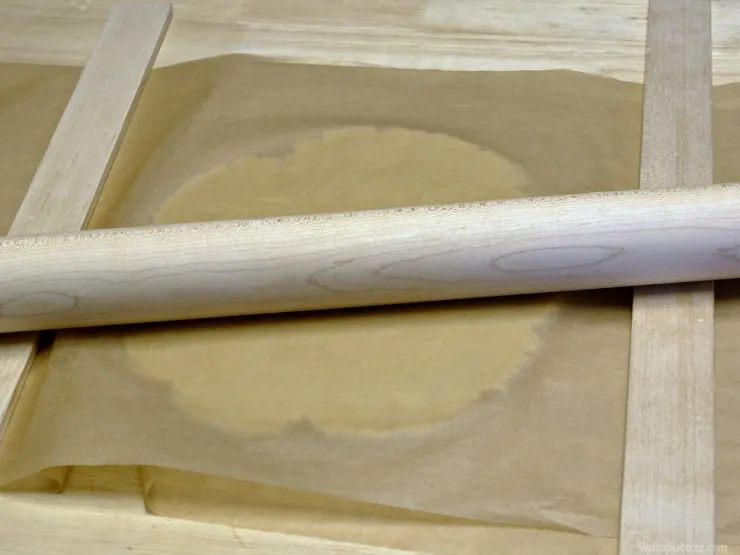
STEP THREE: ROLL OUT DOUGH
- Once the Hanukkah cookie dough is made, roll it out to around ¼-inch thickness.
Pro Dough-Rolling Tip: to make rolling dough easier and less messy and to prevent excess flour from getting in the dough, lay a piece of wax or parchment paper down on a flat surface and put a ball of dough on it. Next, place another sheet on top of the doughball and then press it out into a circle shape with your fingers. Lastly, roll it out to the appropriate thickness.
STEP FOUR: CHILL
- As you finish rolling out each dough ball, place it along with the paper, on a plate or baking sheet and pop it in the refrigerator for at least half an hour.
- By the time you are finished rolling out all of the dough, the first sheet you put in will be ready to be cut. Remember, you’ll need 3 cookies for each Hanukkah Piñata Cookie.


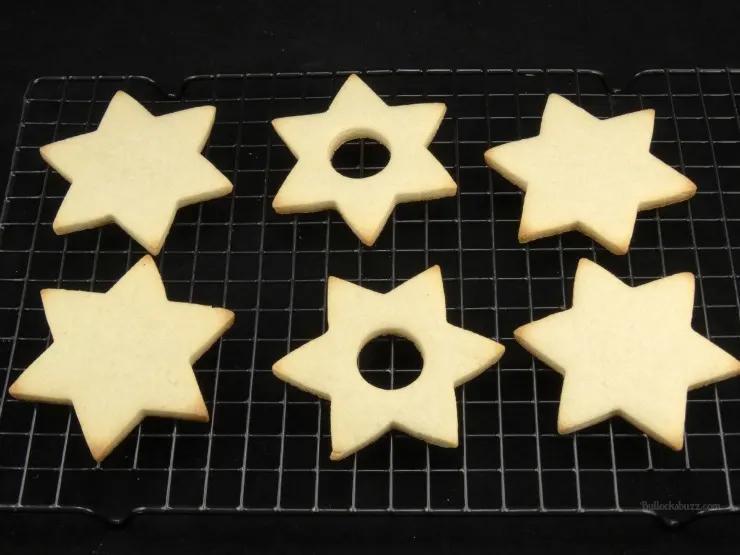
STEP FIVE: CUT AND COOL
- Using a small round cookie cutter or a knife, cut a small circle out of the centers of ⅓ of the cookies. Make sure you leave at least ¼ inch all the way around. See picture below.
- Then refrigerate the cookies for another 30 minutes – this helps keep the dough from spreading too much.
STEP SIX: BAKE AND COOL
- Once the Hanukkah cookie dough is chilled, bake them one tray at a time for 11-14 minutes or until the edges just begin to brown.
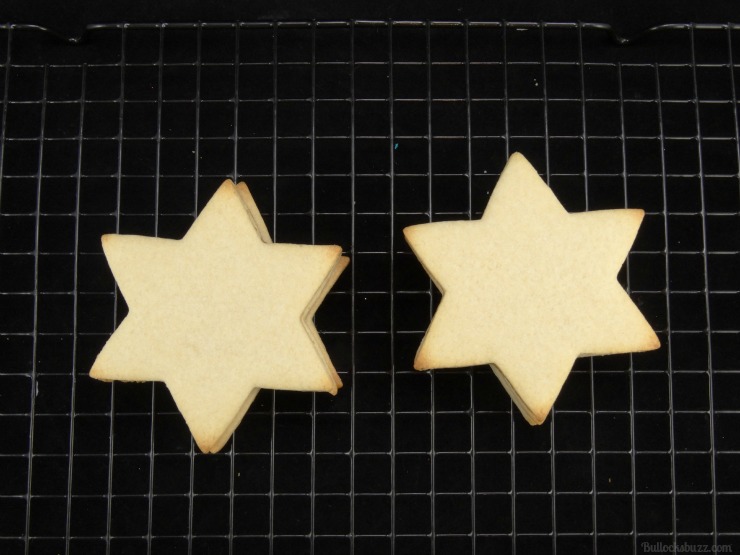
- Promptly remove from the oven, and then allow the cookies to cool completely.

STEP SEVEN: ASSEMBLE HANUKKAH PINATA COOKIES
- First, set the cookies on your baking sheet or cooling rack in the order you are going to assemble them.
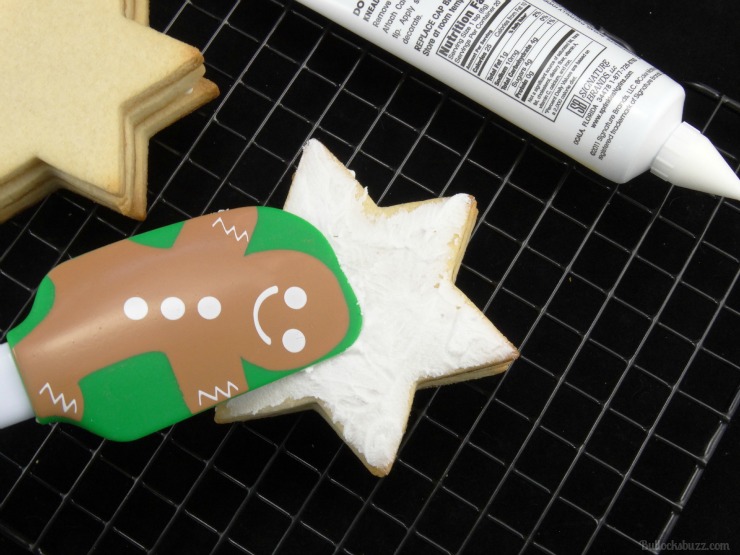
- Next, working with one cookie at a time, pipe a thin line of icing along the outside edge of all of the cookies without the cutout. This will be the glue that holds the finished Hanukkah cookies together.
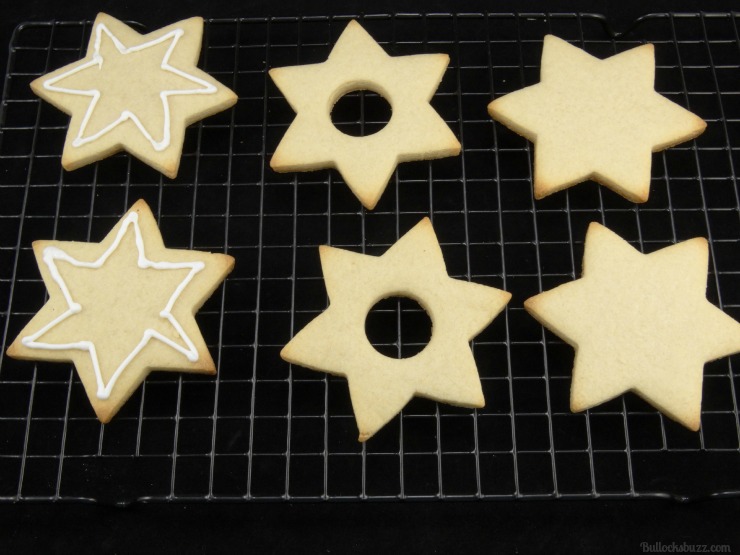
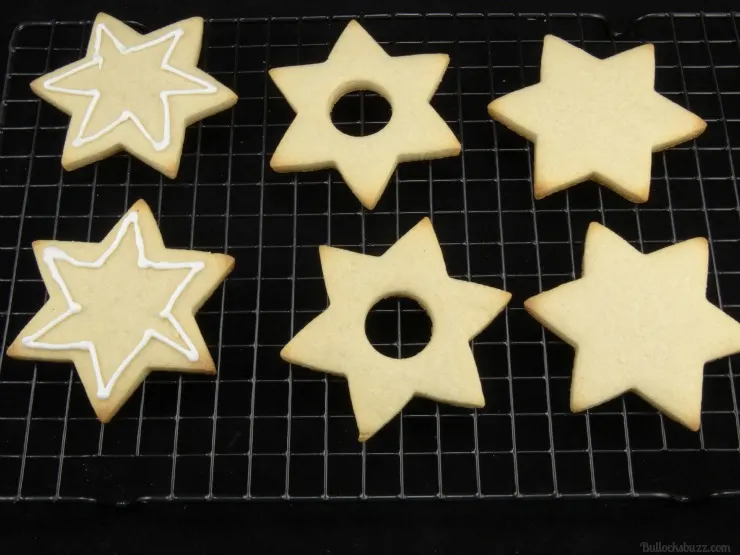
- Now press one of the cookies with the center cut out on top of the cookie you just frosted.

- Then fill the opening with small candies like this…
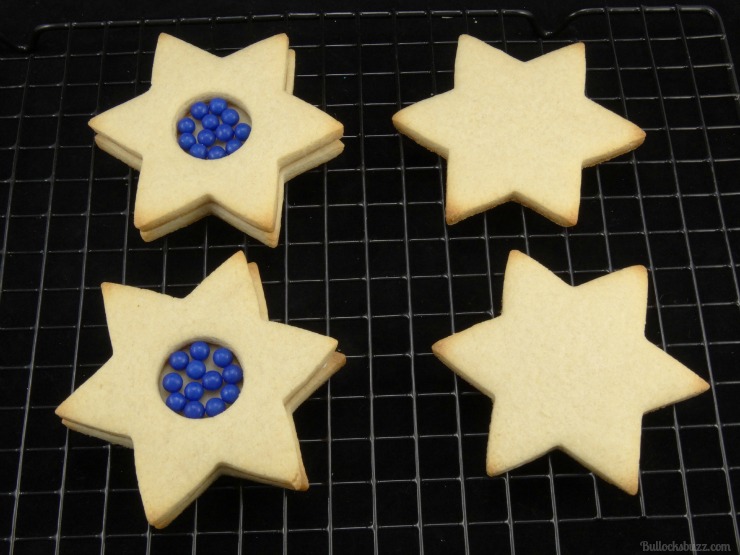

- Next, pipe a thin line of frosting around the outside edge of that middle cookie and place a final plain cookie on top.

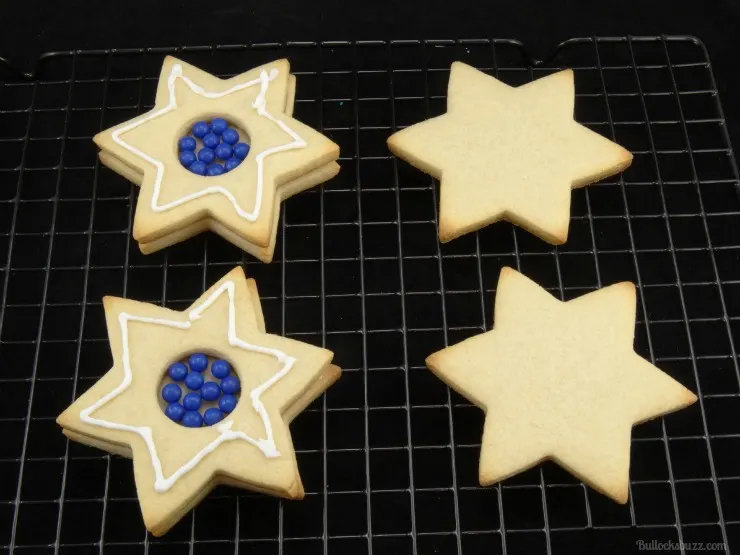
- Allow the cookies to sit at room temperature for at least 30 minutes so the frosting will set and hold the layers together.

STEP EIGHT: DECORATE
- Once the thirty minutes has passed, spread a thin layer of frosting over the very top of the cookies, and decorate them however you’d like.

After that, all that’s left is to enjoy your Hanukkah Piñata Cookies!


Aren’t they cute?! I told you it was super easy to make these Star of David Hanukkah Piñata Cookies!
More Hanukkah Recipes
Looking for more fun and easy Hanukkah recipes? Check these out! Simply click on the picture below that you like, and it will take you right to the post!

LIKE IT? LOVE IT? PLEASE SHARE THIS HANUKKAH COOKIE RECIPE!
I hope you enjoy this Hanukkah Piñata Cookies recipe much as I did! They are so fun and festive, and even more fun to eat!
If you give these holiday snacks a try, I’d love to know! Leave a comment below and tag a photo @bullocksbuzz and #bullocksbuzz on Instagram or Facebook so I can see your holiday creations!
Be sure to Pin it to save it, and then share with your friends and family by clicking the share buttons above the post title!
And finally, if you get a chance, please comment and leave me a ⭐⭐⭐⭐⭐ rating on the printable recipe card below!
Hanukkah Piñata Cookies Printable Recipe
Hanukkah Piñata Cookies


A fun and delicious way to make holiday cookies! Everyone will love the surprise inside!
Ingredients
For the Cookies
- 4¼ cups all purpose flour
- ¾ teaspoon baking powder
- ¾ teaspoon salt
- 1½ cups sugar
- 1 cup butter at room temp.
- 2 large eggs at room temp
- 1½ teaspoons pure vanilla extract
- ¾ teaspoon almond extract
Decorations for Cookies
- Blue frosting
- White frosting
- Blue Sixlets
Instructions
Cookie Dough Instructions
- Mix the flour, salt, and baking powder together in a bowl and set aside.
- Cream the butter and sugar until it is light and fluffy.
- Add eggs, vanilla and almond extract, mixing until well combined.
- Add the dry ingredients a bit at a time and stir until just combined.
- Once the cookie dough is made, go ahead and roll it out.
Rolling and Baking Instructions
- To make this easier - and less messy - lay a piece of wax or parchment paper down, put a ball of dough on it, place another sheet on top of the dough, then press it out into a circle shape with your fingers. Then roll it out to about 1/4" thickness.
- As you finish rolling out each dough ball, place the entire thing, paper and dough, on a cookie tray and pop it in the refrigerator for at least half an hour.
- Once dough is chilled, use a small square cookie cutter or a knife to cut the centers out of 1/3 of the cookies. Depending on the shape you selected, make sure you leave at least 1/4" all around. Refrigerate the cookies for another 30 minutes.
- Meanwhile, preheat the oven to 375°.
- Once the cookies are chilled, bake them one tray at a time for 11-14 minutes until the edges just begin to brown.
- Allow the cookies to cool completely.
Assembling Instructions
- Set the cookies in the order you are going to assemble them on your baking sheet.
- One at a time, pipe a thin line of frosting along the outside edge of one of the cookies without the cutout.
- Next press one of the cookies with the center cut out on top of the cookie you just frosted.
- Now fill the opening with small candies.
- Pipe a thin line of frosting around the outside edge.
- Top it with another plain cookie, and allow them to sit at room temperature for about 30 minutes. This will give the frosting time to harden so the cookie layers will stay together.
- Once the thirty minutes has passed, spread a thin layer of frosting over the very top of the cookies.
- Then decorate any way you'd like using sprinkles and candies.
Notes
The calorie number is an estimate based on a calorie calculator on the verywellfit website.
Nutrition Information:
Yield:
12 cookiesServing Size:
1 cookieAmount Per Serving: Calories: 435Total Fat: 18gSaturated Fat: 10gTrans Fat: 1gUnsaturated Fat: 6gCholesterol: 72mgSodium: 310mgCarbohydrates: 63gFiber: 1gSugar: 29gProtein: 6g
Nutritional information is automatically calculated with ingredients and serving size and may not be accurate. Please always double check with your own nutritional apps as well.

Summer Len Davis
Tuesday 15th of December 2015
I absolutely LOVE these cookies, they're adorable! the fun candies in the middle really make the cookies something special, and I love that Big Lots has everything you need to make them! [client]