
This post may contain affiliate links. I only recommend products I use and love. Read the full disclosure here
Updated on: August 1, 2025
Originally published on: August 1, 2025
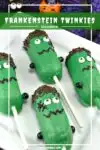
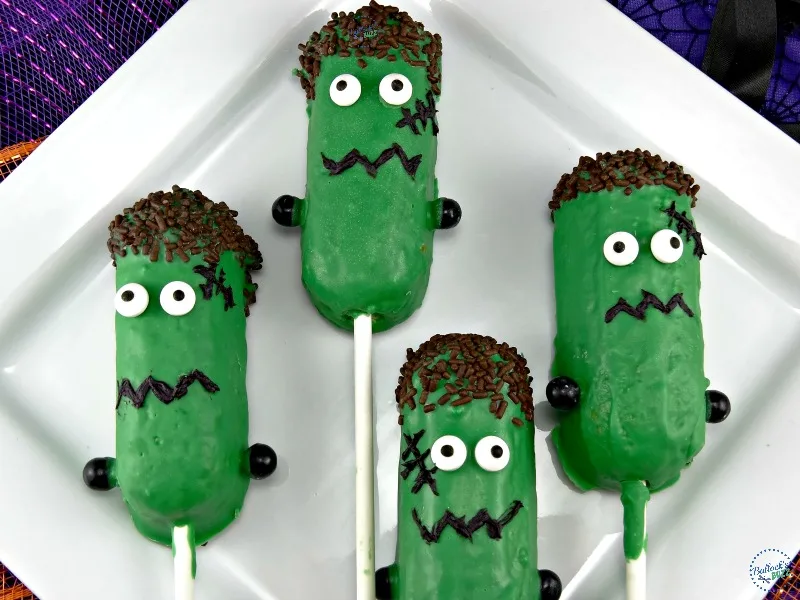
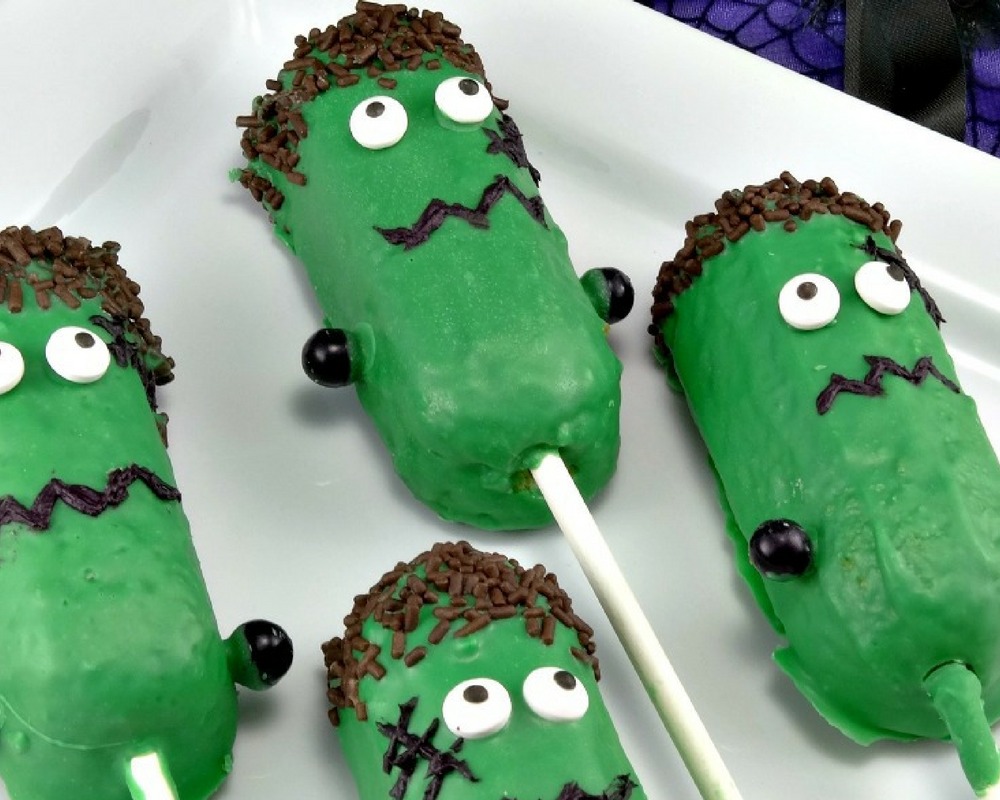
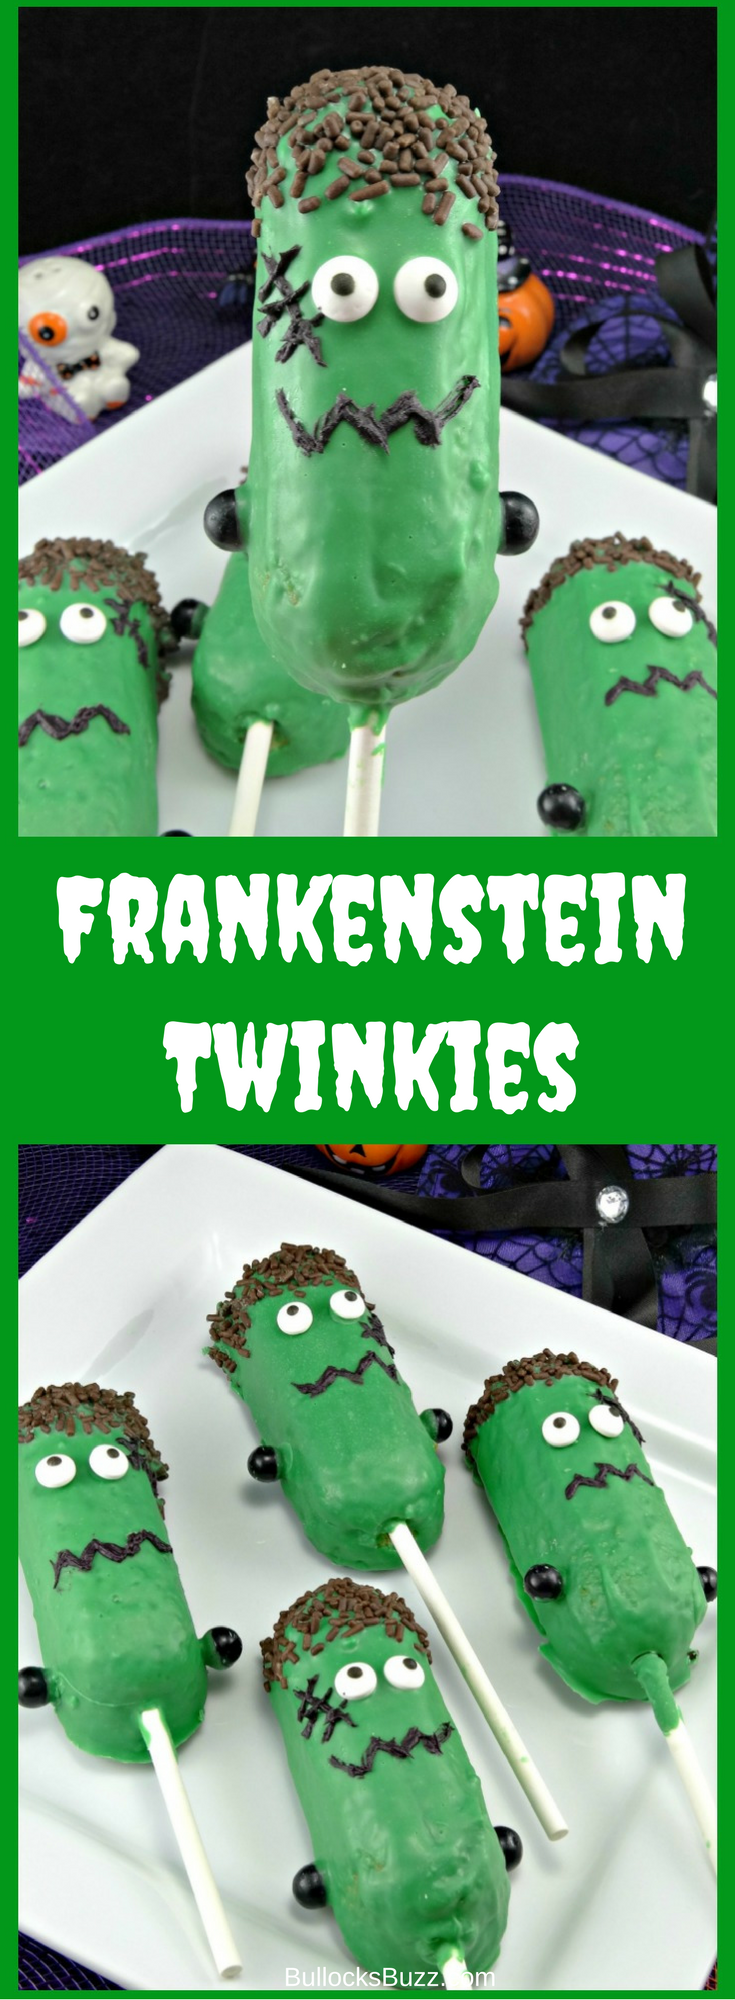
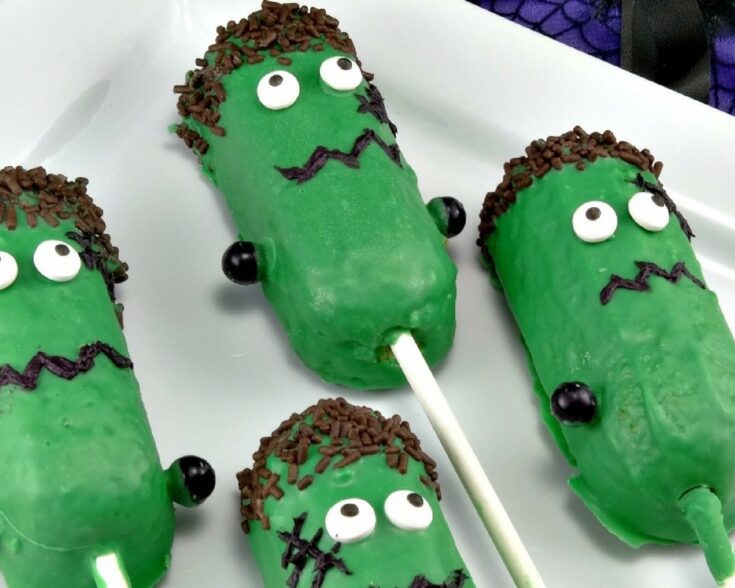
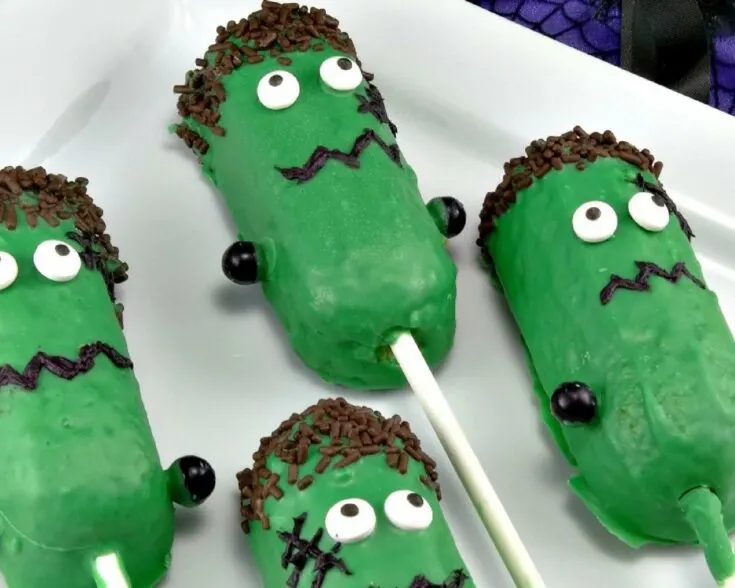
These Frankenstein Halloween treats made from Twinkies are spooky, silly, and always a hit – no baking required!


I love to make Halloween treats, especially when they are as adorable and impressive as these Spooky Frankenstein Twinkies. In fact, these Frankenstein Halloween treats are so darn cute, they’re almost too cute to eat!
I love to make Halloween treats, especially when they’re as spooktacular and impressive as these Frankenstein Halloween treats made from Twinkies. In fact, they’re so darn cute, I don’t even know if I could eat them! (Okay, who am I kidding — of course I could.)
Best of all, they couldn’t be easier to make. There’s no baking involved, and they only take five simple ingredients. They’re always a hit with kids and make one of the cutest additions to any Halloween party table.
These Frankenstein Halloween treats remain one of the most popular Halloween food crafts on the site — and for good reason. Plus, they pair perfectly with this Poison Potion Punch and these Halloween Witch Marshmallows!
Why You’ll Love These Frankenstein Twinkies
These little guys aren’t just cute—they’re no-bake, budget-friendly, and make a huge impression at any Halloween party. Plus, kids think they’re hilarious (and delicious). They’re one of my most-pinned Halloween treats for a reason!

How to make Frankenstein Halloween Treats using Twinkies
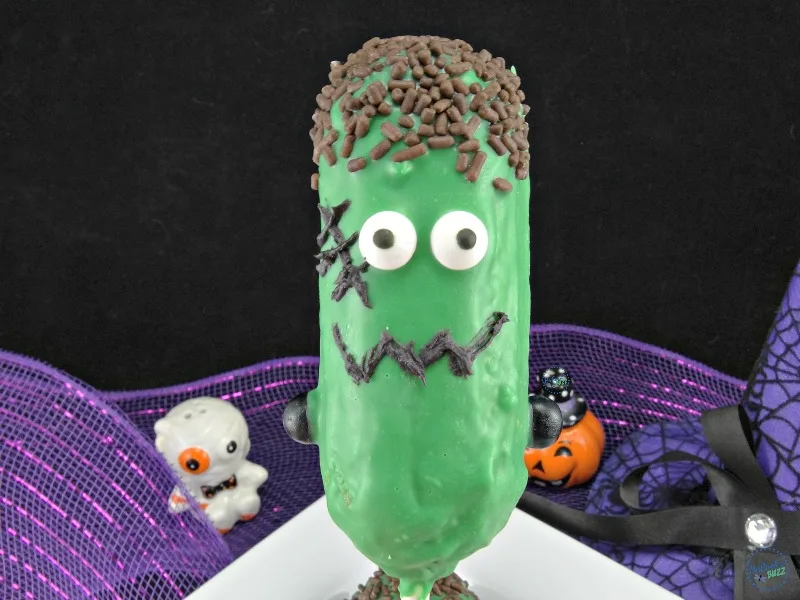
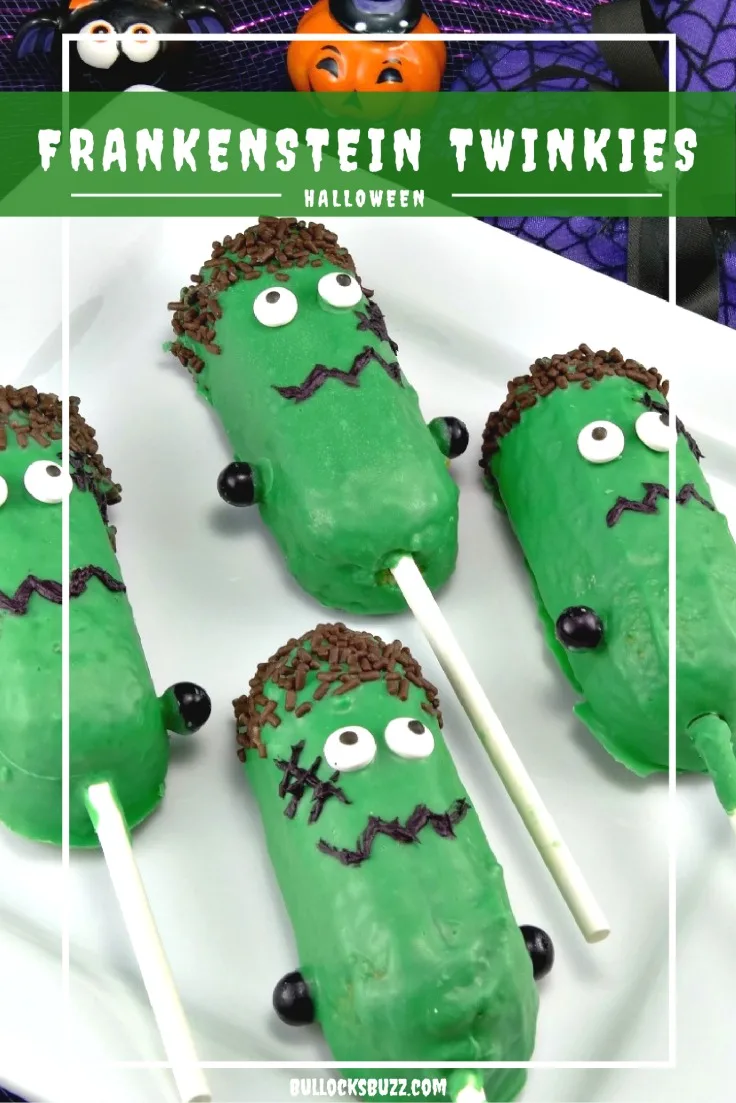
Making these Frankenstein Halloween treats is pretty straight forward. The head is the Twinkie, the chocolate jimmies are the hair, and black Sixlets are used for the bolts on the neck.
Add the candy eyes, and then use black icing to draw the scar and mouth. The prep time for these Spooky Frankenstein Twinkies is about one hour, but that includes the 30 minutes you have them in the freezer.
Ready to see how to make these Frankenstein Halloween treats using Twinkies?
Kitchen Tools You May Need
Disclosure: This blog post contains affiliate links for products or services I think you’ll like. This means if you make a purchase from one of these links, I may make a small commission at no additional cost to you. I only recommend items I use and love.
- Cookie or Lollipop Sticks — I prefer using the thicker longer ones
- Wilton Melting Pot — this is completely optional, but if you’ve ever had any trouble melting candy melts or chocolate in the past, I highly recommend this candy melting pot. After thinking about it for three years, I finally bought one and I’m so glad I did! You just toss your candy in it and walk away…perhaps giving it a stir or two. It melts the candy perfectly!!
- Mixing Bowls – great for holding candy melts and jimmies so you can dip quickly without making a mess.
- Spoon or Spatula – for stirring candy melts or scooping jimmies over the tops.
- Wax or Parchment Paper – line your baking sheet for easy cleanup and no sticking.
- Baking Sheet or Tray lined with wax paper – helps hold the Twinkies flat in the freezer and while setting.
- Knife – for trimming off any extra candy once the coating sets.

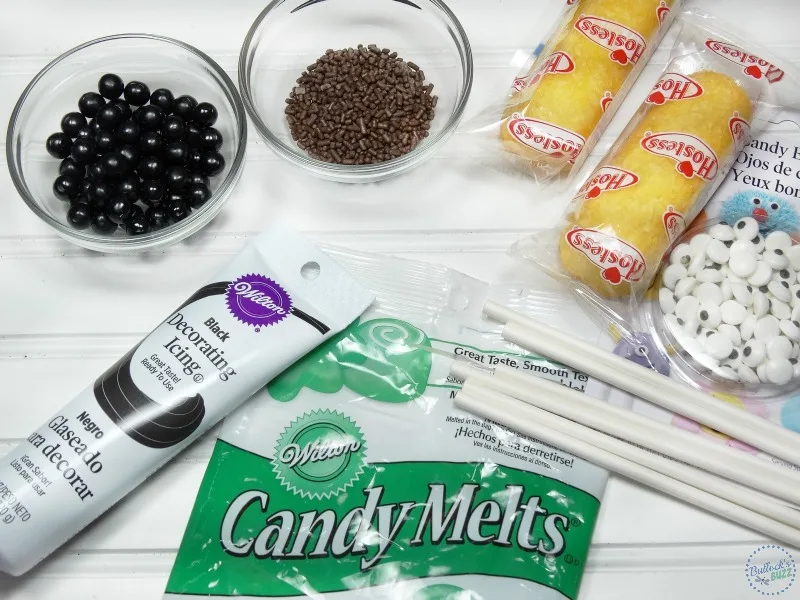
Frankenstein Halloween Treats Ingredients
You’ll only need a handful of ingredients to bring these spooky treats to life—no oven required!
- Vanilla Twinkies
- Green Candy Melts
- Candy Eyes
- Black Sixlets for the bolts
- Chocolate Jimmies for the hair
- Black Decorating Icing use with a toothpick or piping tip
Directions to Make Frankenstein Halloween Treats
These Frankenstein Halloween treats are quick to prep and even more fun to decorate! It’s like a step-by-step monster makeover with a spooky sweet ending. Follow along if you dare!
Step One: Freeze Twinkies
- Place the Twinkies in the freezer for about 30 minutes. It makes them easier to handle while decorating.
Step Two: Prep Baking Sheet
- Meanwhile, line a baking sheet with a Silpat mat or some parchment paper.
- Optional: lightly spray the paper with cooking oil to prevent sticking.


Step Three: Melt Candy Melts
- Melt the green candy melts in a candy melting pot or microwave-safe bowl.
- If microwaving, heat in 30-second intervals, stirring each time, until smooth.
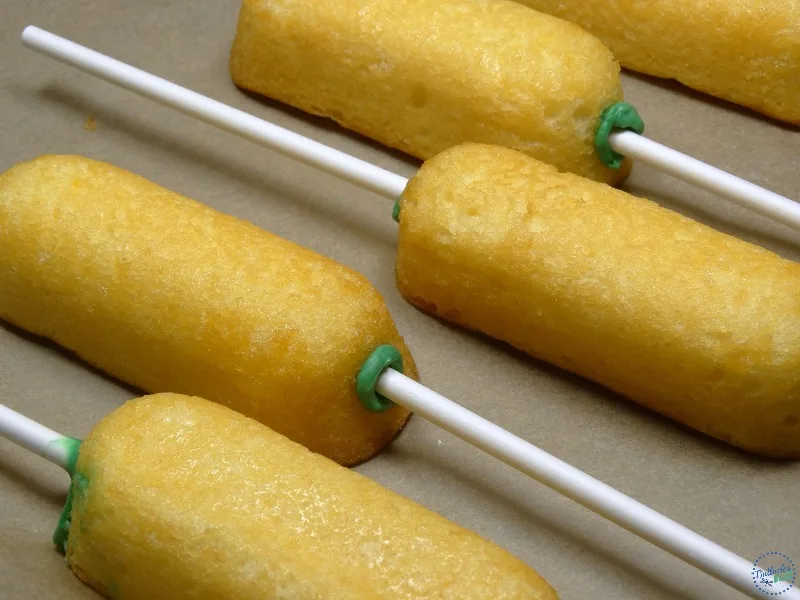
Step Four: Add Stick
- Dip the top third of a lollipop stick into the melted candy.
- Gently insert the stick from the bottom into the center of the Twinkie at least halfway.

Step Five: Freeze
- Place the Twinkies (with sticks inserted) on the prepared baking sheet.
- Freeze for about 15 minutes so the stick stays in place.
Step Six: Dip Twinkies
- Carefully coat each Twinkie in the melted green candy.
- Gently roll or tilt to cover all sides, letting the excess drip off.

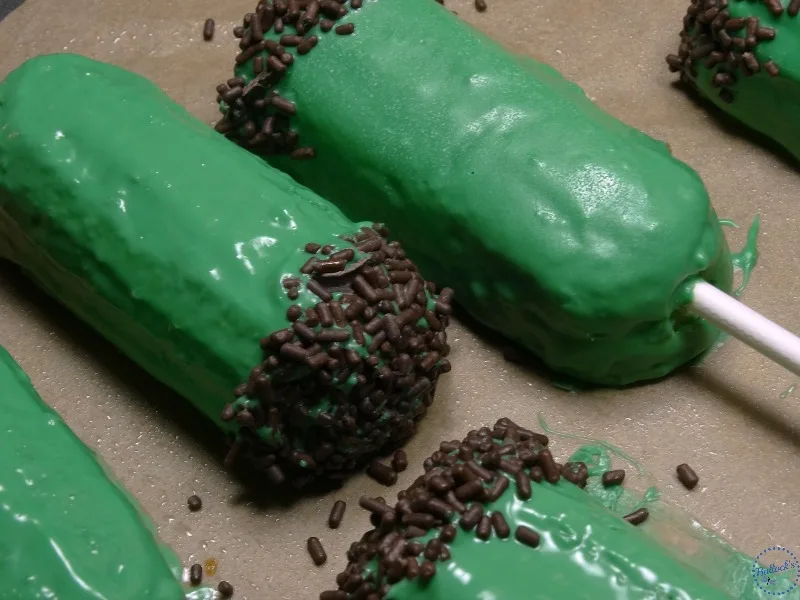
Step Seven: Add Hair
- While the candy is still wet, dip the top part of each Twinkie into the chocolate jimmies for his hair.
- Be sure to work quickly before the candy hardens!
Step Eight: Return to Freezer to Set
- Now, return the Twinkies to the wax paper-lined tray.
- Freeze for another 10 to 15 minutes until the candy coating is fully set.
Step Nine: Trim Off Excess Candy
- Once firm, use a small knife to trim away any hardened candy that pooled at the base or ran off the sides. This gives them a cleaner, polished look.

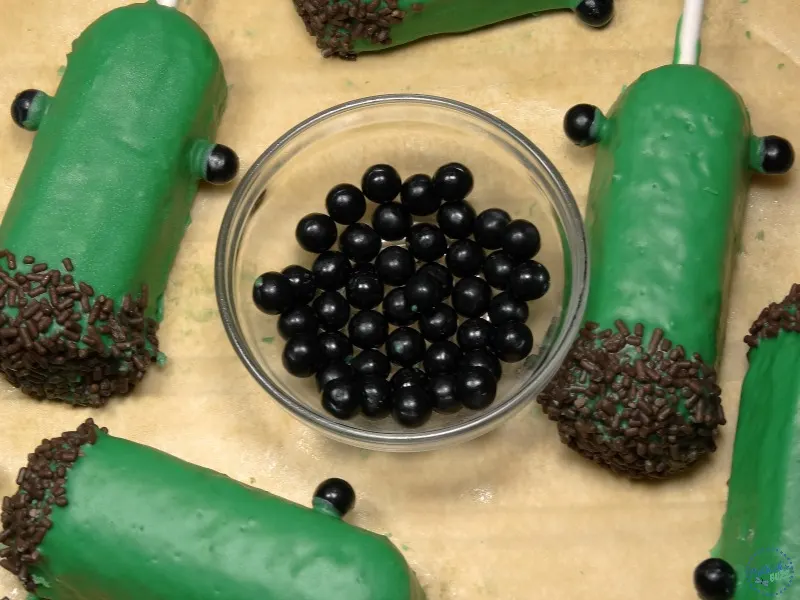
Step Ten: Add the Neck Bolts
- Now, attach one black Sixlet candy to each side of the bottom third of the Twinkie, using a drop of melted candy as “glue” to secure.
- These act as Frankenstein’s neck bolts.
Step Eleven: Add the Eyes
- Next, again using a dab of melted green candy, attach two candy eyes near the top third of each Twinkie.
- If needed, hold them in place briefly until they begin to set.

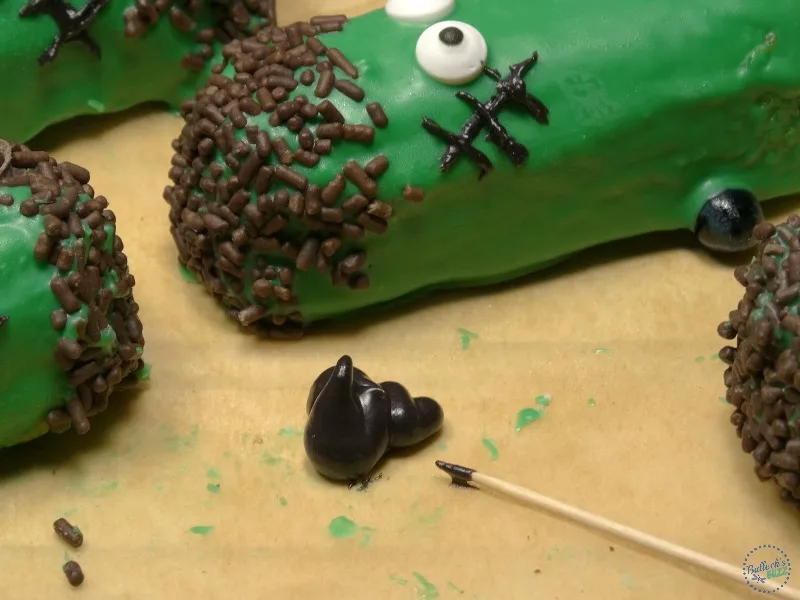
Step Twelve: Add Mouth and Scar
- Use the black decorating icing to draw a mouth and a scar across the face.
Pro Tip: Don’t have a small icing tip? Use a toothpick as a pen and dip it into the icing to “draw.”
Step Thirteen: Allow to Set
- Allow the icing to set for about 5 to 10 minutes.

Tips and Tricks for the Cutest Frankenstein Twinkies
✔️ Don’t skip the freezer steps—they make everything easier to handle
✔️ Use candy melts instead of colored chocolate for smoother results
✔️ You can also pipe a little “stitching” on the forehead if you’re feeling fancy
✔️ Want a full-on Frankenstein party? Pair with my One-Eyed Purple People Eater Pops!
And there you have it. Frankenstein Twinkies that are sure to make them scream with delight! Don’t miss the handy-dandy printable version of this recipe at the bottom of the page.
More Frankenstein Fun You’ll Love
- Send some spooky smiles with this Frankenstein Lunchbox Idea — perfect for school days and snack time.
- These Frankenstein Marshmallow Pops are a fun twist on the classic treat.
- And if you’re into food and crafts, you’ve gotta see these Halloween Candy Jars including Frankenstein (hint: it’s all in the face!).
I hope you love these Frankenstein Halloween treats for kids as much as I enjoyed making them! Use the social sharing buttons below the post title to share with friends and family!

More Halloween Treat Ideas
👻 Twinkie Ghosts – Spooktacular Halloween Ghost Treats
🦇 Halloween Bat Twinkies
👁️ One-Eyed Purple People Eater Marshmallow Pops
🧙♀️ Halloween Popcorn Ball Witches
LET’S BE FRIENDS! STAY UP TO DATE ON ALL BULLOCK’S BUZZ FUN BY FOLLOWING ME ON:
FACEBOOK | TWITTER | PINTEREST | INSTAGRAM |

Printable Recipe Card
Frankenstein Halloween Treats - Frankenstein Twinkies
These spooky Frankenstein Twinkies make perfect Frankenstein treats for Halloween. And with no baking involved, they couldn't be easier to make.
Ingredients
- Twinkies
- 1 bag of green candy melts
- Chocolate jimmies
- Candy eyes
- Black decorating icing
- Cookie sticks
Instructions
- Place Twinkies in freezer for at least 30 minutes.
- Prepare a baking sheet or cutting board by covering with parchment or wax paper.
- Melt candy chips either using a candy melting pot, or by microwaving 30 seconds then stirring and repeating until melted.
- Insert top 1/3 of cookie stick in melted candy. Place in center of Twinkie.
- Place the Twinkies on a wax paper lined baking sheet and put them in the freezer for about 10 minutes to allow the candy to harden. This will ensure the stick stays on place.
- Coat each Twinkie in melted candy and roll to allow the excess candy to drip off.
- Before the candy begins to set, dip the top of each Twinkie in the bowl of Jimmies to make the hair.
- Place the Twinkie on the wax paper lined baking sheet and put back into the freezer for 10 minutes or so, until candy coating is set.
- Using a knife carefully trim excess chocolate that ran off the sides of the Frankenstein Twinkies.
- Using the melted candy as "glue", place 2 eyes on top 1/3 of the Twinkies.
- Do the same with the black Sixlets, placing on each each side of the Twinkie for the bolts.
- Allow to set for 3-4 minutes.
- Using either a toothpick or icing tip, add the scar and mouth.
Notes
The melted candy should be very liquidy.
If you are having difficulty getting them to melt that thin, add a small amount (1/2 tsp) of shortening and stir. Add more as needed in small increments.
Nutrition Information:
Yield:
6 twinkiesServing Size:
1 TwinkieAmount Per Serving: Calories: 96Total Fat: 4gSaturated Fat: 1gTrans Fat: 0gUnsaturated Fat: 2gCholesterol: 3mgSodium: 63mgCarbohydrates: 15gFiber: 0gSugar: 10gProtein: 1g
Nutritional information is automatically calculated with ingredients and serving size and may not be accurate. Please always double check with your own nutritional apps as well.
Do you have a favorite Halloween treat? I’d love to hear about it!I may even feature your treat in a blog post, with credit to you, of course! Share with us in the comments below!

Rithya
Tuesday 29th of November 2016
The ideas not just easy, but it's great to try. Thanks so much.