This post may contain affiliate links. I only recommend products I use and love. Read the full disclosure here
Updated on: January 12, 2026
Originally published on: January 12, 2026
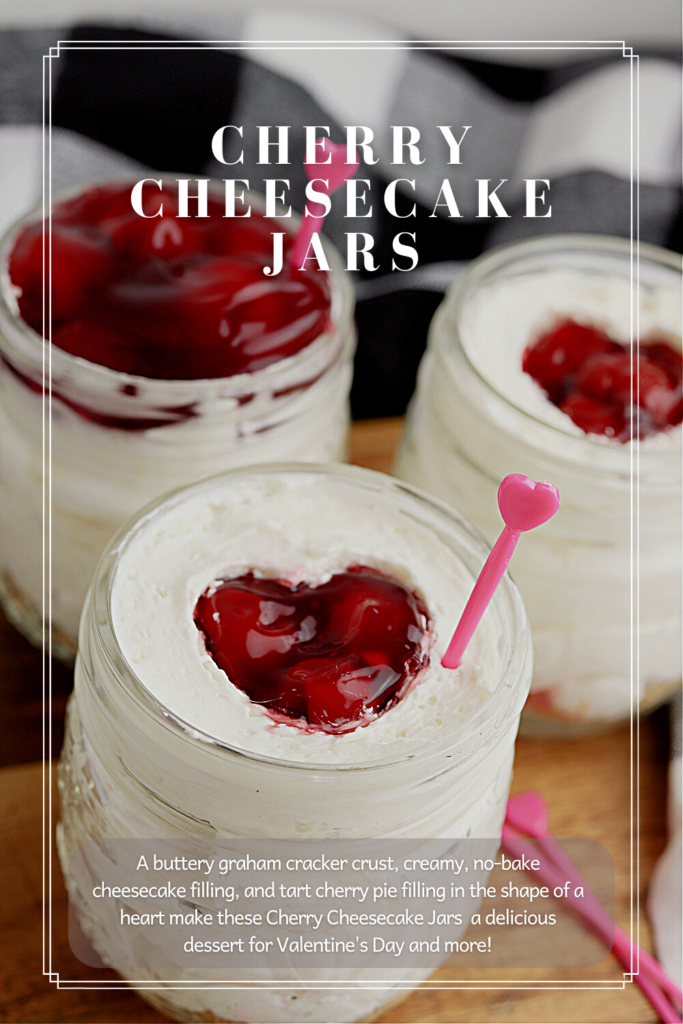
With a buttery graham cracker crust, creamy, no-bake cheesecake filling, and tart cherry pie filling in the shape of a heart, these Cherry Cheesecake Jars are a delicious dessert or Valentine’s Day gift!

If you’re looking for a unique homemade Valentine’s Day treat that doesn’t require turning on the oven, this one checks all the boxes. These individual cherry cheesecakes in a jar are topped with a cute cherry heart that feels special without being complicated. They’re the kind of dessert that gets an audible “aww” before anyone even takes a bite.
Sweet treats always make for a great gift idea — and even more so when they are homemade. With this made-from-scratch no-bake recipe for cherry cheesecake jars, you can put together a homemade dessert that feels thoughtful and intentional without adding stress to your day. No oven, no water bath, no fuss.
Why These Cherry Cheesecake Jars Are Perfect for Valentine’s Day
While this dessert works for just about any occasion, it really shines on Valentine’s Day. Each jar is its own little gift, which makes them perfect for sharing with friends, family, neighbors, or even as a sweet surprise for someone special.
The cherry heart on top adds just the right festive touch, and because everything is layered in a jar, these cheesecakes travel well and store beautifully. They’re great for gifting, parties, or even a cozy night in.
And even better? They’re easier than they look.
What Makes This Dessert a Favorite
- No baking required
- Individual portions already done for you
- Easy to make ahead of time
- Cute enough for gifting, simple enough for everyday
- Customizable for other holidays and flavors
If you’ve never made cheesecake in a jar before, this is a great place to start.
Easy dessert-in-a-jar recipes are SO much fun! Try these other recipes: Easy Raspberry Shortcake in a Jar and No-Bake Lemon Meringue Pie.
Too busy to make this tasty treat right away? Pin it for later! Pin this easy dessert recipe to your favorite board on Pinterest and it will be waiting there when you’re ready.

Helpful Tips Before You Start (New Value Add)
- Room-temperature cream cheese matters. It blends more smoothly and prevents lumps.
- Fold the whipped topping gently. This keeps the filling light and fluffy.
- Leave space at the top. You’ll need room for the cherry heart and the lid.
- Chill before serving. The texture improves after at least an hour in the fridge.
These small steps make a big difference in how polished the final jars look.
HOW TO MAKE CHERRY CHEESECAKE IN A JAR
This no-bake cherry cheesecake jars recipe comes together in under 30 minutes of hands-on time. The hardest part is waiting for them to chill.
Find the complete recipe with measurements in the recipe card below.
Disclosure: This blog post contains affiliate links for products or services I think you’ll like. This means if you make a purchase from one of these links, I may make a small commission at no additional cost to you. By the way, I only recommend products that I use and love.
KITCHEN TOOLS YOU MAY NEED
CHERRY CHEESECAKE JARS RECIPE INGREDIENTS
Here’s what you’ll need to make this no-bake cherry cheesecake-in-a-jar recipe:
- cream cheese
- powdered sugar
- vanilla extract
- whipped topping
- graham cracker crumbs – you can use premade crumbs for easier prep work, or add some graham crackers to a bag and gently crush them using the bottom of a jar or a rolling pin.
- cherry pie filling
CHERRY CHEESECAKE IN A JAR INSTRUCTIONS
Making these fun individual desserts couldn’t be easier or quicker. In less than 30 minutes you can have them ready to chill. The longest part of the entire recipe is waiting for the cherry cheesecake jars to chill!
STEP ONE: COMBINE CREAM CHEESE, VANILLA, AND SUGAR
- Using either a spoon, an electric mixer, or a stand mixer, mix together the cream cheese, powdered sugar, and vanilla until the mixture has a smooth and creamy texture.

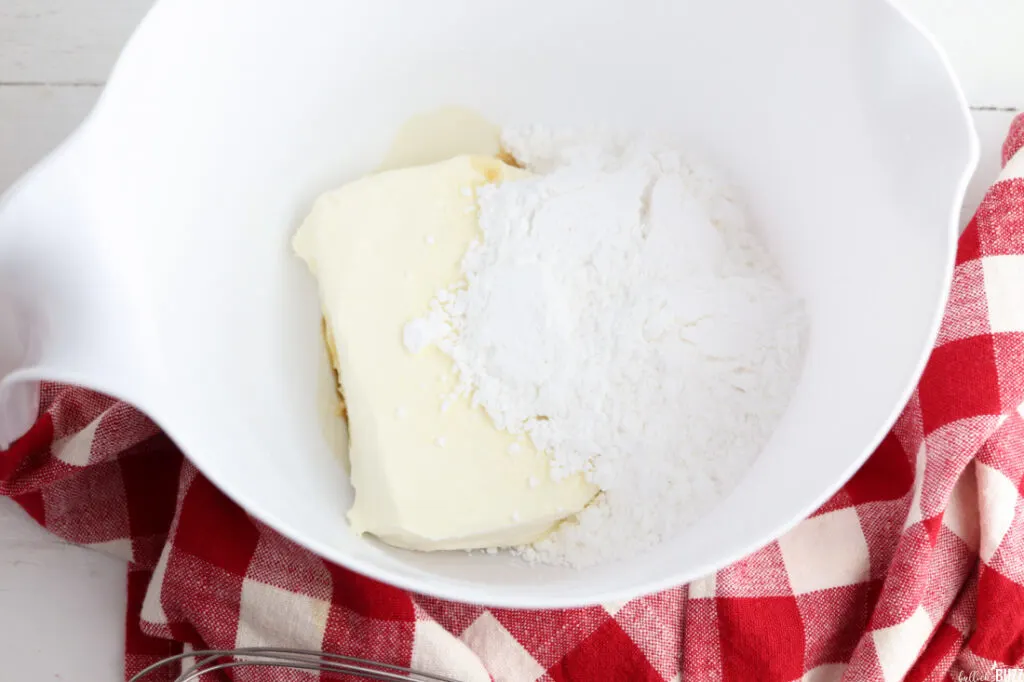
STEP TWO: ADD WHIPPED CREAM TOPPING
- Next, use the spatula to fold in the whipped topping and mix well, again until the cheesecake mixture is creamy and smooth.
Pro Tip – to avoid the whipped topping from separating, it is best to fold it in instead of using a mixer.
- Once mixed together, spoon the cream cheese mixture into the piping bag.


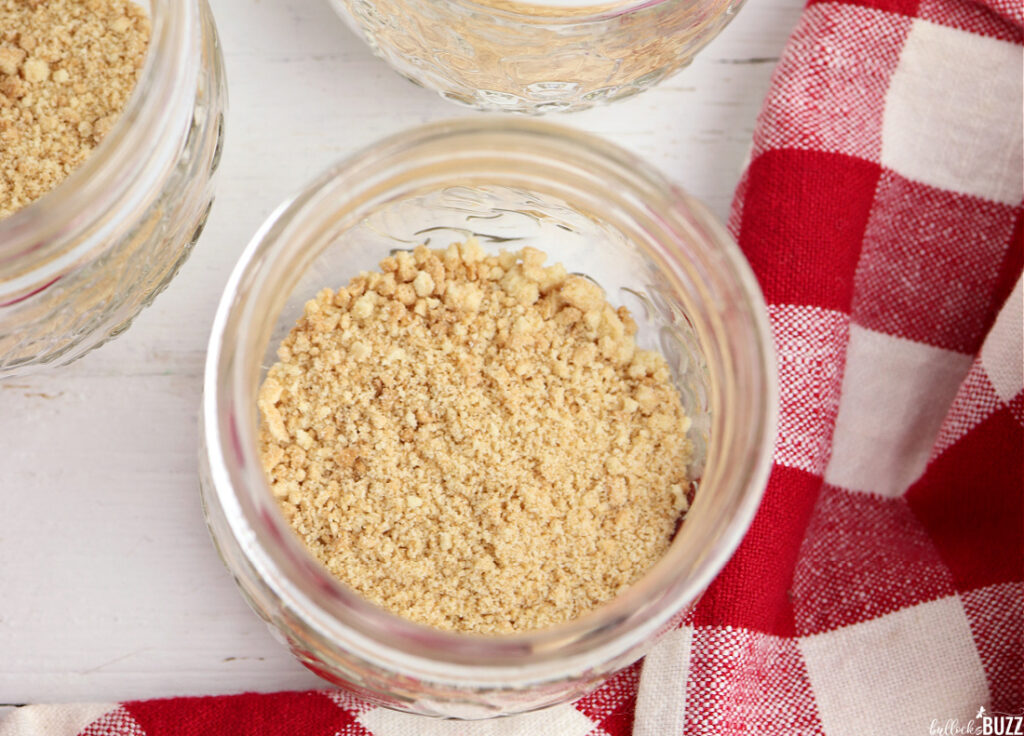
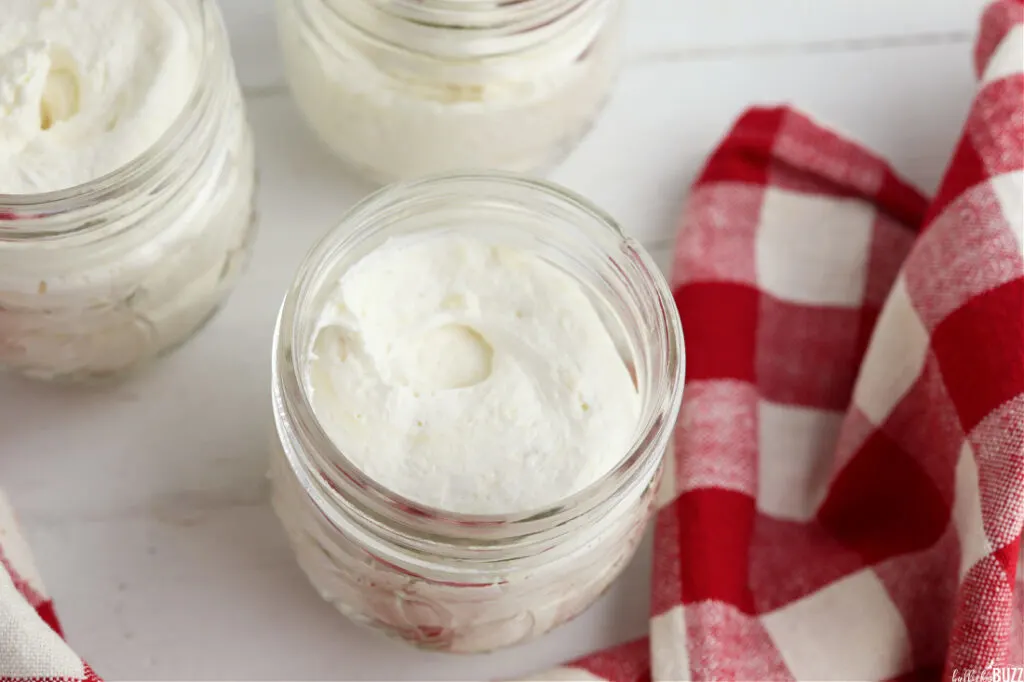
STEP THREE: ASSEMBLE THE CHEESECAKE JARS
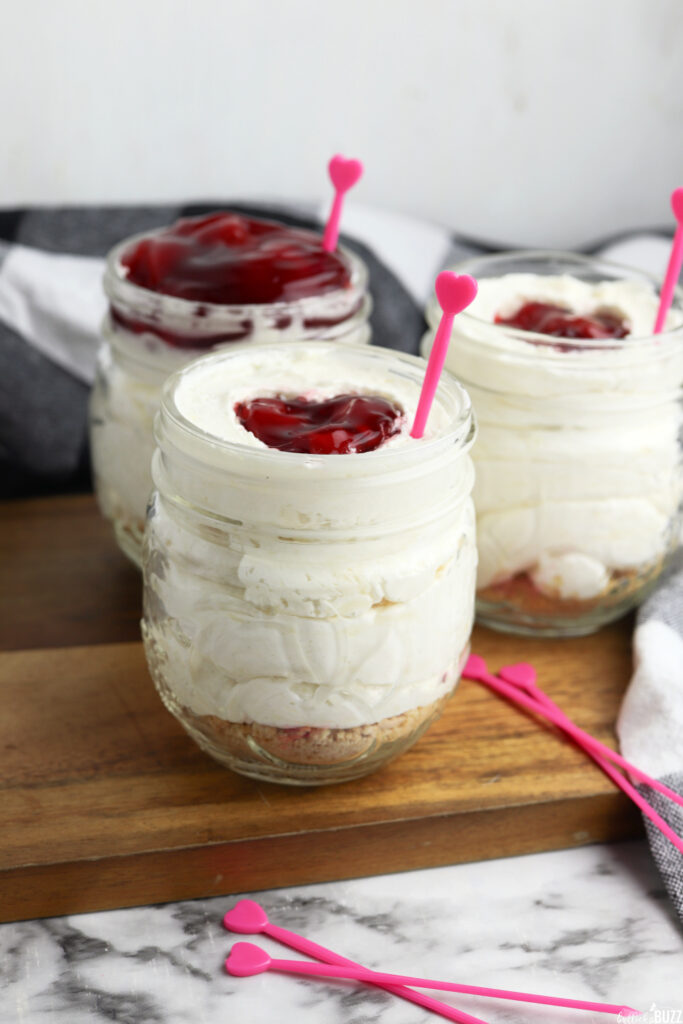
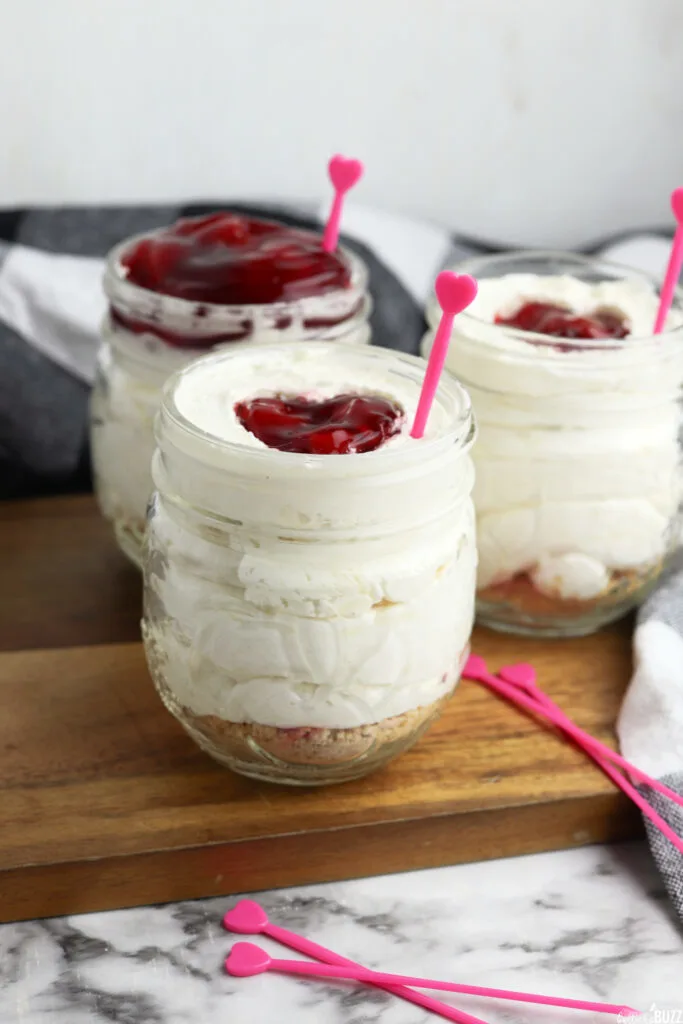
- Next place a small amount of graham cracker crumbs in the bottom of each half-pint jar. I used a cup of graham cracker crumbs which meant each jar got ¼ cup apiece.

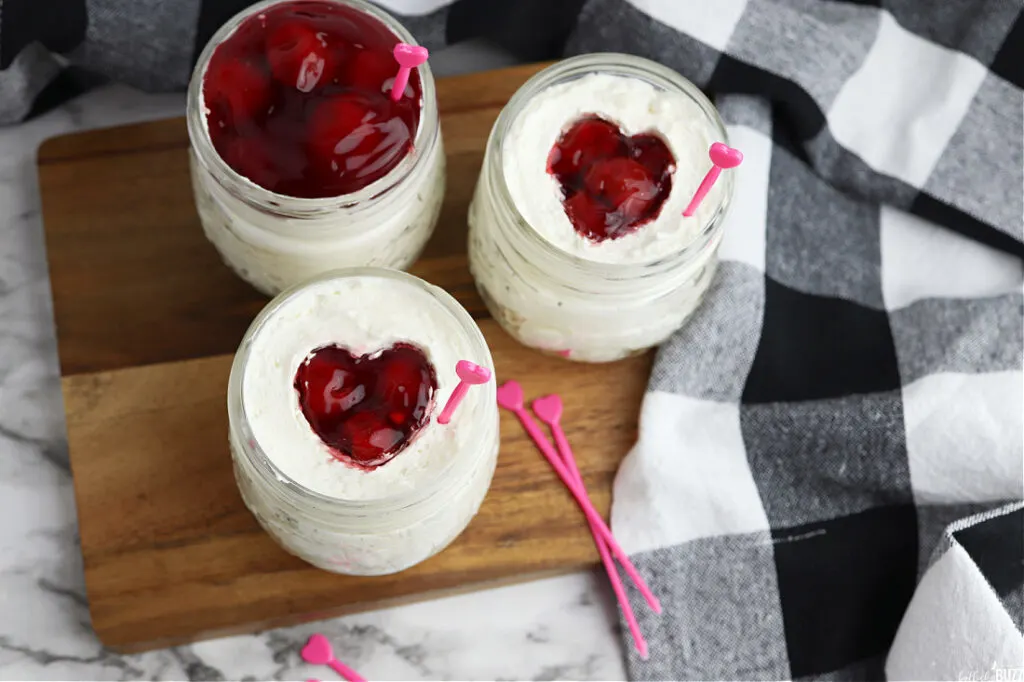
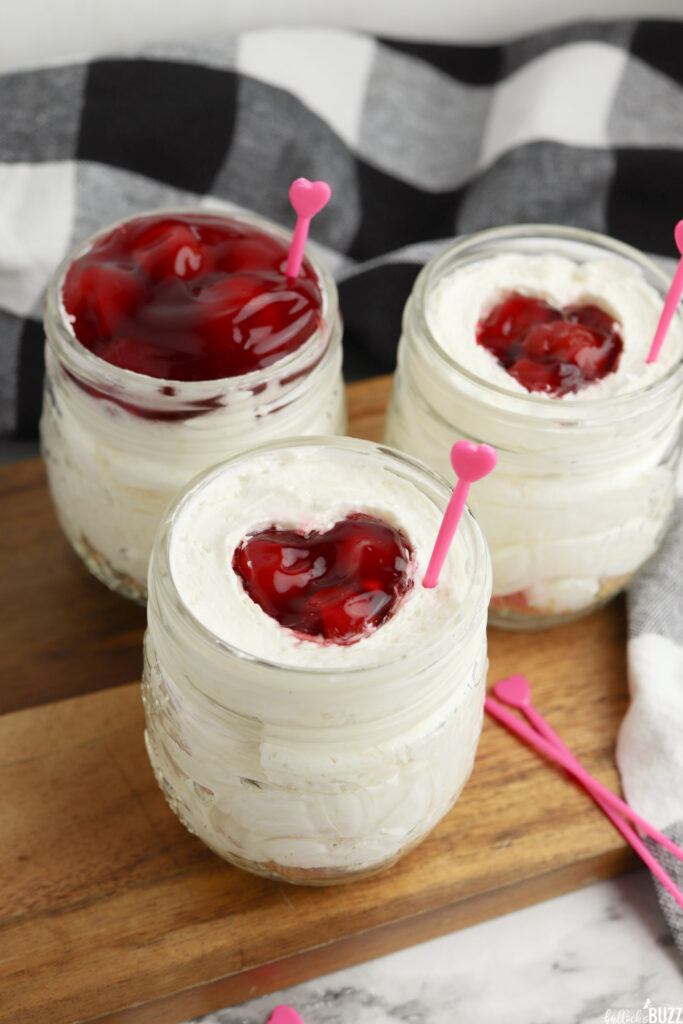
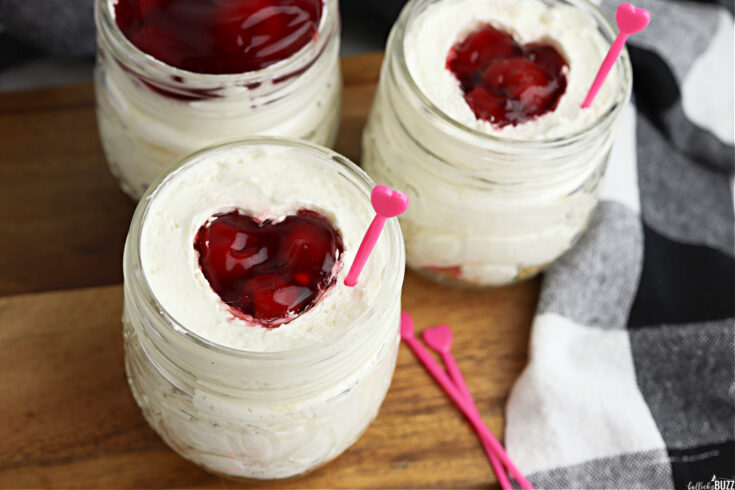
- Now add the cheesecake layer by piping the filling into each jar, but DO NOT fill the jars all the way to the top. Instead, be sure to leave about one inch of space at the top of each jar for the cute cherry heart and the lid.

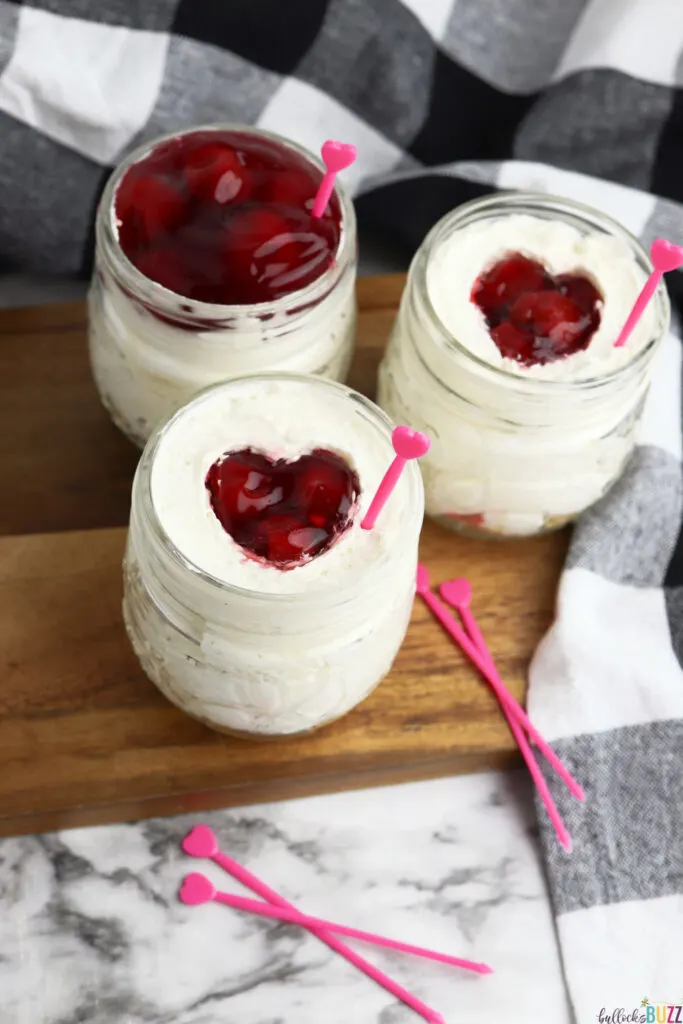
STEP FOUR: ADD THE CHERRY HEART
- To create the cherry pie-filling heart, lightly place the heart-shaped cookie cutter in the center of the jar. Do not push it down into the cheescake mixture, just set it gently on top of it.


- Then pipe some more of the cream cheese mixture around the outside of the cookie cutter almost to the top of the jar – leaving just a tad bit of room for the lid so it doesn’t smush anything.

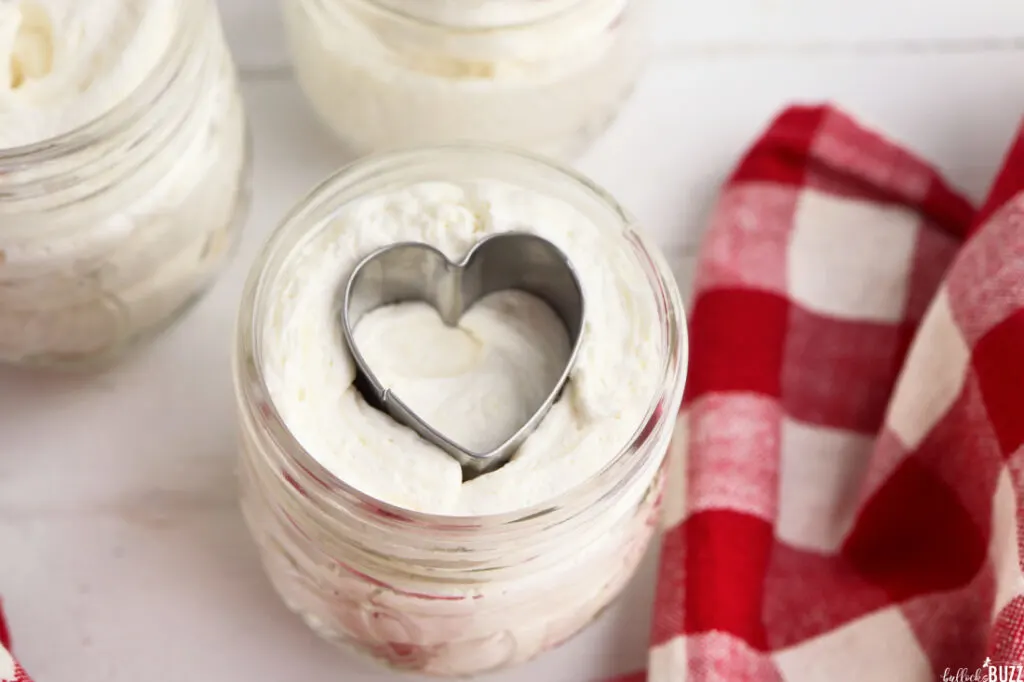
- Next, fill the inside of the cookie cutter with the cherry pie filling taking care not to let the filling go over the top of the cookie cutter.


- Once the heart is full, slowly and carefully lift the cookie cutter up to remove it. It’s okay if you need to wiggle it slightly to help loosen it from the cheesecake filling.
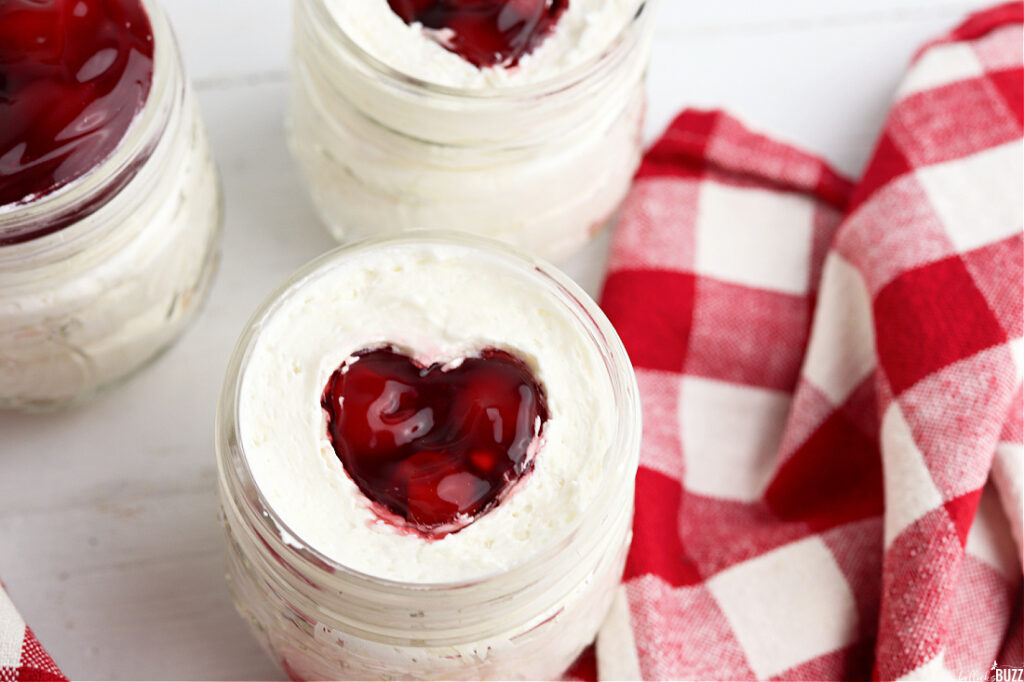

- If the edges of the heart are a bit rough, use the toothpick to carefully smooth them out.
- Repeat with the remaining jars until all of the no-bake cheesecake jars are finished.
STEP FIVE: CHILL
Lastly, place the lids on the jars and put the Cherry Cheesecake Jars in the refrigerator to chill for at least one hour before serving.
Storage, Make-Ahead, and Gifting Tips
One of the best things about these cheesecake jars is how well they store. Cheesecake Jars can last up to 5 days depending on how you store them.
- Refrigerator: Up to 5 days when sealed and chilled
- Freezer: Up to 3 months when tightly covered
If you’re gifting them, add a ribbon, a handwritten tag, or a printable label for a finished look. They’re especially cute when wrapped individually and kept chilled until delivery.

Easy Variations You Can Try
These cherry cheesecake jars are delicious as written, but they’re also incredibly flexible.
- Swap graham crackers for Oreos, vanilla wafers, or gingersnaps
- Use strawberry, raspberry, blueberry, or peach pie filling
- Skip the heart and spoon fruit on top for everyday desserts
- Add a hint of citrus zest or fruit extract to the filling
This base recipe works year-round with simple seasonal swaps.

SUBSTITUTIONS, ADDITIONS, AND VARIATIONS
Easy to make, mouth-wateringly delicious, self-contained, and already at the ideal serving size, cheesecakes in a jar come pretty close to being a perfect dessert.
And while these cherry cheesecakes are delicious as-is, there are lots of ways you can change these individual desserts up for other tastes, holidays, occasions, or just because.
Substitutions
Instead of graham crackers, try using other types of cookies to make amazing treats like these Chocolate Chip Cookie Cheesecake in a Jar. Gingersnaps, vanilla wafers, butter cookies, and even Oreos, are all tasty options.
Additions
Try adding a little bit of flavoring to the cheesecake mix to make different flavors. Add some fruit extract such as orange, strawberry, or raspberry. Or add a few drops of fresh lemon juice or lime juice.
You could also add dollop of whipped cream on top and then garnish with fresh fruit or even a mint leaf or rosemary.
Variations
Here are a few ways you can change up these mason jar cheesecakes.
- If making a heart on top of each jar is too much work, or you want to use this Cherry Cheesecake Jars recipe for a different occassion, no worries! Omit the use of the cookie cutter and spoon the cherry pie filling on top of the cheesecake layer until the jar is full.
- Use homemade pie filling with fresh fruit instead of canned cherry filling.
- Swap out the cherries for different fruit such as strawberry, raspberry, blueberry, or even peach. YUM!


MORE DESSERTS IN A JAR
Looking for even more desserts in a jar? Here are some of my favorites:
MORE DESSERTS FOR VALENTINE’S DAY
Here are some more sweet desserts for Valentine’s Day that I know you will love!
- Homemade Rainbow Hearts Candy
- Valentine’s Day Fudge Recipe No-Bake
- Heart-Shaped Red Velvet Whoopie Pies (with free printable card)
VALENTINE’S DAY CHERRY CHEESECAKES JAR RECIPE
Cherry Cheesecake Jars

With a buttery graham cracker crust, creamy, no-bake cheesecake filling, and tart cherry pie filling in the shape of a heart, these Cherry Cheesecake Jars are a delicious no-bake dessert!
Ingredients
- 8 ounces cream cheese, softened
- 1 cup powdered sugar
- 1 teaspoon vanilla extract
- 8 ounces whipped topping, thawed
- 1 cup graham cracker crumbs
- ½ cup cherry pie filling
- 4 half pint jars
- 1-inch heart cookie cutter
- Piping bag
- oothpick
Instructions
- Mix together the cream cheese, powdered sugar, and vanilla until smooth and creamy.
- *Gently fold in the whipped topping. Mix until completely incorporated.
- Place ¼ cup of graham cracker crumbs in the bottom of each half-pint jar.
- Pipe the cheesecake filling into each jar, leaving about one inch of space at the top of each jar.
- Place the heart cookie cutter in the center of the jar. Do not push it down, just let it sit on top of the cheesecake filling.
- Carefully pipe more cheesecake mixture around the outside of the cookie cutter.
- Next, fill the inside of the cookie cutter with cherry pie filling taking care not to overfill it.
- Carefully lift the cookie cutter up to remove it. Continue filling the heart cookie cutter on top of each jar until all the jars have cherry pie filling on top.
- Use a toothpick to smooth the edges of the heart, if needed.
- Place the lids on the jars and chill for at least one hour before serving.
Notes
*Pro Tip - to avoid the whipped topping from separating, it is best to fold it in instead of using a mixer.
If making a heart on top of each jar takes too much time, or you want to use this Cherry Cheesecake Jars recipe for a different occasion, no worries! Omit the use of the cookie cutter and spoon the cherry pie filling on top of the cheesecake layer until the jar is full.
Nutrition Information:
Yield:
4Serving Size:
1Amount Per Serving: Calories: 649Total Fat: 38gSaturated Fat: 25gTrans Fat: 0gUnsaturated Fat: 10gCholesterol: 57mgSodium: 318mgCarbohydrates: 73gFiber: 1gSugar: 50gProtein: 6g
Nutritional information is automatically calculated with ingredients and serving size and may not be accurate. Please always double check with your own nutritional apps as well. Learn more at https://bullocksbuzz.com/blog-policy-and-disclosure/.
Crystal Green
Tuesday 24th of January 2023
These look so delicious. I like how simple they are to make. I also appreciate the fact that you added the heart texture to make it perfect for Valentine's Day. I don't think mine would last 5 days in our household.
Alaina Bullock
Tuesday 24th of January 2023
They definitely didn't last long here! Let me know what you think if you make them.