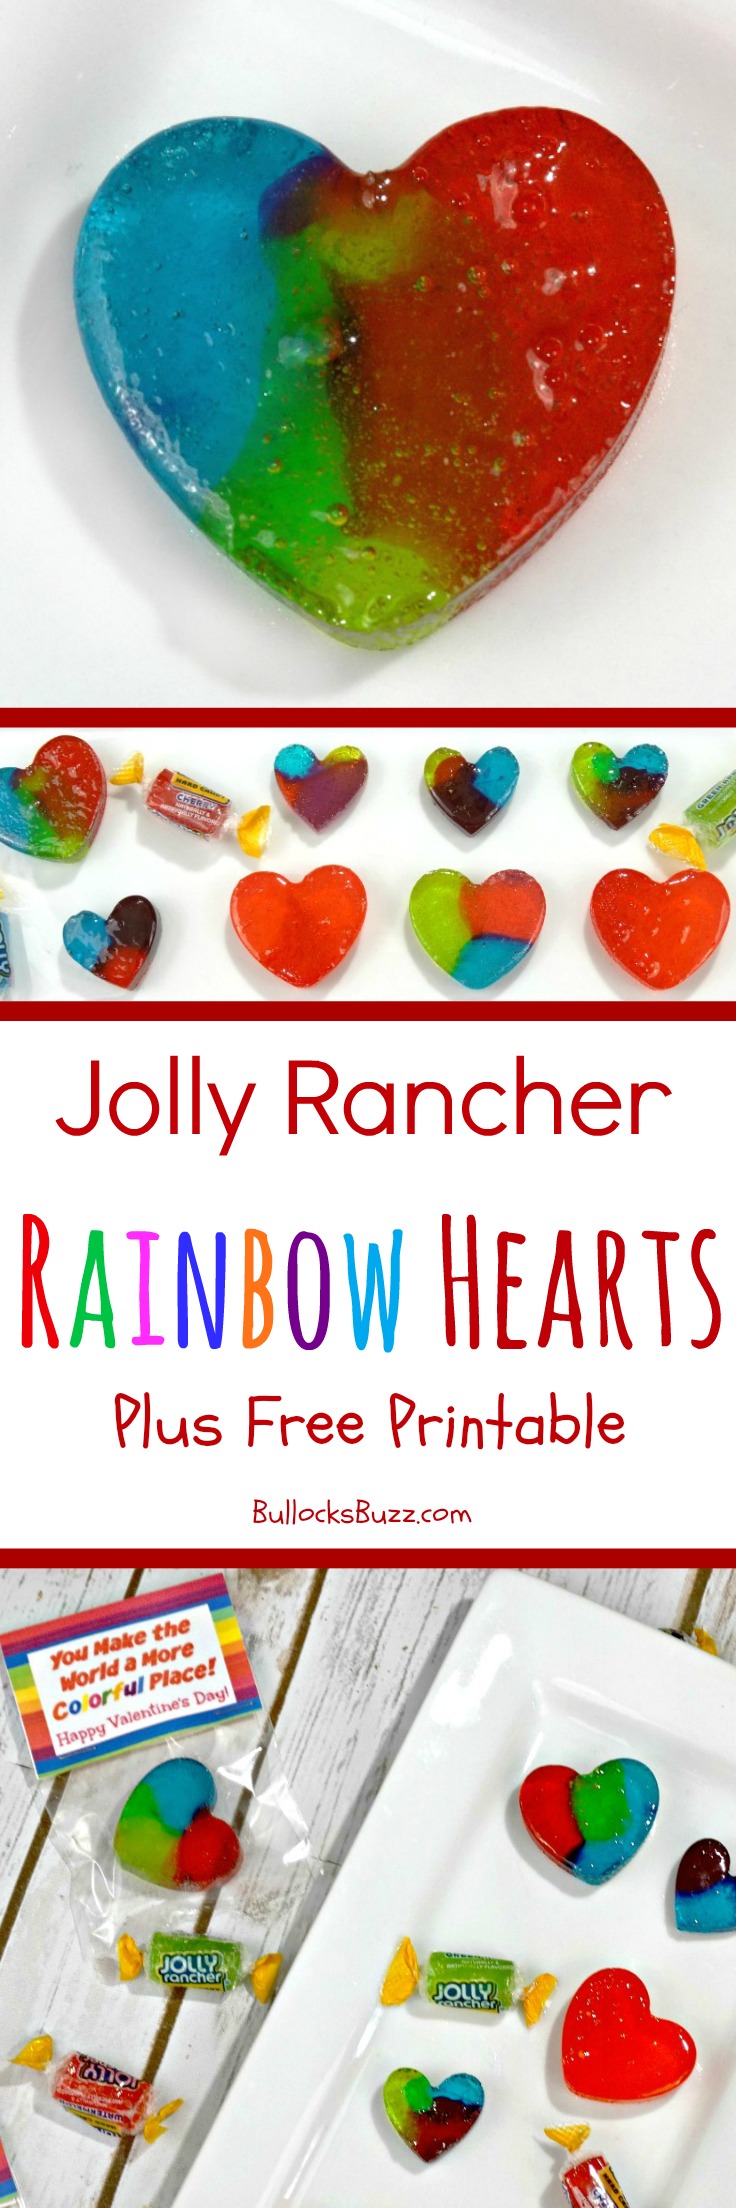
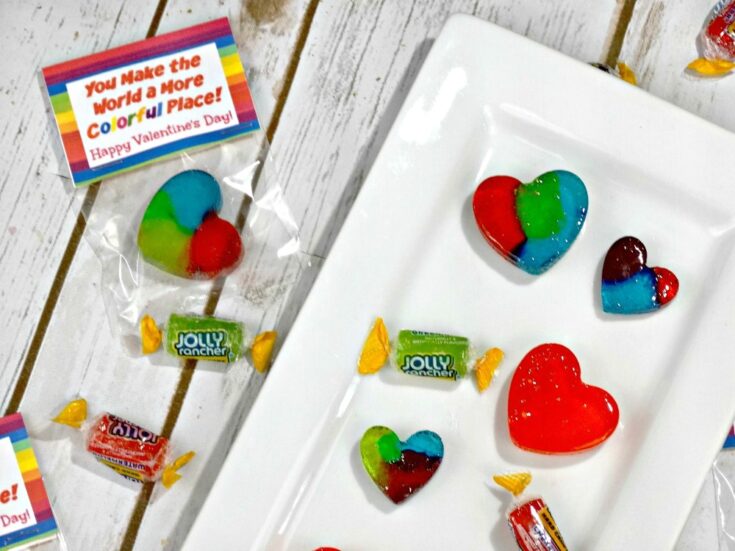
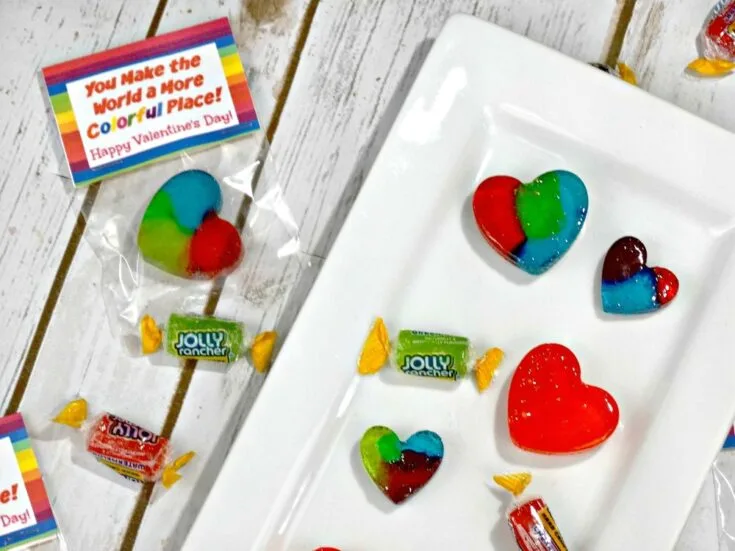
These delicious and colorful one ingredient homemade candy hearts are the perfect Valentine’s Day treat! Combine these Jolly Rancher homemade Rainbow Hearts Candy with my free printable Valentine’s Day Treat Bag Topper for an adorable Valentine that just can’t be beat!
What could be better than Valentine’s Day candy? Homemade Valentine’s Candy – more specifically these delicious – and oh, so pretty – Jolly Rancher Homemade Rainbow Hearts Candy!
DIY Jolly Rancher Homemade Rainbow Hearts Candy – Stained Glass Candy for Valentine’s Day
Kids and adults will love the way these fruit-flavored homemade candies taste. And they look so neat, too! In fact, they are so colorful and pretty, you almost won’t want to eat them – almost!


Bonus…since they’re heart-shaped, they are perfect for Valentine’s Day! Especially when paired with my adorable Valentine’s Day Treat Bag Topper (get the free printable bag topper and instructions for use below)! It makes an excellent valentine for kids!
How to Make Jolly Rancher Rainbow Hearts Homemade Valentine’s Day Candy
Don’t let the thought of making homemade Valentine’s Day candy put you off from trying it. Especially this particular recipe. There are no special tools (other than the molds) needed, and this candy recipe only calls for one ingredient. That’s right, one! Plus, making these Valentine’s candy hearts takes very little time.
You’ll find the complete Jolly Rancher Homemade Rainbow Hearts Candy recipe and instructions in the free printable recipe card at the end of this post.
But first, I’ve shared the step-by-step instructions along with images below so you can see just how EASY these sweet little treats are to make.

Valentine’s Day Candy-Making Tips
Before we get started making this yummy Jolly Rancher Homemade Rainbow Hearts Candy, I have a few important tips to share that I learned the hard way!
Humidity: if you live where it is humid, the candy hearts are going to be a bit sticky! Unfortunately, there’s not much we can do about that other than try to make them on a day where the humidity is on the low side.
Either way, they’ll still come out fine. Just be sure to provide some wet wipes for sticky hands! You could also try letting them sit out overnight, and once the humidity drops, they’ll be less sticky.
Mold Size Matters: if you choose to use a smaller heart mold, it works best if you break the candies into pieces first. I’ll explain better in the instructions below.
Alternate the Colors: make sure you alternate colors to get that cool stained glass effect.
Fill the Molds Full: regardless of which size candy mold you use, make sure you fill them all the way to the top. This is because they will shrink down to half the size after melting in the oven.

Kitchen Tools You May Need
So, are you ready to see just how simple it is to make these fun homemade stained-glass candies?
Disclosure: This blog post contains affiliate links for products or services I think you’ll like. This means if you make a purchase from one of these links, I may make a small commission at no additional cost to you. I only recommend items I use and love.
- Silicone hearts mold (large or small)
- plastic snack bags that close
Ingredients to Make Jolly Rancher Homemade Rainbow Hearts Candy for Valentine’s Day
While these rainbow candy hearts look difficult and expensive to make, they’re not. In fact, you only need one single ingredient to make this homemade candy:
- Jolly Rancher candy – pick your favorite flavors– you will need around 6 – 8 candies for each individual heart-shaped well for the large hearts, and 2 – 3 candies for each smaller heart well.
Instructions to Make Jolly Rancher Rainbow Hearts Homemade Candy
Who would’ve thought that making Jolly Rancher Homemade Rainbow Hearts Candy would be so easy and fun?!
Step One- Preheat the Oven
- Begin by preheating the oven to 350F degrees.
Step Two: Fill the Molds
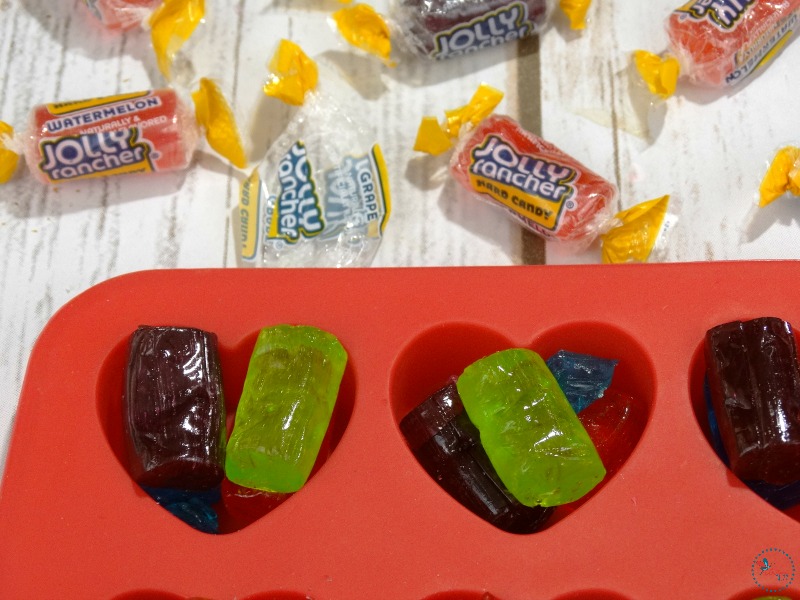
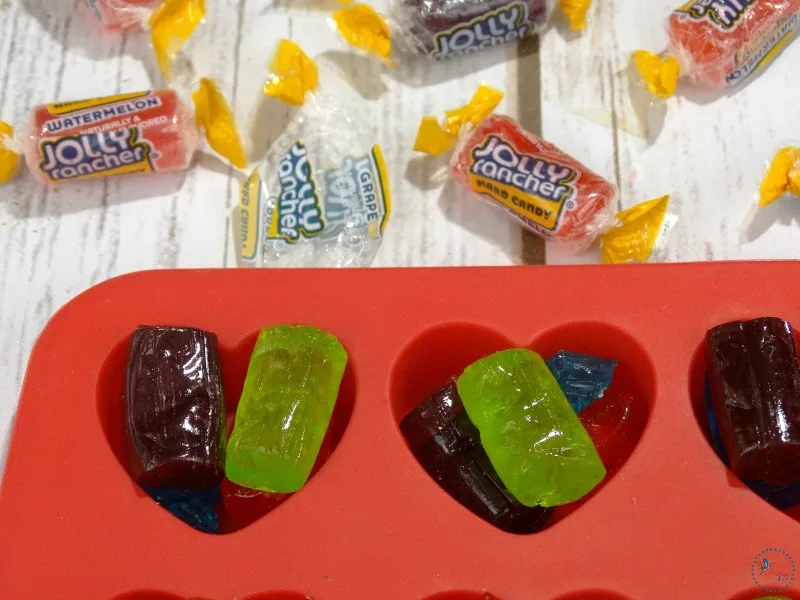
When it comes to filling the heart-shaped molds, size matters. If using larger-size heart molds, fill each cavity with 4 – 6 Jolly Ranchers, remembering to alternate colors for that awesome stained-glass effect. Be sure to fill each well all the way to the top as the candy will shrink a bit as it melts.
If using smaller molds, you will need to smash the candies into smaller pieces. Note – this can get a bit messy, but it’s a great way to take out any frustration you may be harboring, lol! 😉
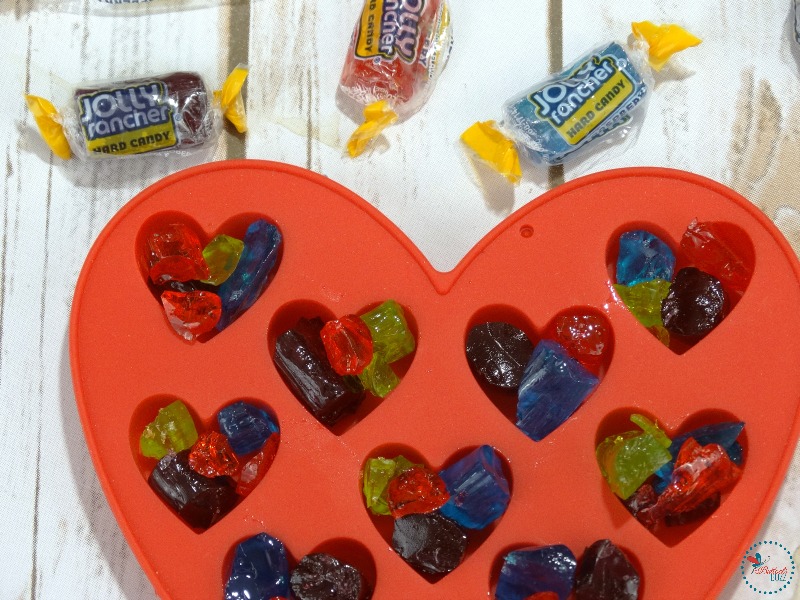
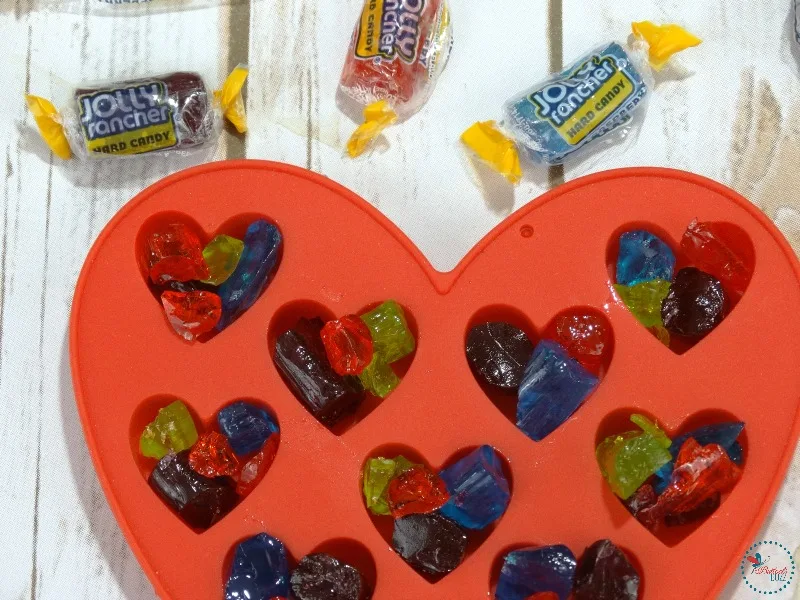
To break the candy, unwrap the Jolly Ranchers and place them in a plastic snack bag (I used one color per bag). Close the bag, making sure to push out any extra air. Then hit the candy with a mallet or hammer until it breaks up into small(ish) pieces – similar in size to what you see in the photo above.
Once they are all broken into small pieces, open the bag back up and place the Jolly Rancher pieces into the mold. Again, make sure you remember to alternate colors and fill each well up to the top.


Step Three: Bake Candy
Place the silicon mold(s) on a cookie sheet and put it in the preheated oven, baking for approximately 7 – 9 minutes.
Make sure you watch the oven because the melting can take place quickly and you are going to want to remove the mold as soon as the candy is all melted, but before it starts to bubble.
Pro Tip: if you do get some bubbles, just use a metal spoon to tap them out.

Step Four: Remove and Cool
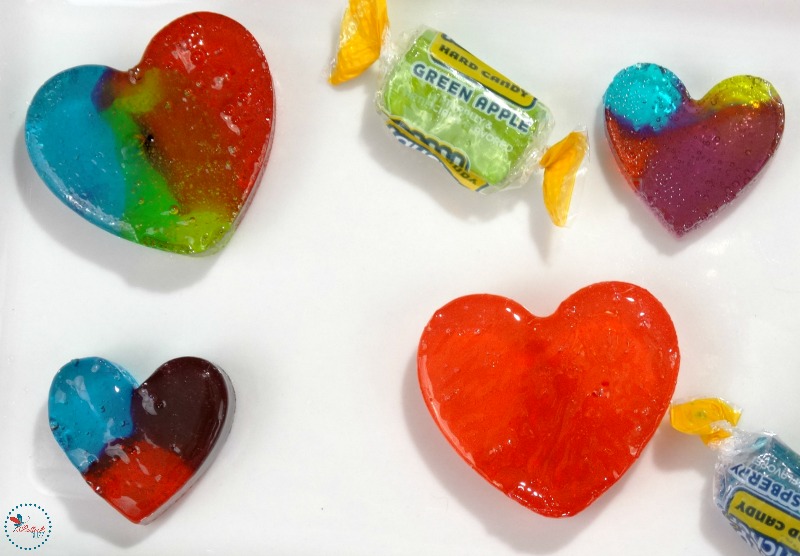
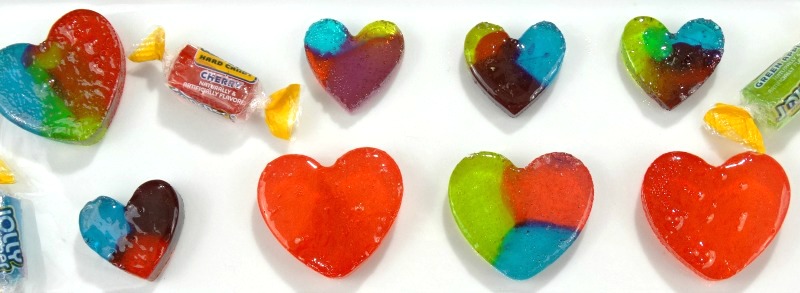
Once the candy is melted, remove them from oven and let cool completely in the mold. Then, once the candy is completely cooled, remove them from mold.
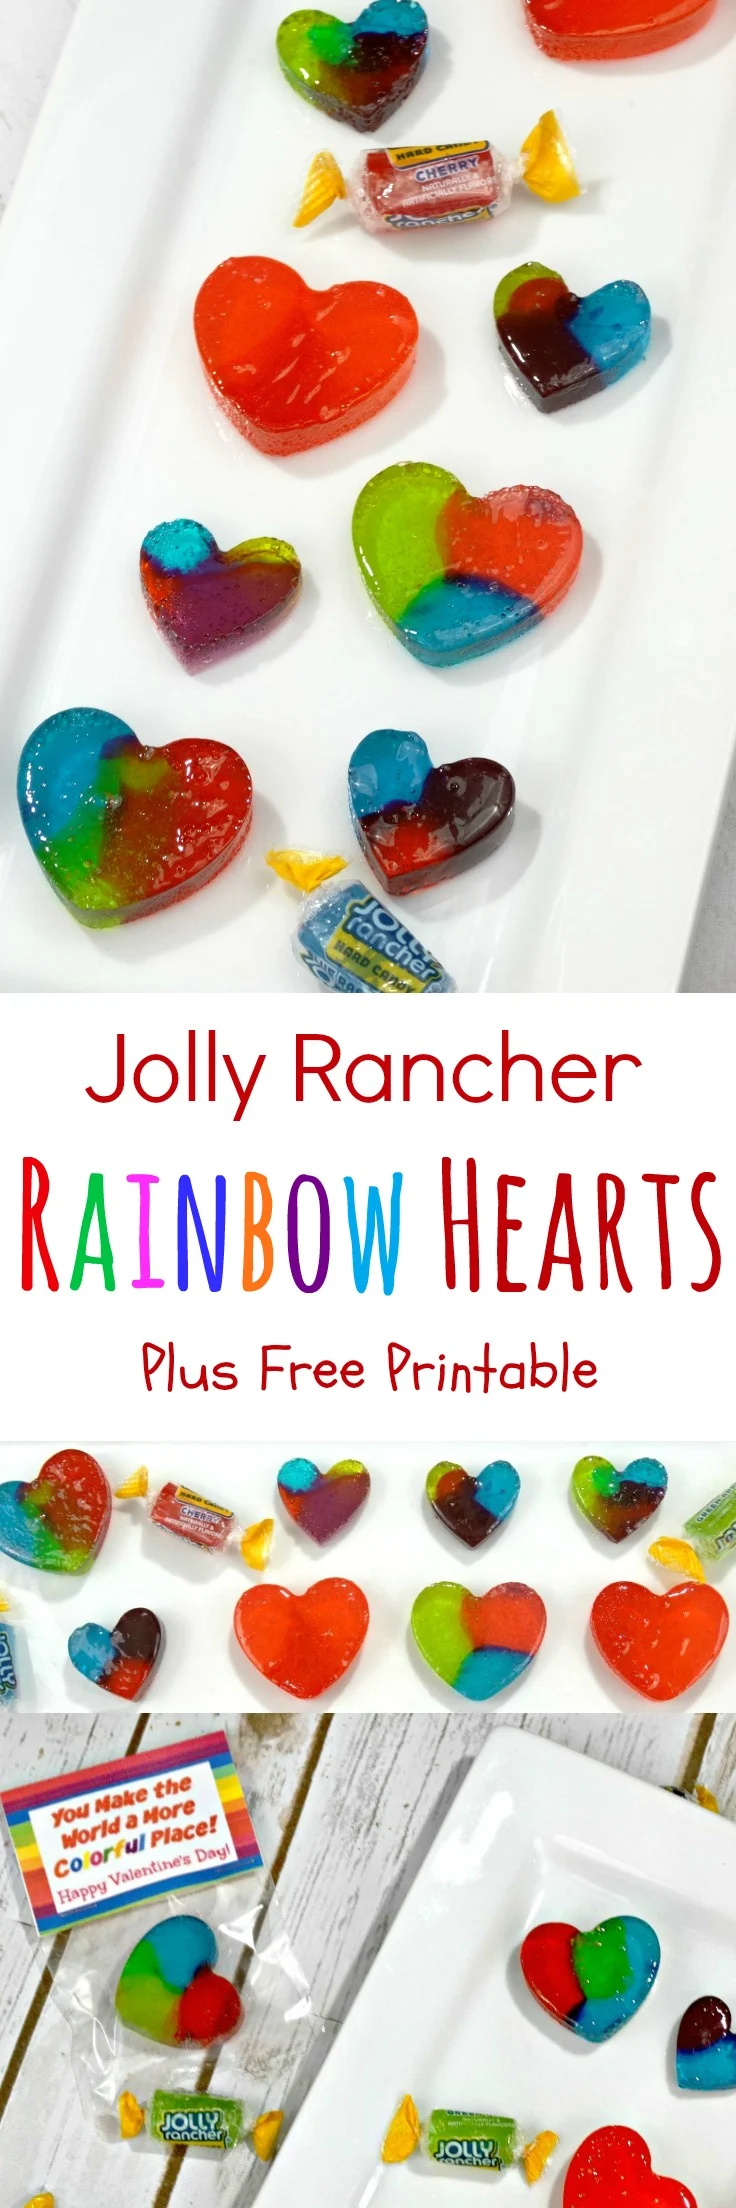
And you are done! Aren’t the Valentine’s Day Jolly Rancher Homemade Rainbow Hearts Candy so pretty?!

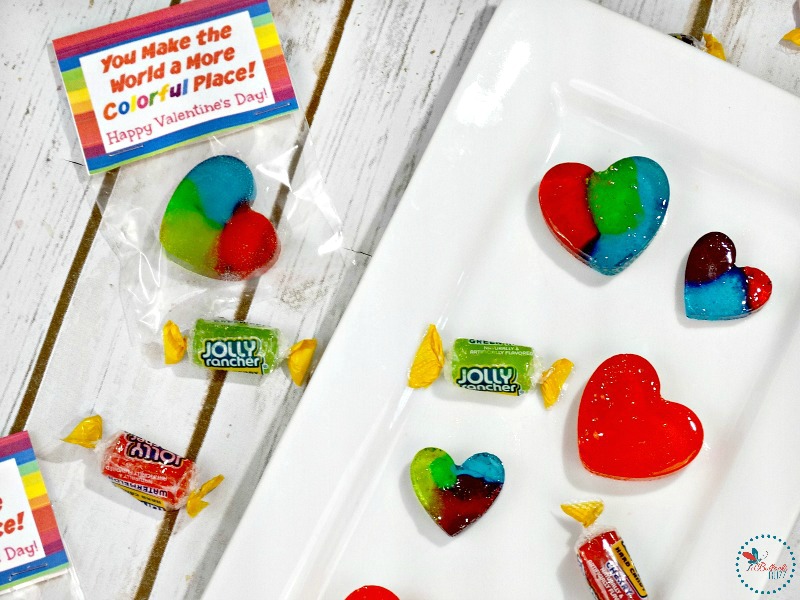
For an extra sweer Valentine’s Day treat, pair these candy hearts with my free printable Valentine’s Day bag topper (click the link to download)!
Together the candy and treat bag toppers make the perfect kids Valentine for classroom parties!
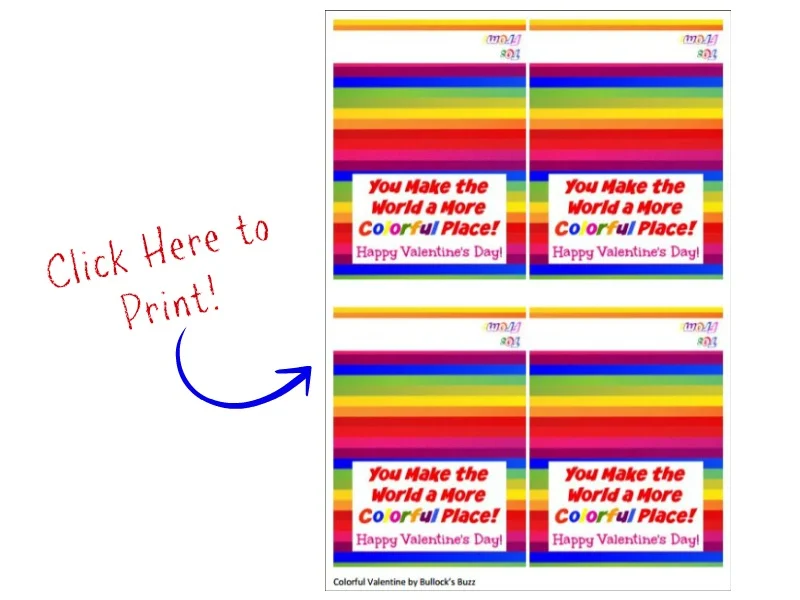
Free Printable Valentine’s Day Treat Bag Topper + Tutorial
These fun and colorful ‘You Make the World a More Colorful Place’ Valentine’s Day treat bag toppers are the ideal match for the Jolly Rancher Homemade Rainbow Hearts Candy. They are incredibly easy to put together, and cost much less than store-bought ones!
Even better, you can print them right from home using an inkjet or color laser printer.
Supplies You Will Need to Make Valentine’s Day Treat Bag Toppers
There are four (4) treat bag toppers per page, and they are designed to fit snack bags that measure 3 x 4 inches.
For these treat bag toppers, I’ve found that that a high quality, lightweight cardstock or medium-weight printer paper works best.
- treat bag topper printable
- 3 x4-inch clear treat bags
- Cardstock or printer paper
Please remember that all printables at bullocksbuzz.com are for personal use only, you may not sell, share, or link directly to these files.

Printable Valentine’s Day Treat Bag Topper Instructions
Making this treat bag topper is as easy as printing, folding, adding the candy, and then sealing the bag. They are perfect for classroom Valentine’s parties, Valentine’s Day card exchanges, special treats, and friendly gifts.
Step One: Download and Print
- To get started, download the treat bag toppers, print them, and then cut them apart.
Step Two: Fill Out Fields
- Let your child fill out the ‘To/From’ fields on the back side of the bag topper.

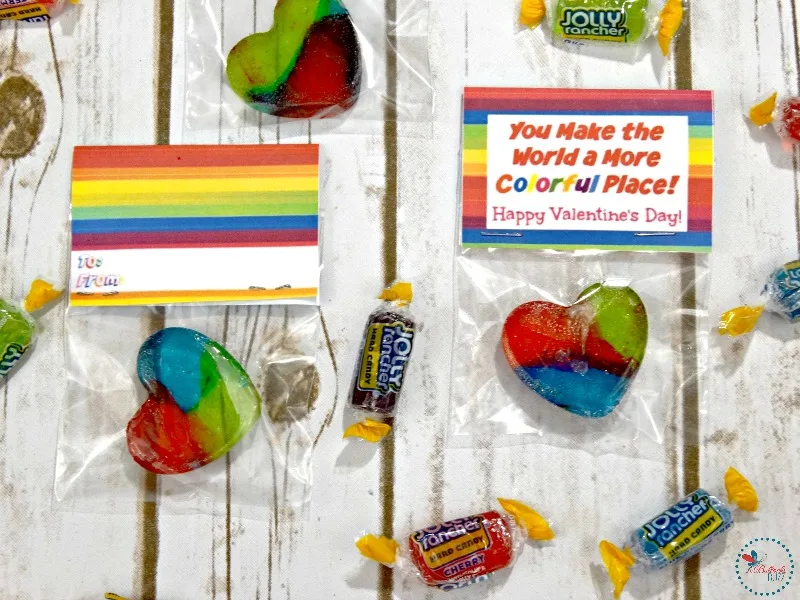
Step Three: Add Candy
- Next, add some of the Jolly Rancher Homemade Rainbow Hearts Candy to each bag.
Pro Tip: remember, these Jolly Rancher Rainbow Hearts can be very sticky if they are made on a humid day. This can make it difficult to get them into the small treat bags. You can make it work by placing the candy in the freezer for several minutes, then quickly putting them into the treat bags. 🙂
Step Four: Fold and Seal
- Lastly, fold each treat bag topper in half, then staple it to the top of the bag.
And there you have it, an extra sweet, extra colorful Valentine that everyone will ‘love’!
An alternative Valentine’s Day idea is to use this printable with a bag of crayons! How cute is that?! Enjoy!

More Valentine’s Day Recipes
Looking for more sweet recipes and crafts for Valentine’s Day? Look no further! I think you will really like these other ideas!
- Heart-Shaped Red Velvet Whoopie Pies + Printable Treat Bag Topper
- Valentine’s Day Coffee Mug – Sweet DIY Valentine’s Day Gift
- DIY Owl Valentines Candy Cards + Free Printable!

Show Me What You’ve Got!
Did you make this tasty and colorful Jolly Rancher Homemade Rainbow Hearts Candy for Valentine’s Day recipe? Or did you make the treat bags? If so, I’d love to see how they turned out!
Nothing makes me happier than seeing your take on my recipes and crafts. So please be sure to tag me on Instagram @bullocksbuzz or using #bullocksbuzz!
And finally, if you get a chance, please comment and leave me a ⭐⭐⭐⭐⭐ rating on the printable recipe card below!
Love this post? Here’s more Valentine’s Day posts I think you’ll like!
- DIY Valentine’s Day Cards for Kids with Free Printable! Candy-Free
- Valentine’s Day Cocktail Recipe – Cupid’s Heart Red Cocktail
- Heart-Shaped Red Velvet Whoopie Pies + Printable Treat Bag Topper


DIY VALENTINE’S DAY MUG – KISSES FROM THE MRS.
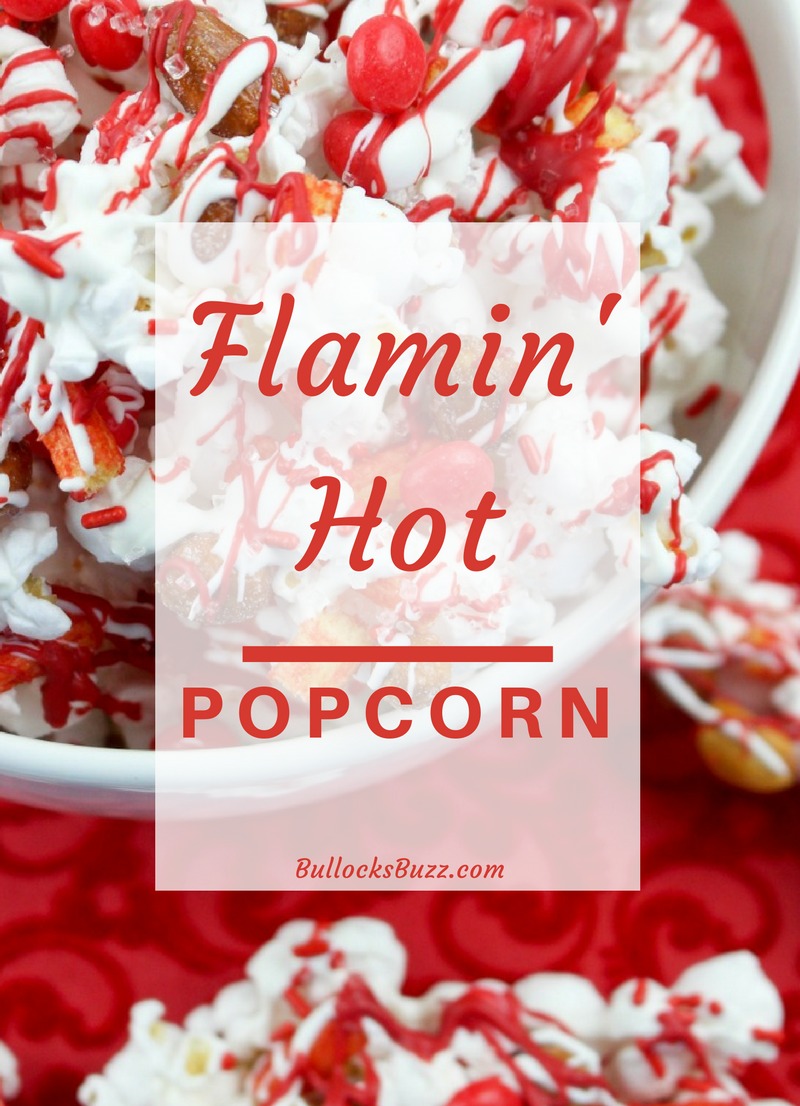
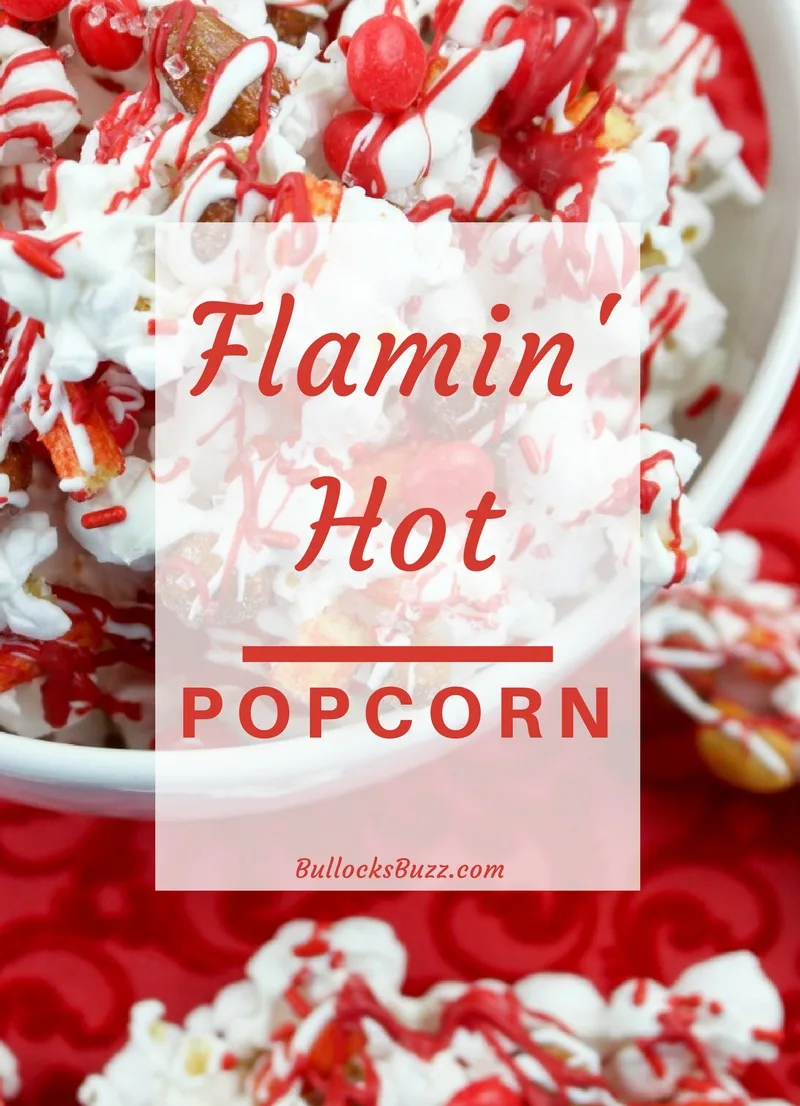 Flamin’ Hot Valentine’s Day Popcorn
*Bullock’s Buzz’s free downloads and printables are for personal, non-commercial use only. If you have a commercial inquiry, please contact me.
You are welcome to link to the download on your site, but please link to the original post for the download (don’t host the original files on your site).
PRINTABLE JOLLY RANCHER RAINBOW HEARTS CANDY RECIPE CARD
Homemade Jolly Rancher Rainbow Hearts - Perfect for Valentine's Day!
Make Valentine's Day even sweeter with these delicious and pretty homemade Jolly Rancher Rainbow Hearts! Plus, a free printable Valentines treat bag topper!
Ingredients
- Jolly Rancher candies
- Heart-shaped silicon molds
Instructions
- Begin by preheating the oven to 350 degrees.
- For larger heart molds: fill each cavity with 4 - 6 Jolly Ranchers, remembering to alternate colors for that awesome stained glass effect.
- For smaller heart molds: it works best if you smash the candies into pieces. Just unwrap the Jolly Ranchers and place them in a plastic snack bag (I used one color per bag). Close the bag, making sure to push out any extra air. Then hit the candy with a mallet or hammer until it breaks up into small(ish) pieces – similar in size to what you see in the photo above. Open the bag back up and place the Jolly Rancher pieces into the mold.
- Place the silicon mold on a cookie sheet and put it in the oven, baking for approximately 7 - 9 minutes. Make sure you watch the oven because the melting can take place quickly and you are going to want to remove the mold when the candy is all melted, but before it starts to bubble. Tip: if you do get some bubbles, just use a metal spoon to tap them out.
- Once the candy is melted, remove them from oven and let cool completely in the mold. \
- Then, once the candy is completely cool, remove them from mold.
Notes
Pair with my free printable Valentine's Day treat bag topper!
Nutrition Information:
Yield:
21 candy heartsServing Size:
1Amount Per Serving: Calories: 2Total Fat: 0gSaturated Fat: 0gTrans Fat: 0gUnsaturated Fat: 0gCholesterol: 0mgSodium: 0mgCarbohydrates: 1gFiber: 0gSugar: 0gProtein: 0g
Nutritional information is automatically calculated with ingredients and serving size and may not be accurate. Please always double check with your own nutritional apps as well.
Audie
Monday 27th of December 2021
Anyone try this with metal cookie cutters to use as the mold?
Alaina Bullock
Tuesday 28th of December 2021
Hi Audie, hmmm what an interesting idea! I have not tried it, but if you do, please let me know how it comes out. I'd really love to know!
Dan
Sunday 22nd of January 2017
Wow! Such a great idea!
Alaina Bullock
Monday 23rd of January 2017
Thanks Dan! They taste amazing!