This post may contain affiliate links. I only recommend products I use and love. Read the full disclosure here
Updated on: October 10, 2020
Originally published on: October 21, 2016
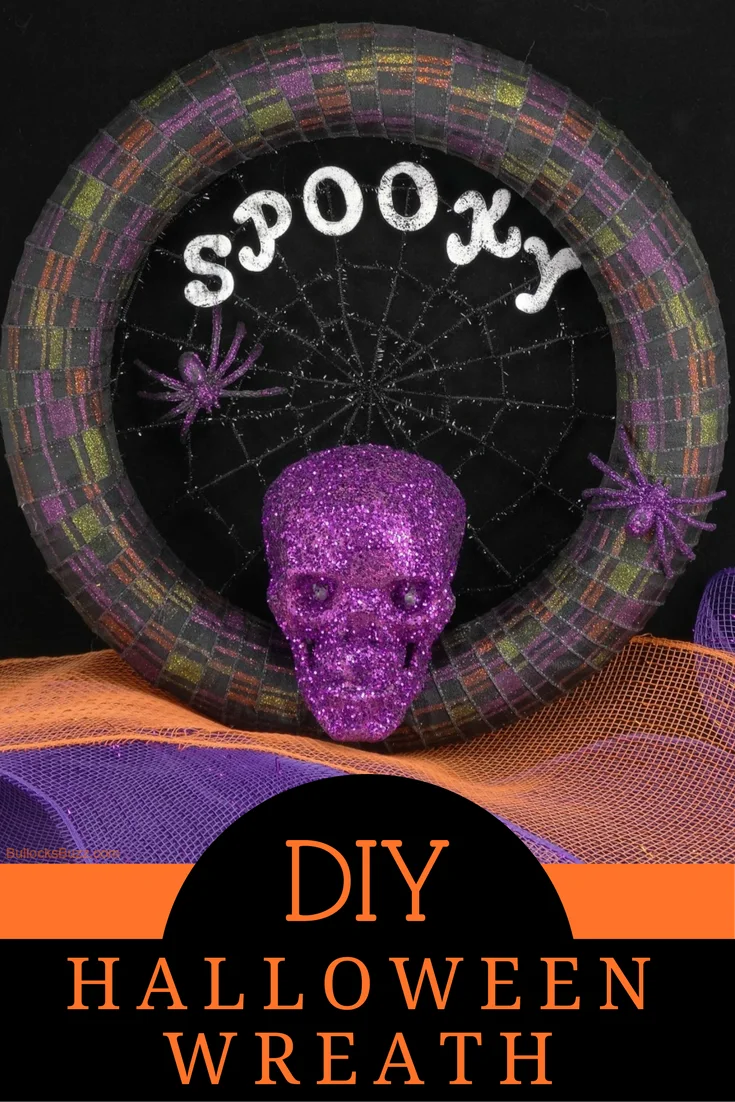
I’ve been on a roll with Halloween, sharing lots of fun and tasty Halloween treats and fun DIY Halloween crafts. So today I decided to share another fun and slightly creepy craft, a DIY Spooky Halloween Wreath!

I’ve been wanting a Halloween wreath for years. Every year I see so many cute wreaths online and in the stores, but they are so expensive! No way am I going to fork over that much money when I can make my own. For a lot less, too!
So this year, that is exactly what I did, and it came out so cute I couldn’t wait to share this DIY Spooky Halloween Wreath with you!
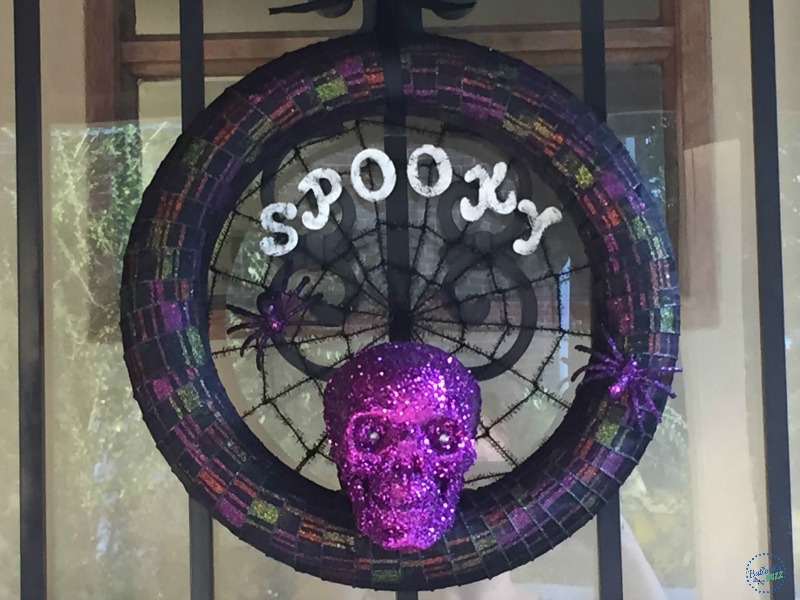
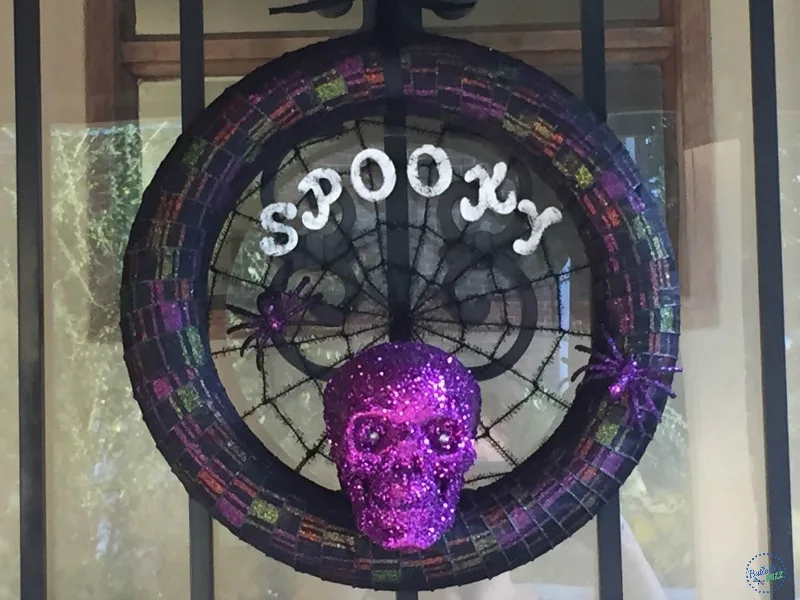
Isn’t it spooktacular?!
This spooky DIY Halloween wreath is extremely easy to make and inexpensive. Aside from the ribbon and paints which I already had, I found everything I needed at the dollar store. So for just $12 I now have a unique Halloween wreath that will last for years! And even better, it only took about an hour to make.
Also, keep in mind you can make it larger by using a bigger wreath form. You can also change up the colors of ribbon and embellishments to better match your Halloween decor.

How to Make a Spooky Halloween Wreath
Making your own Spooky Halloween Wreath is a cinch! All you need are a few supplies and a little bit of time.
Please note, I added Amazon affiliate links to make shopping easy. If you make a purchase through these links, I’ll make a small bonus at no extra charge to you.
DIY Spooky Halloween Wreath Supplies
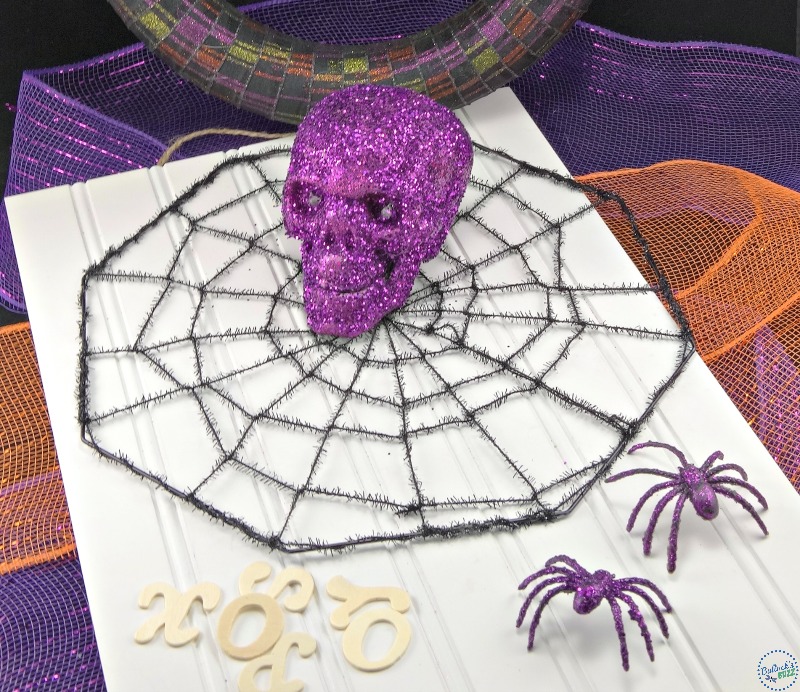
- 1 10″ foam wreath form
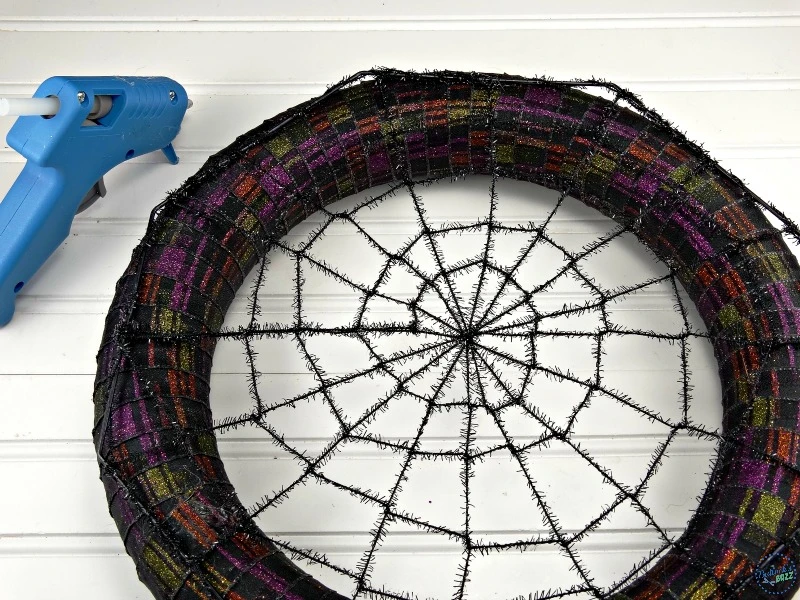
- 1 spider web from the Dollar Tree (it came with a spider that I took off)
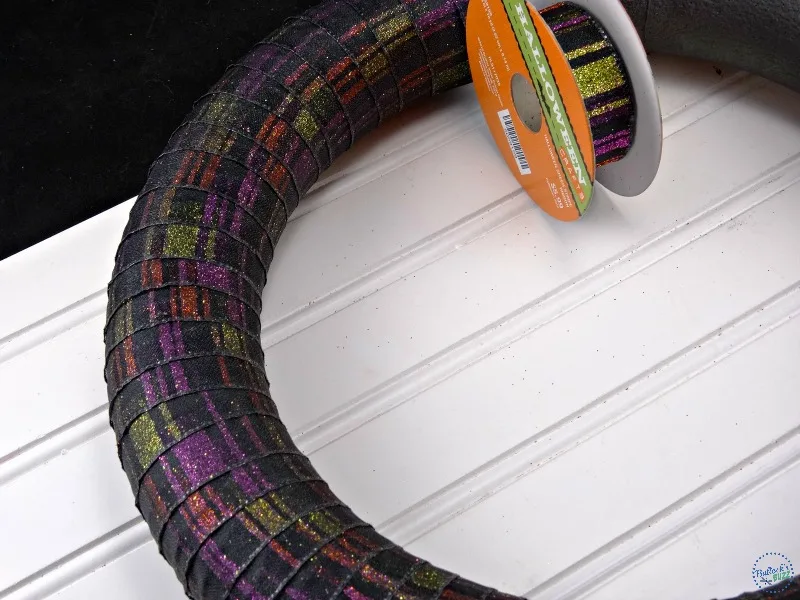
- 1 roll of Halloween ribbon (mine was 10 yards long and it fit perfectly)
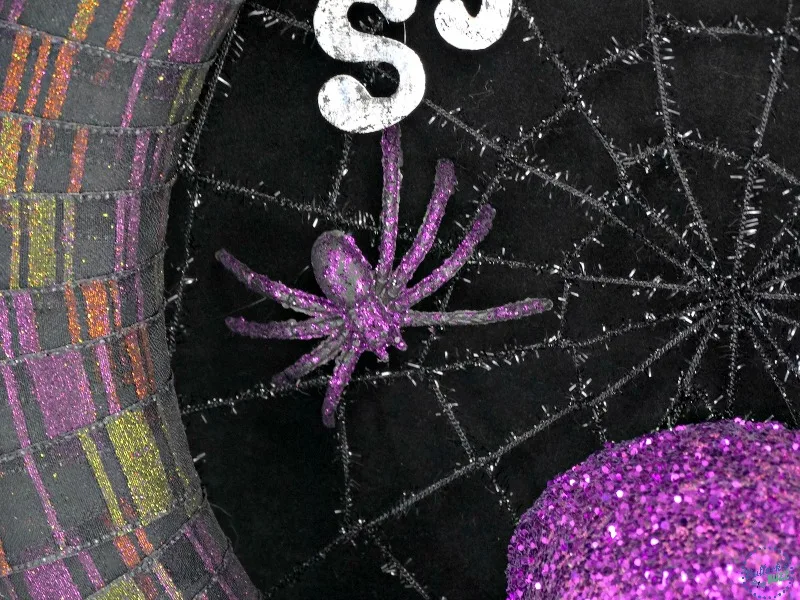
- 2 plastic glitter spiders (mine came off of Halloween flowers)
- 1 glitter skull
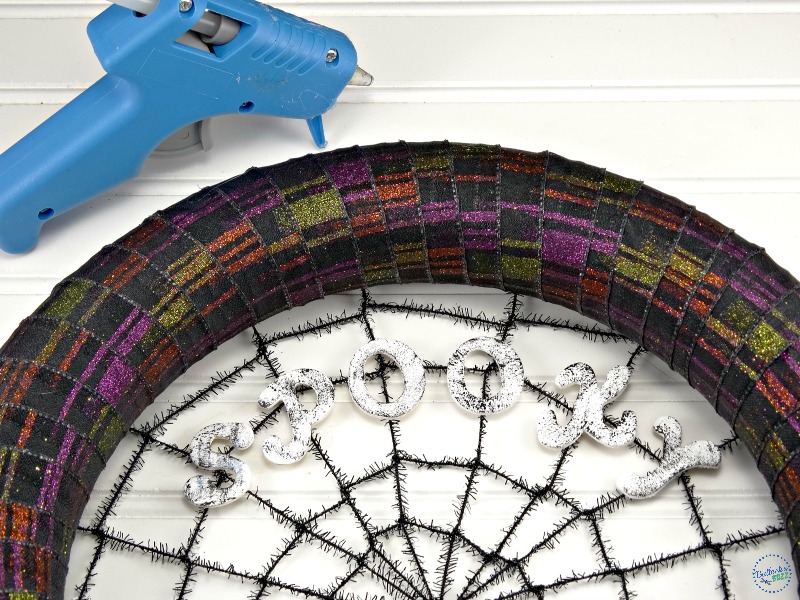
- 1″ wood scrapbook letters to spell out the word ‘spooky’
- White craft paint
- Black craft paint
- Black spray paint
- Paintbrush
- Hot glue gun and glue
Instructions to Make Spooky Halloween Wreath
Tip: if you can’t find glitter spiders and a glitter skull, buy what you can find and cover them with glitter yourself.
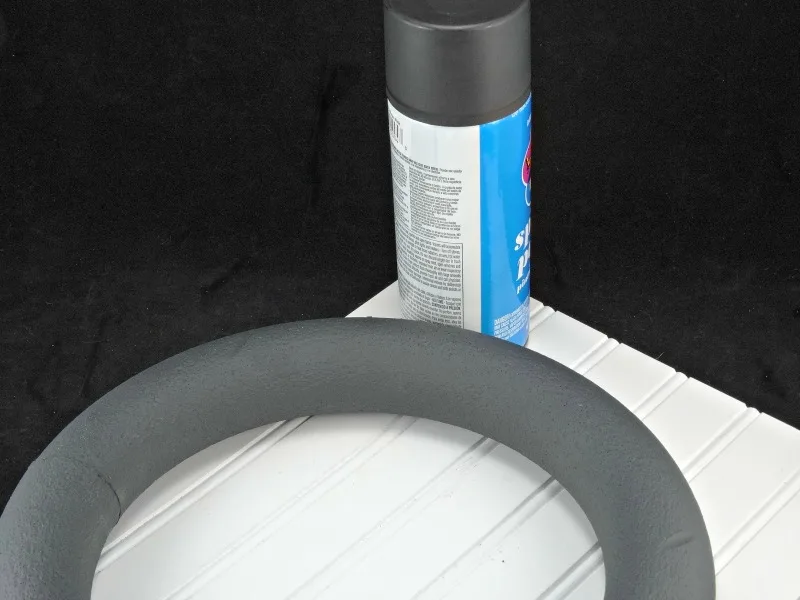
Step One: Spray Paint Wreath Black
Begin by spray painting the foam wreath form black. It took mine about an hour to dry, but I went ahead and let it sit overnight just to be sure.

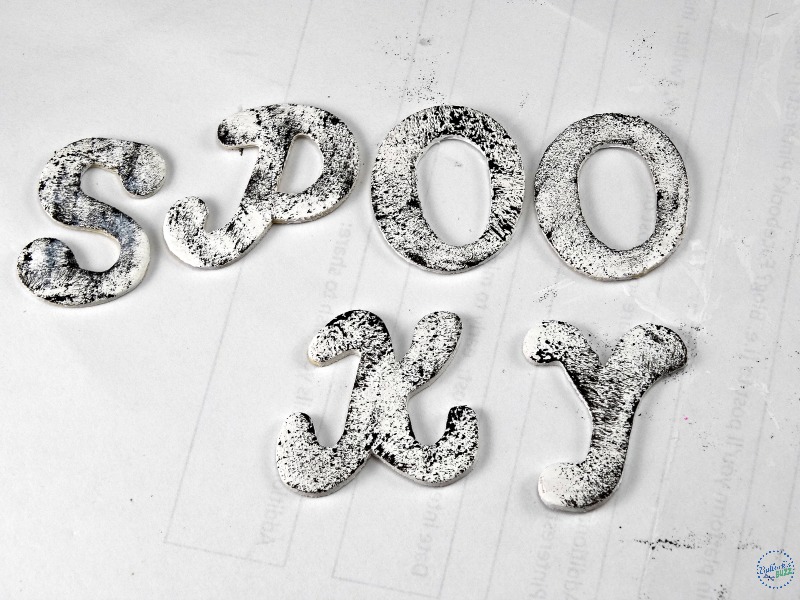
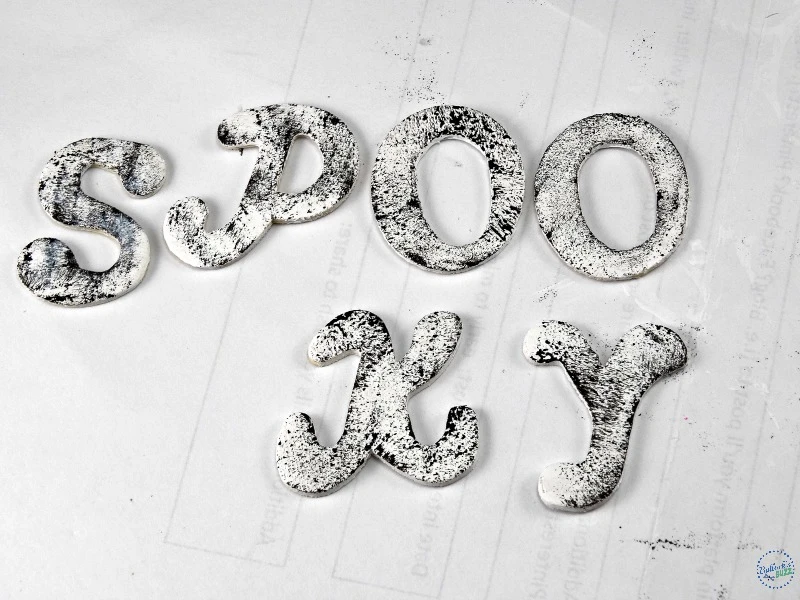
Step Two: Paint Wood Letters
Next, paint the wood letters white. Once dry, use a sponge brush to lightly dab some black paint on top of the white paint. Then set the letters to the side and allow them to dry.
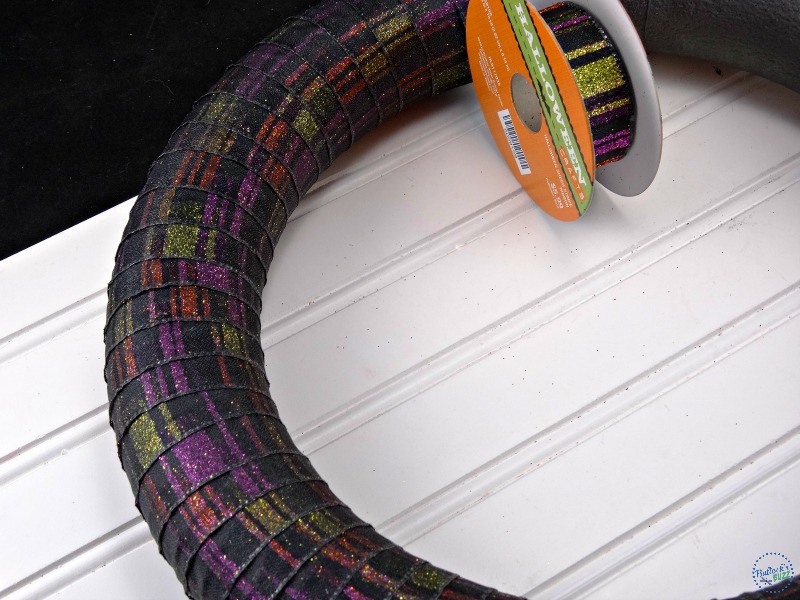
Step Three: Wrap Wreath in Ribbon
Once the wreath form is dry, begin wrapping the ribbon around it. Secure the starting end with a small dab of hot glue and overlap the edges as you go, pulling it taut for a more seamless effect. Once finished, glue the end of the ribbon to secure it. Remember, styrofoam will melt when hot so be careful with the hot glue, add just a dab.
Step Four: Attach Spider Web
Next, use the hot glue to attach the spider web to the backside of the wreath.

Step Five: Attach the Letters
Once the spiderweb is secure, do a dry run of where you want to attach the wood letters. Then use a dab of hot glue to attach each letter to the spider web.

Step Six: Add Remaining Embellishments
Now it is time to add the embellishments to your DIY spooky Halloween Wreath. First, lay out where you want to add the spiders, then attach them using just a small dab of hot glue. Then, do the same with the skull.

Step Seven: Add Loop for Hanging
Lastly, tie a ribbon into a loop at the top of the spooky Halloween Wreath to use for hanging, and you are done!
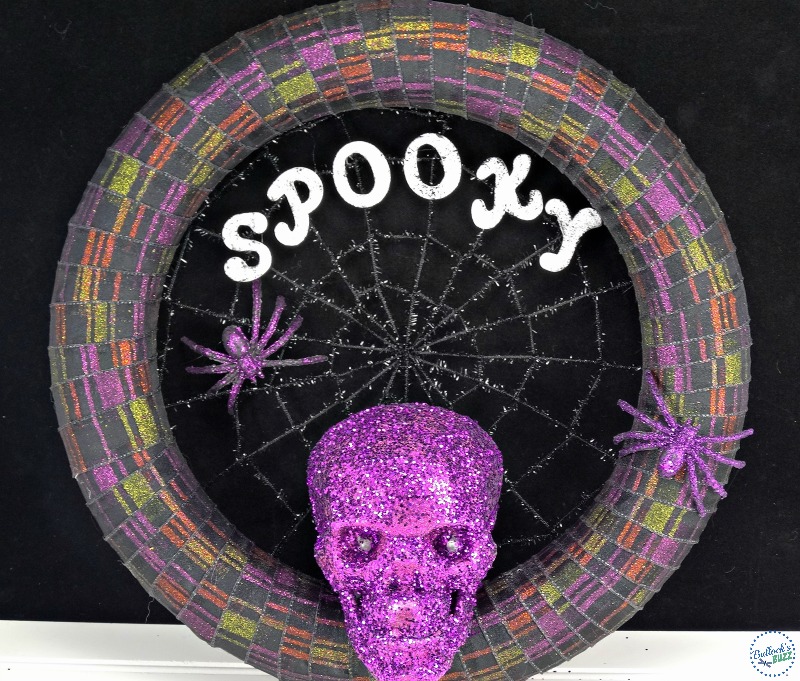

Isn’t it truly spooktacular?! I hope you enjoy your DIY Spooky Halloween Wreath!
LET’S BE FRIENDS! STAY UP TO DATE ON ALL BULLOCK’S BUZZ FUN BY FOLLOWING ME ON:
FACEBOOK | TWITTER | PINTEREST | INSTAGRAM | GOOGLE+
Enjoy this post? Subscribe to our newsletter so you’ll never miss another!
Subscribe to Newsletter
I hope you love this DIY Spooky Halloween Wreath as much as I enjoyed making it! Use the social sharing buttons below the post title to share with friends and family
More Easy DIY Halloween Crafts You May Enjoy


Upcycled Halloween Pumpkins

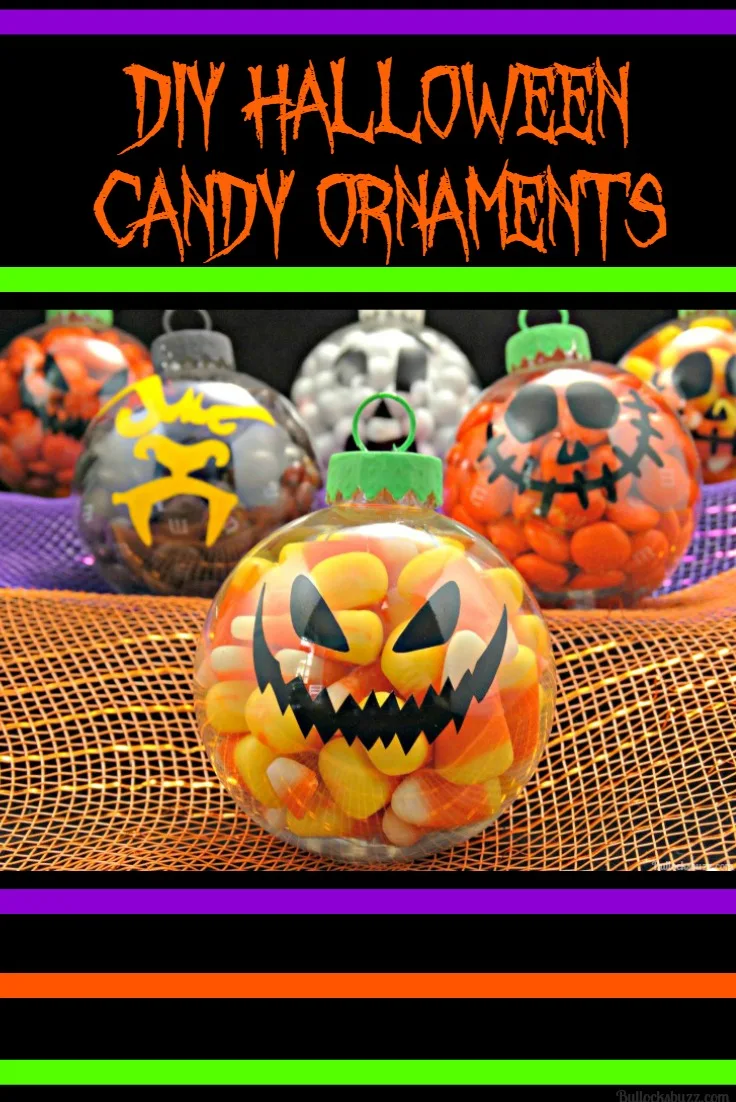
Halloween Candy Ornaments

