
This post may contain affiliate links. I only recommend products I use and love. Read the full disclosure here
Updated on: August 18, 2025
Originally published on: August 18, 2025
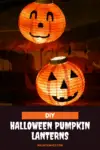
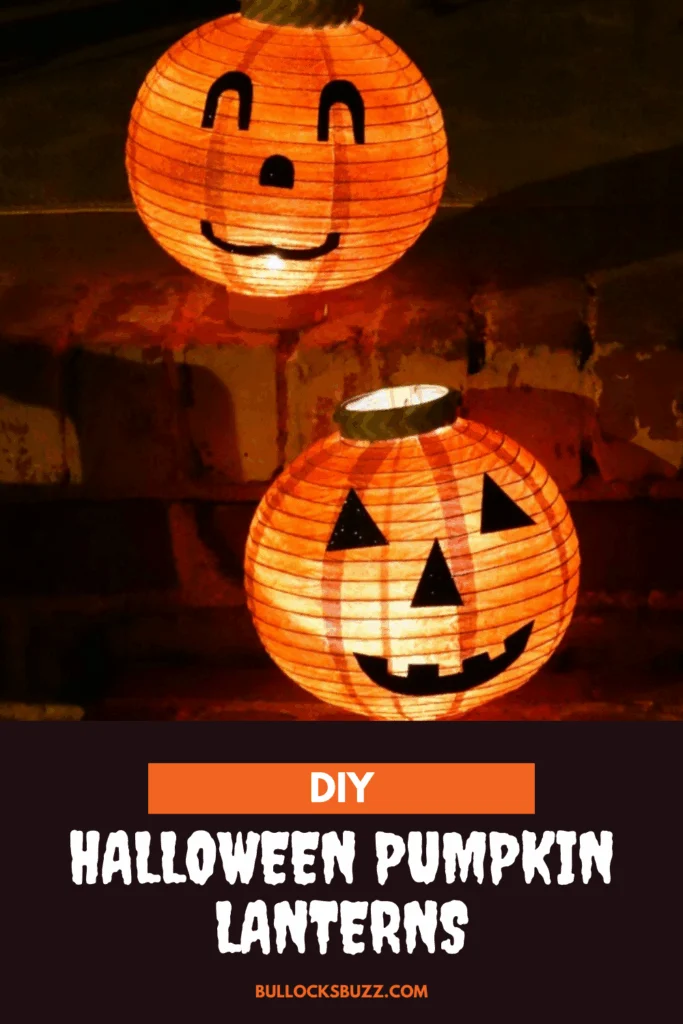
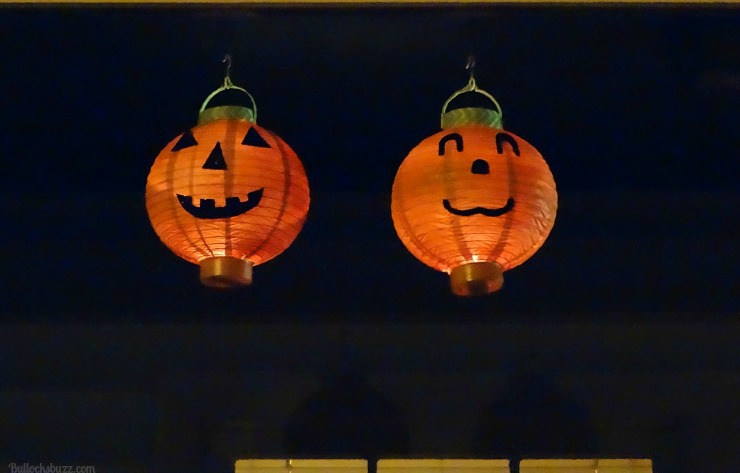
Boo! Halloween is creeping closer, and you know what that means: it’s time to deck the halls (or at least the porch) with some ghoulish goodies. Over the years on Bullock’s Buzz, I’ve shared lots of Halloween ideas, but these DIY Halloween Pumpkin Lanterns are one of my favs. They’re simple, budget-friendly, and an absolute scream to make!

Believe it or not, this idea popped into my head when I dug out a box of paper lanterns left over from my wedding. Instead of letting them haunt my closet forever, I decided to give them a Halloween makeover, and the results were pumpkin-perfect! Whether you’re throwing a monster mash or just want to greet trick-or-treaters with a spooky glow, these lanterns are the way to go.
Why You’ll Love This Craft

How to Make DIY Halloween Pumpkin Lanterns
These DIY Halloween Pumpkin Lanterns are simple, spooky, and oh-so-fun to make, the perfect craft for adding a little glow to your haunted holiday. So grab your glue, let your creativity creep out, and light up the night with DIY Halloween Pumpkin Lanterns that will have trick-or-treaters grinning from ear to ear.
Supplies You’ll Need ✂️
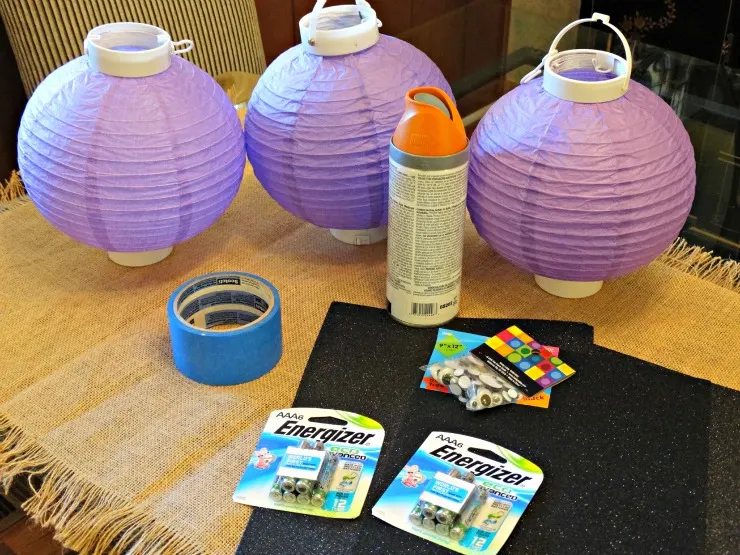
You can make these glowing pumpkin lanterns with just a few supplies!
- Round paper globe lanterns – (I used paper lanterns from Michaels, sturdier than the typical dollar store ones, which may not hold up as well.)
- Orange spray paint
- Green acrylic paint or green Washi tape
- Black glitter foam sheets
- Glue (hot glue works great)
- Painter’s tape (or some other kind of tape)
- Scissors
DIY Halloween Crafts: Pumpkin Lanterns (Upcycled)
Step-by-Step Instructions
Follow these eerily easy steps to craft your DIY Halloween Pumpkin Lanterns:
Step 1: Prep the Lanterns
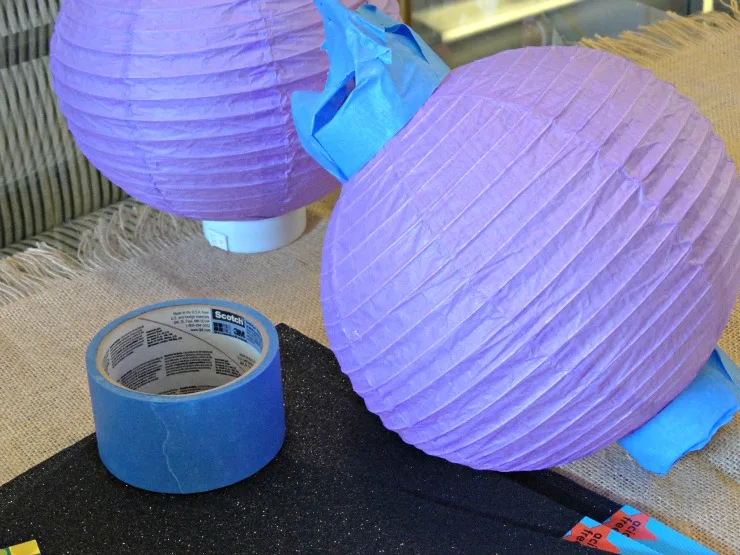
- Begin by taping off the top handle or hardware section of each lantern to protect it from the paint. You don’t want them turning orange, because they will become the stems. I used painter’s tape, but any type should work.
Tip: Ensure the tape does not overlap onto the paper part of the lantern to avoid accidentally removing the orange paint when you remove the tape.

Step 2: Paint the Lanterns
- Outside, or in a well-ventilated area, lightly spray paint the lanterns using the orange spray paint. Try to get an even coat around the entire lantern so it looks consistent once lit.
- Let them dry completely before moving on to the next step. It took mine about a tad over an hour.

Step 3: Make the Pumpkin Faces
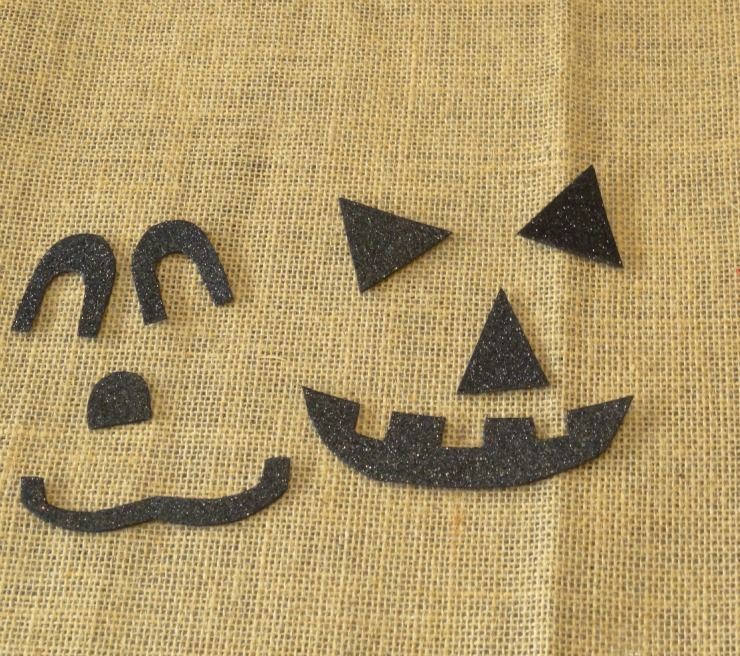
- While your pumpkin lanterns are drying, go ahead and cut out their eyes, noses, and grins from the black glitter foam.
- Go silly, spooky, or downright ghoulish; the creepier the better!

Step 4: Add the Stems
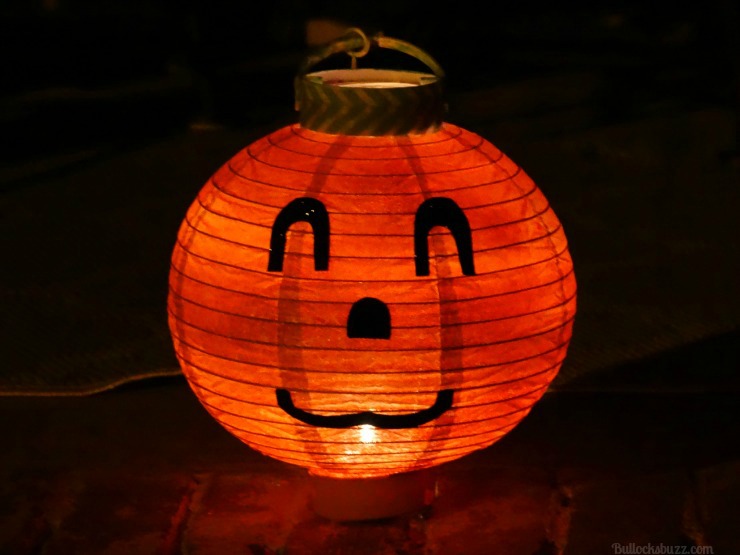
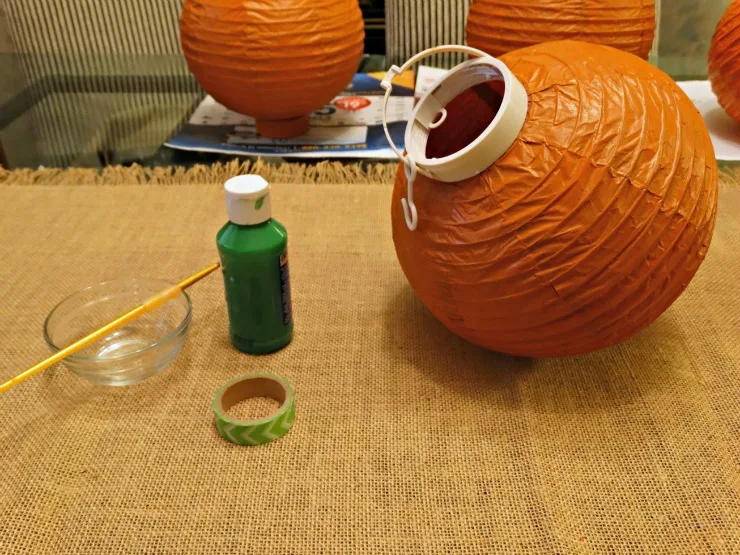
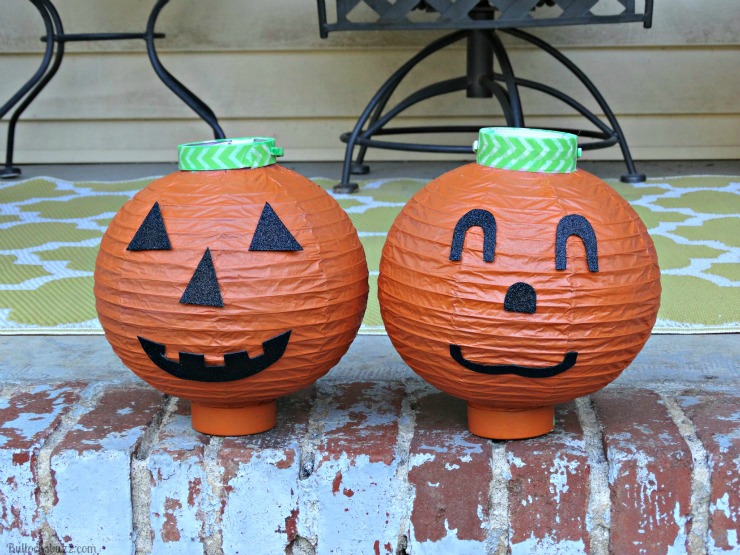
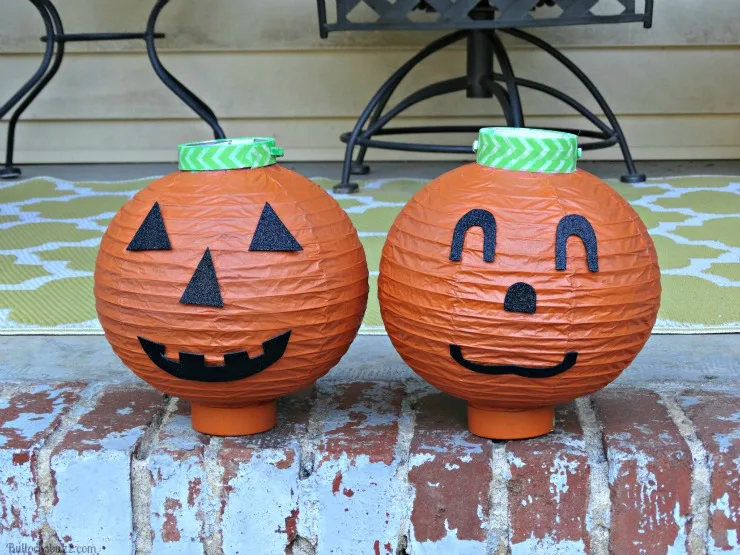
- Once the lanterns are completely dry, remove the tape from around the handles, and then either paint them green or use green colored tape for the “stem”. I chose to add a thin layer of green paint, then once that was dry, I added some Washi tape with a fun green-colored zigzag pattern!
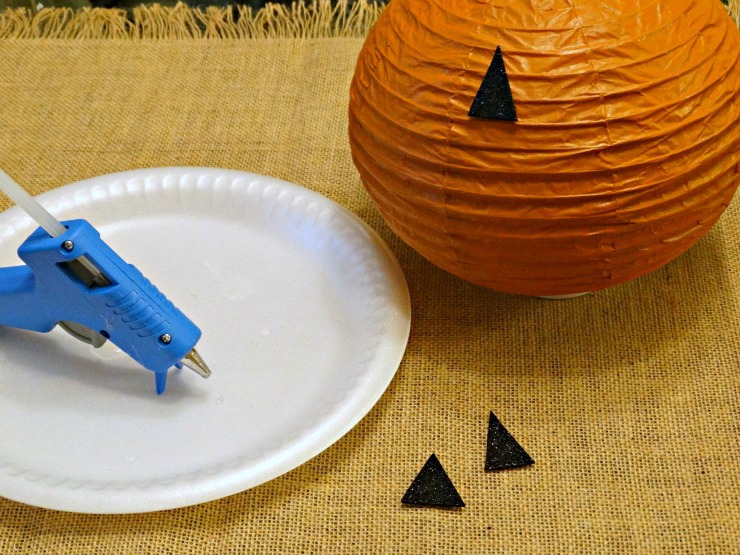

Step 5: Attach the Faces
- Once the stem is dry, use some glue to attach your cut-out pumpkin faces to the lanterns. I used hot glue, but any type of glue will work.

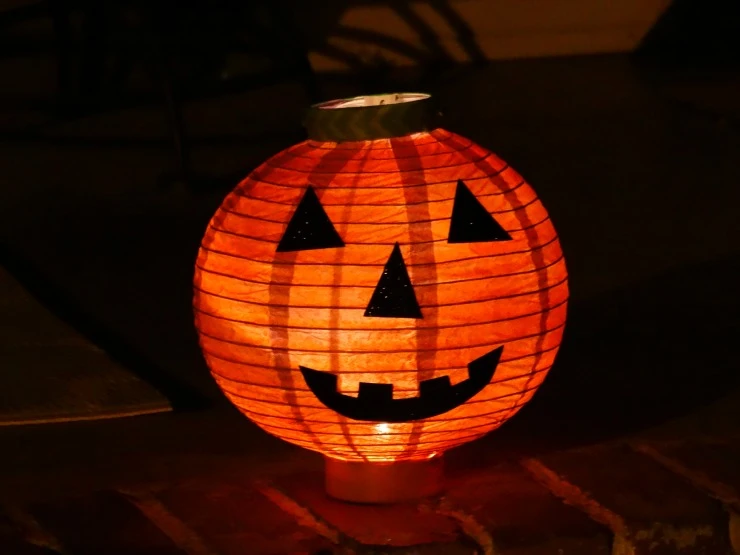
Step 6: Add the Batteries for the Lights
- Lastly, add the batteries to the lights on each lantern. If your lanterns do not come with lights, slip in a battery-operated tea light or a strand of fairy lights.
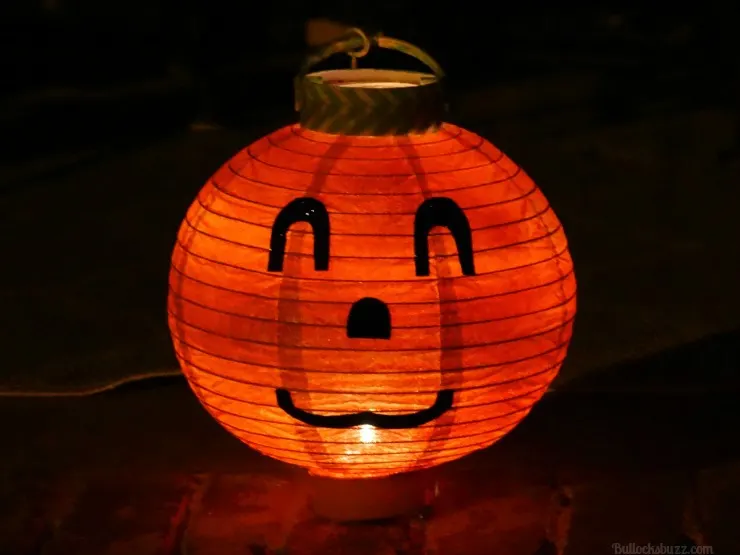
And that’s it, your spooktacular pumpkin lanterns are finished! A frightfully fun and easy Halloween craft that’ll light up the night. Aren’t they boo-tiful!?
Creepy Crafting Tips 👀
- For a haunted twist, go with purple, green, or black paint instead of orange.
- Add glitter spray for a glam-ghoul sparkle.
- Paint glow-in-the-dark accents for an extra eerie nighttime surprise.
- 🎃 Be careful when removing the painter’s tape; go slowly so you don’t peel off any of that orange paint. A gentle touch keeps your pumpkin looking spooktacular!

Display Ideas 🕷️
So now that your pumpkin lanterns are glowing, where should you show them off? Here are a few boo-tiful ways to put them on display:
- 🎃 Guide the ghouls – line your walkway with glowing pumpkins to lead trick-or-treaters to your door.
- 🌙 Float a fright – hang them from trees or your porch for floating jack-o’-lantern vibes.
- 🕯️ Center of attention – use them indoors as a fang-tastic party centerpiece.
- 👻 Pumpkin patch glow – mix and match sizes for a light-up patch that’s wickedly fun.
And that’s it! Your spooktacular pumpkin lanterns are complete! A frightfully fun, gourd-geous little craft that’s simple enough for kids, cheap enough for your budget, and perfect for turning your porch into a Halloween haunt.


More Halloween Fun
If you’re batty for crafts like I am, don’t stop here! Keep the spooky spirit alive with a few more frightfully fun Halloween ideas from Bullock’s Buzz:
LET’S BE FRIENDS! STAY UP TO DATE ON ALL BULLOCK’S BUZZ FUN BY FOLLOWING ME ON:
FACEBOOK | TWITTER | PINTEREST | INSTAGRAM
Enjoy this post? Subscribe to our newsletter so you’ll never miss another!
Subscribe to Newsletter
Do you have a favorite Halloween craft? I’d love to hear about it! In fact, I may even feature your craft in a blog post, with credit to you, of course! Share with us in the comments below!
Therese Wiebe
Sunday 15th of October 2017
Would be pretty Christmas bulbs! Can you paint over? Or save for next year?
Alaina Bullock
Sunday 15th of October 2017
Hi Therese, I am not sure about painting over them, but they definitely last! I actually just put them back out this year yesterday, and they still look great! However, I LOVE that idea! Do you mind if I do it?
Carolyn West
Monday 12th of October 2015
These are fabulous. I would never have thought you could even spray paint paper lanterns. Perfect idea for Halloween and how great that you had so many decorations left over from your wedding. #client
AlainaBullock1
Monday 12th of October 2015
I was so happy that they turned out as well as they did! I had a few moments where I wasn't sure about the spray paint, but it worked great!