This post may contain affiliate links. I only recommend products I use and love. Read the full disclosure here
Updated on: November 7, 2024
Originally published on: November 7, 2024
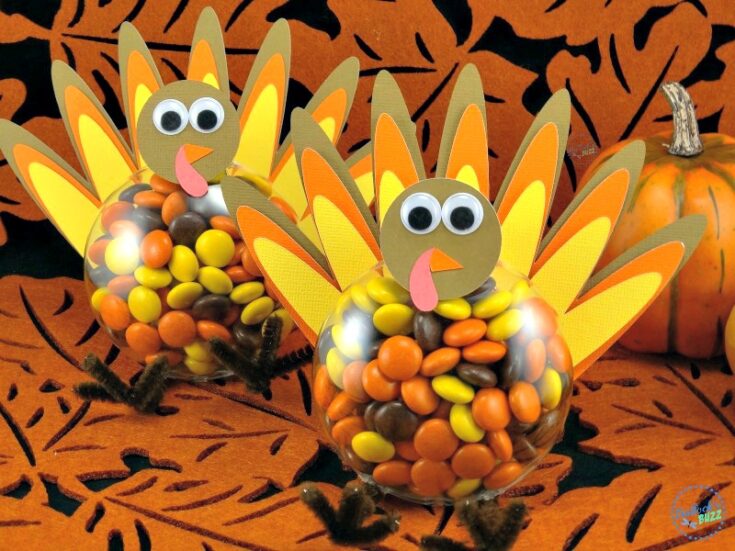
Filled with candy, these Thanksgiving Turkey treats are perfect for classroom parties, the kids’ table, or as place holders at your Thanksgiving feast!
One of my favorite parts of Thanksgiving, aside from the food of course, is the crafts! This year I have lots of fun Thanksgiving crafts and treats planned, the first of which I think you will love! Since my Halloween candy-filled ornaments were such a hit, I took that idea and gave it a festive twist to create these cute Thanksgiving turkeys filled with sweet treats!
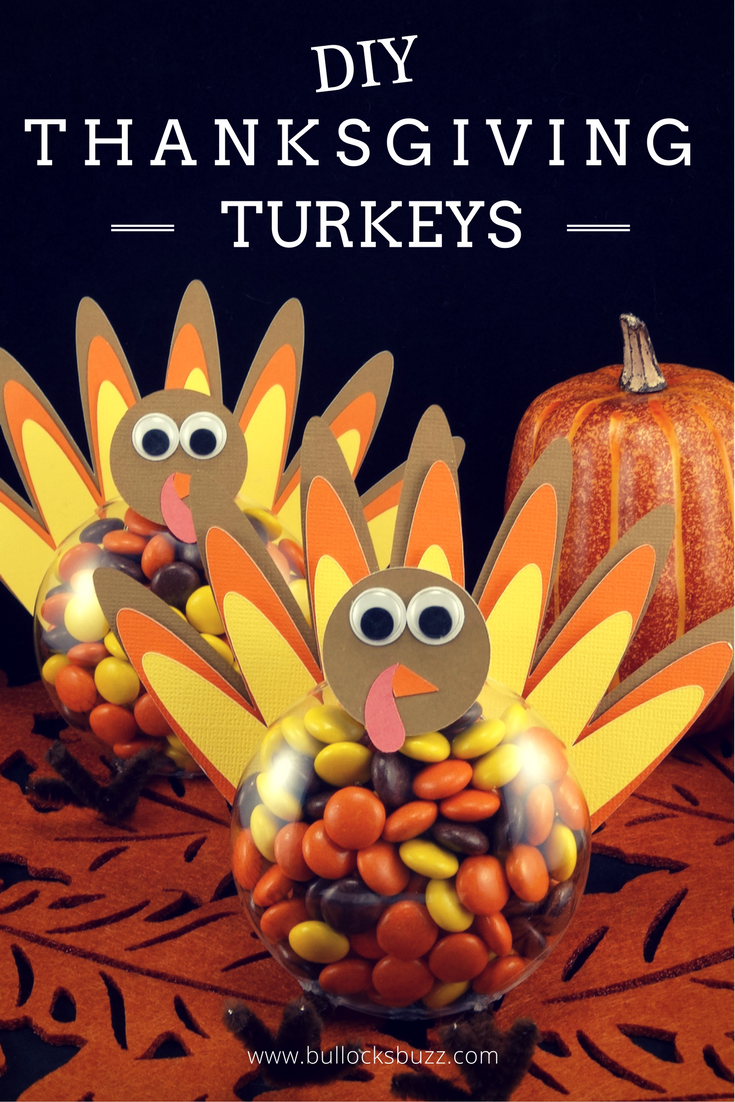
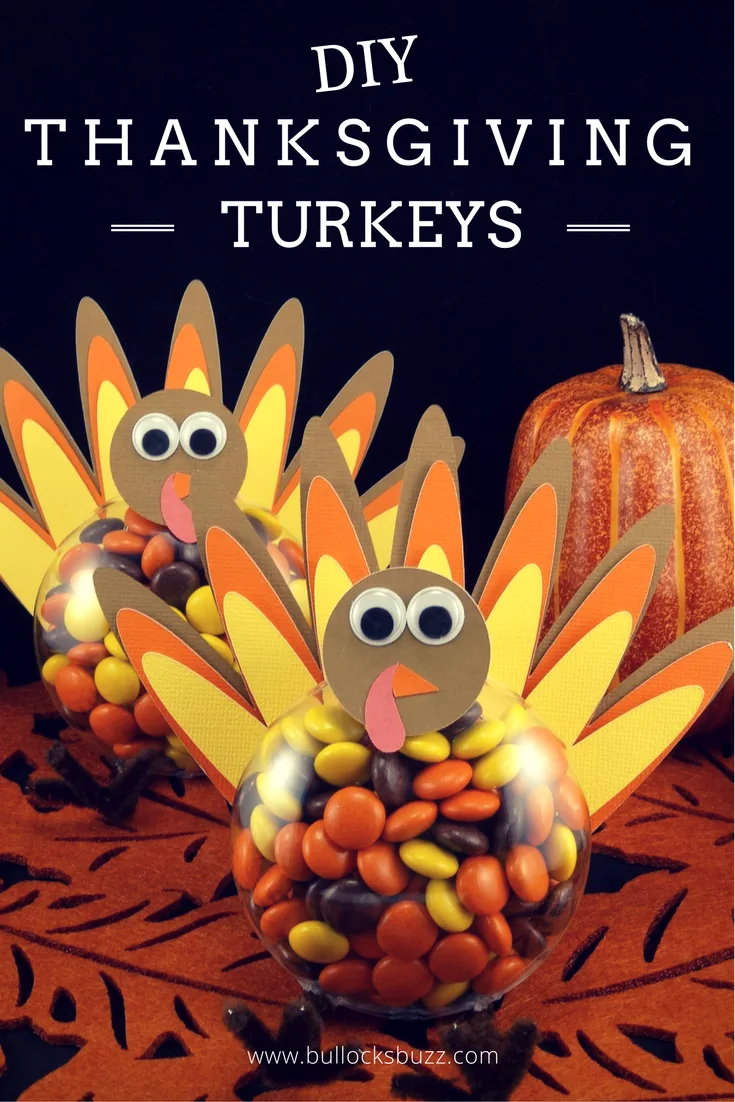
Filled with candy, these Thanksgiving Turkey treats are absolutely adorable. They are the perfect addition to any holiday table. Whether you’re using them to decorate the kids’ table, giving them as classroom party treats, or adding name cards to make them placeholders, they’re sure to bring a smile.
Just imagine how fun and festive they’ll look as a part of your Thanksgiving decor! Whatever you choose to do, I promise that these will be a huge hit with friends and family!


How to Make Easy Thanksgiving Turkey Treats
If you’ve got a Cricut or other die-cutting machine,
Like with my DIY Grinch Ornaments, I used my Cricut Explore Air™ to make these turkeys. It makes these turkeys a breeze to create. But don’t worry if you don’t have a Cricut or other die-cutting machine! You can also make them by tracing and cutting with scissors, and you’ll still end up with adorable results.
Quick Tip: Trace your child’s hand to make this craft even more personalized. Some other ways to make turkey feathers: trace your hand or you can find any similar feather image through a search and trace it to make a stencil using tracing paper, then put it on the construction paper.
If you DO have a Cricut, I’ve included my custom feather file HERE (UPDATED LINK 2023) to make it even easier. Check out the link below to access the file and get crafting!
Update 2023: Cricut File Access
I’ve recently reshared this project on Design Space to make it public again. However, some parts of my original file were from a free Cricut file that’s either now unavailable or no longer free. Because of this, Cricut may charge for certain elements used in the original design.
To make this as accessible as possible, I’ve recreated and made the original project public by adding an image, so you should be able to access the complete design files. If any issues arise, you can also access my new feather file without any restrictions here: Cricut Design Project Link.
For the Head, Beak, and Snood:
- Head: The new feather file doesn’t include the circle for the head, but it’s easy to add. Just make a circle measuring 1.4 x 1.4 inches.
- Beak and Snood: If you’re having trouble accessing a beak and snood, you can create these yourself or search Design Space for a free turkey image with these elements.
Here are the measurements to make these parts from scratch:
- Beak: Triangle, 0.39 x 0.25 inches
- Snood: Elongated teardrop shape, approximately 0.33 x 0.72 inches
If you encounter any issues accessing the file, please leave a comment, and I’ll do my best to help you get it sorted.
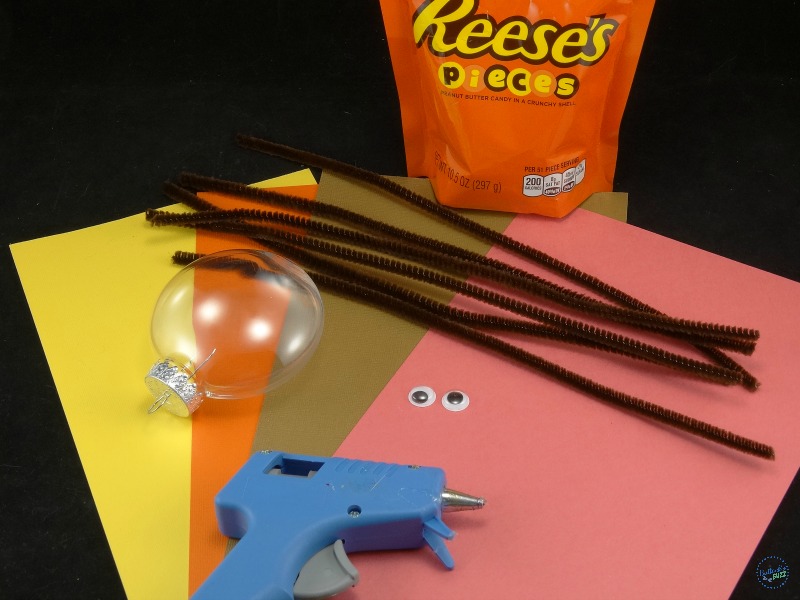

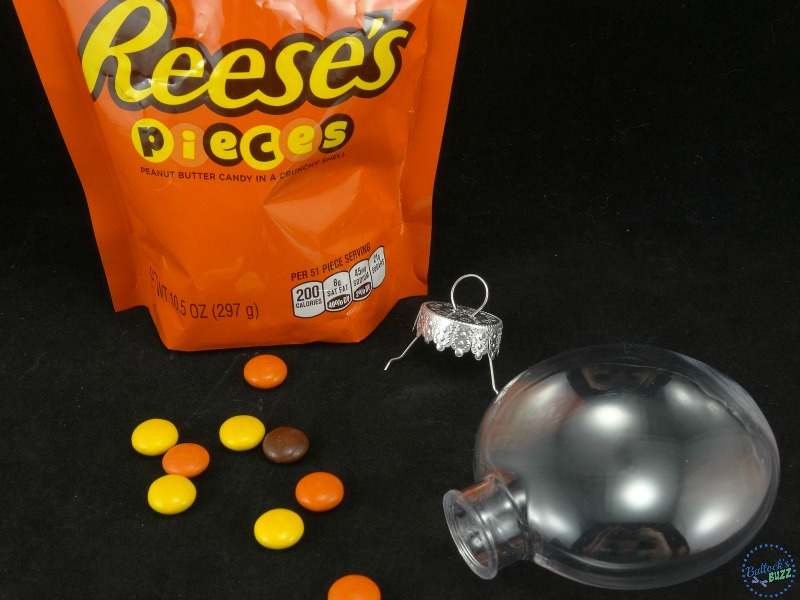
Supplies You Will Need to Make Thanksgiving Turkey Treats
- Clear, round, disc plastic ornaments
- Cricut Explore or other die cutting machine (or scissors)
- Feather File
- Cardstock in red, orange, yellow, and brown
- Brown pipe cleaners
- Wiggly eyes
- Reese’s Pieces®
- Hot glue gun and glue sticks
(Click each supply item for a quick link to where you can buy it. These links are affiliate links, which means I may earn a small commission if you purchase, at no extra cost to you.)

Directions to Make Thanksgiving Turkey Treats
Making these festive turkey treats is simple and fun. Here’s how:
Step One: Clean Ornaments
Begin by washing the ornaments with hot soapy water first. Swirl it around inside, rinse and place upside down on a rack to dry.*
Step Two: Fill Ornaments
Now fill the ornament with Reese’s Pieces®, and replace the cap.

Step Three: Cut Feathers
Using a cutting machine such as the Cricut or Silhouette (or even pre-made stencils), create the feathers from cardstock. My custom feather file can be accessed here. If you do not have a cutting machine, trace your hands, your child’s hands, or find a similar template online you can print, trace on the card stock paper, and cut out.
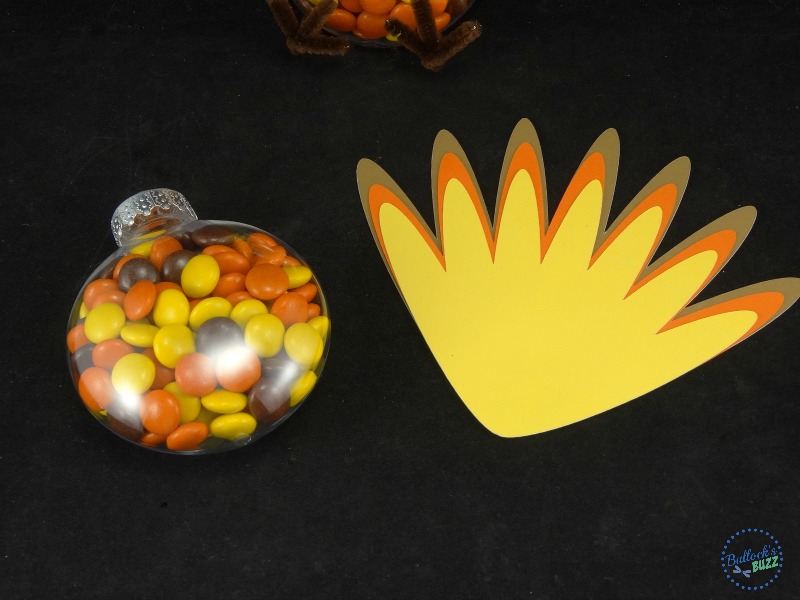

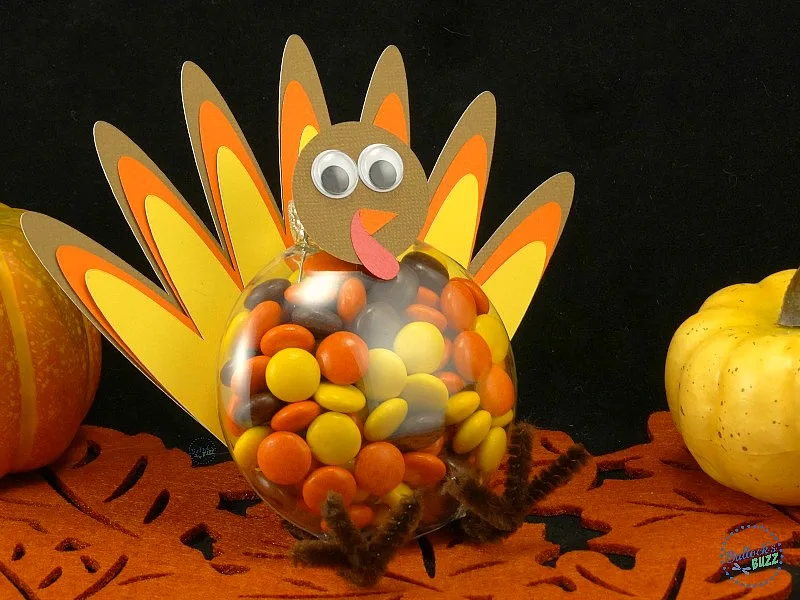
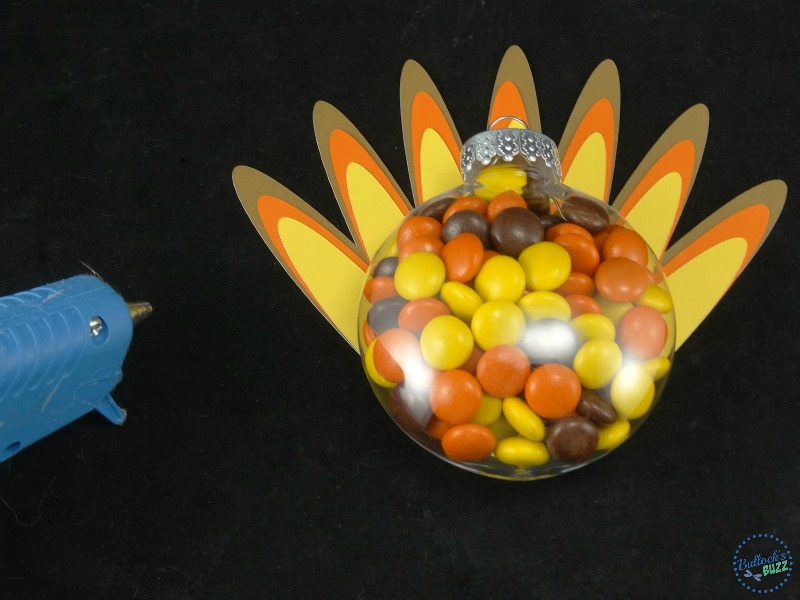
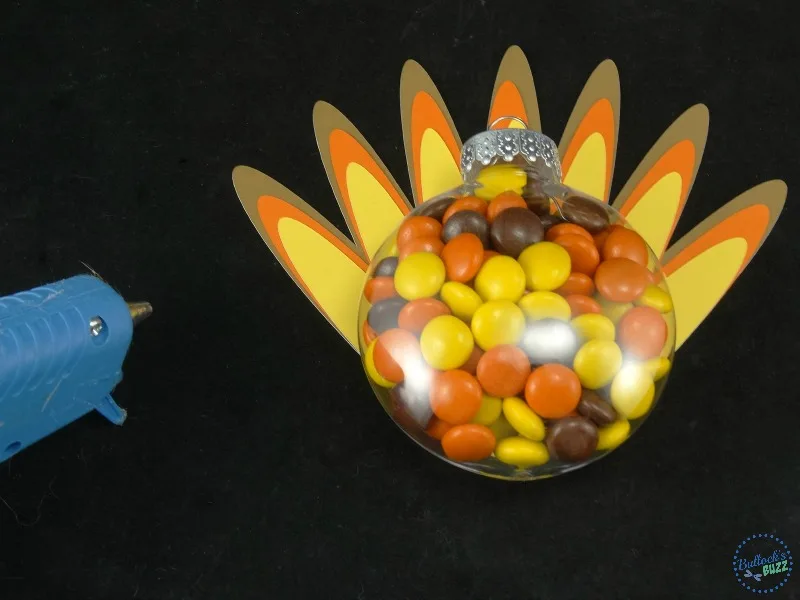
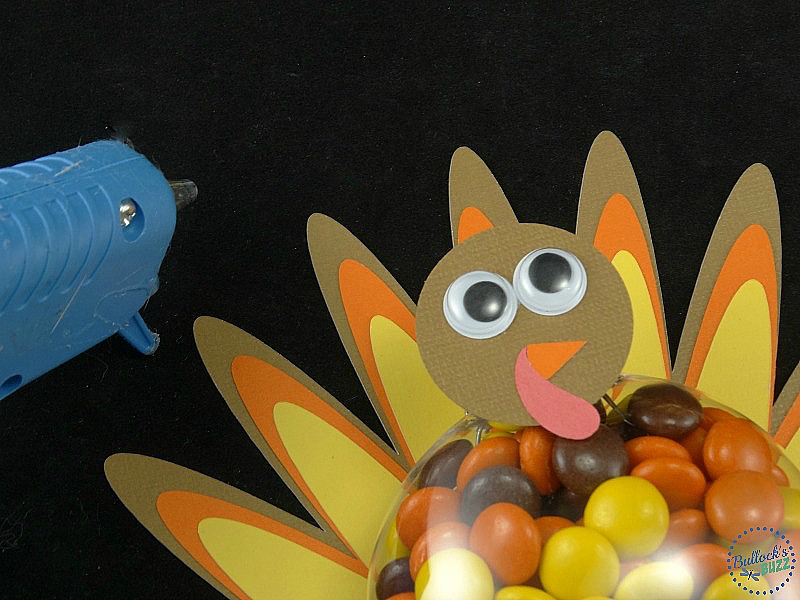
Step Four: Assemble and Attach Feathers
Next, glue the feathers together like in the picture above. You need to layer them starting with the largest in the back, the medium in the middle, and the smallest at the front. Then, using hot glue, attach the feathers to the back of the ornament.
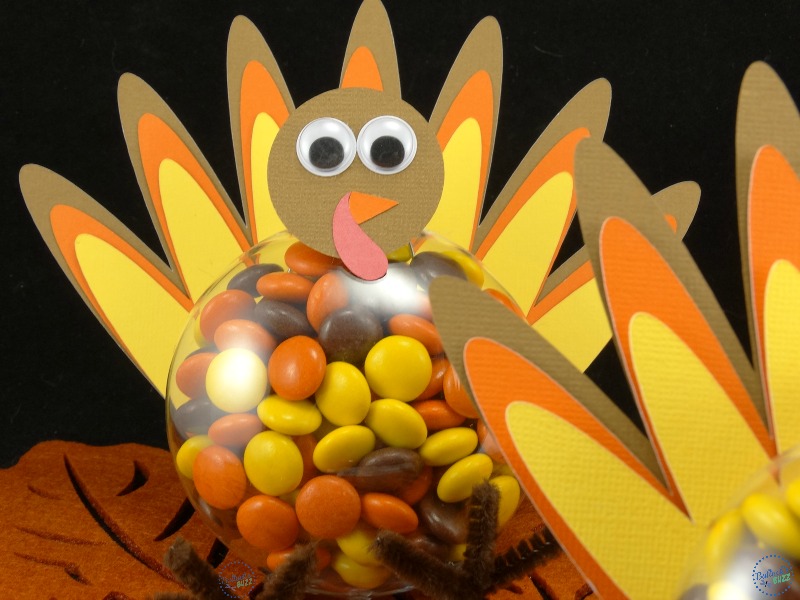
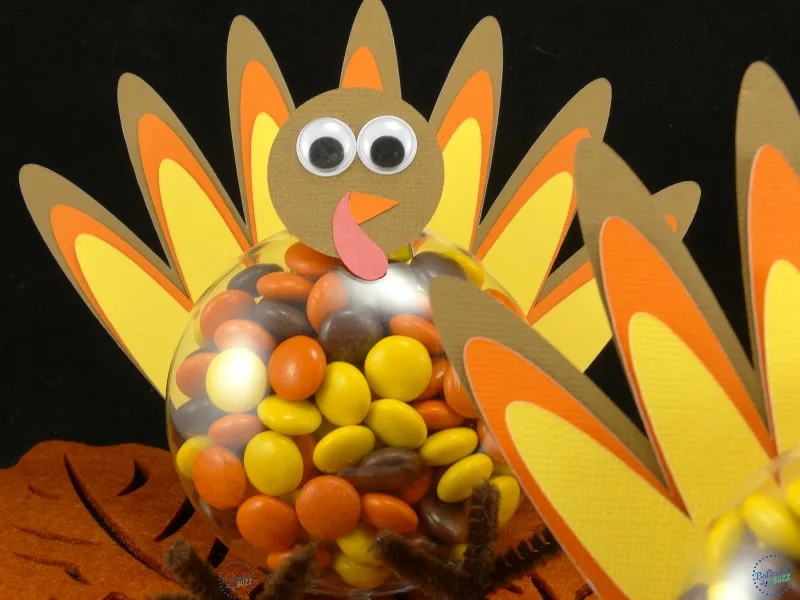
Step Five: Assemble and Attach Head
For the head, cut out a circle measuring 1.4 by 1.4 inches from brown cardstock. Then cut a triangular-shaped beak from orange cardstock and a snood (I used sort of an elongated teardrop design) from red cardstock.
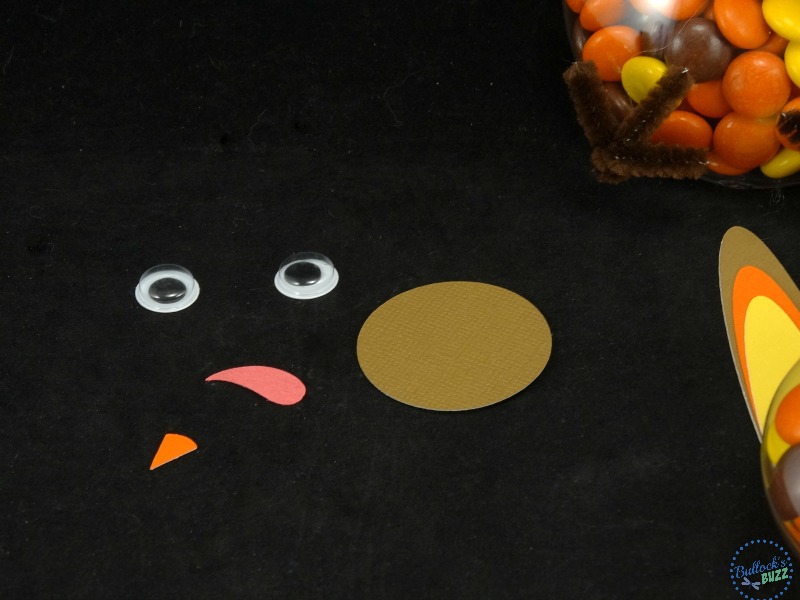

Now glue the wiggly eyes, the beak, and the snood on to the circle you cut for the head. Then hot glue the head onto the front of the silver cap of the ornament.

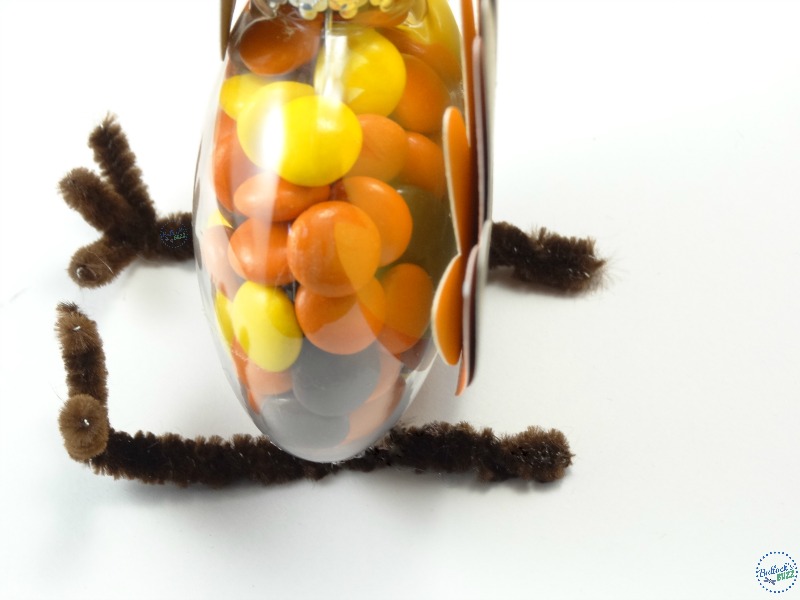
Step Six: Make and Attach the Legs
Now all that is left is to make the legs. You’ll need 6 (six-inch-long) pipe cleaners for each turkey, three per leg. Starting about one and a half inches up from the bottom end of the three pipe cleaners, begin twisting them together. Continue twisting until you reach the top.
Next, spread out the bottom part (the part that is not twisted together) of the pipe cleaners to form the toes, and then make a 90° bend so the feet are pointing upward.
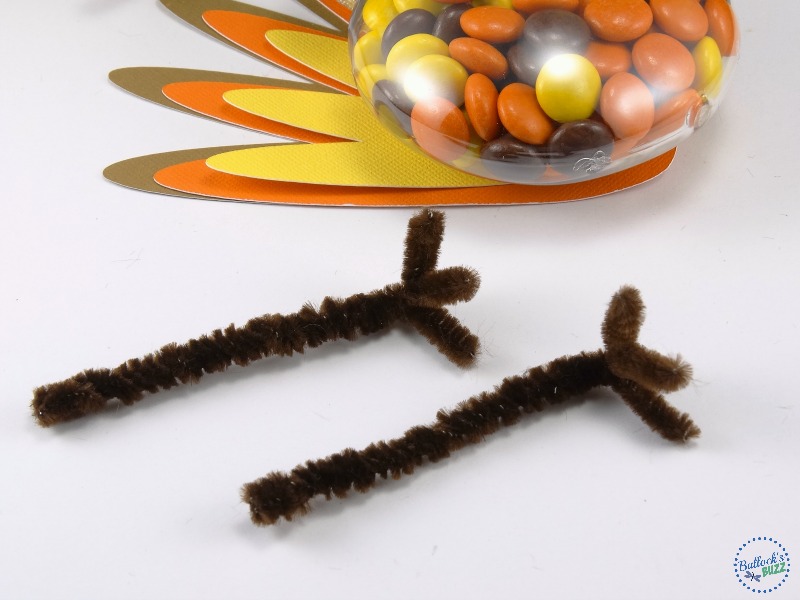
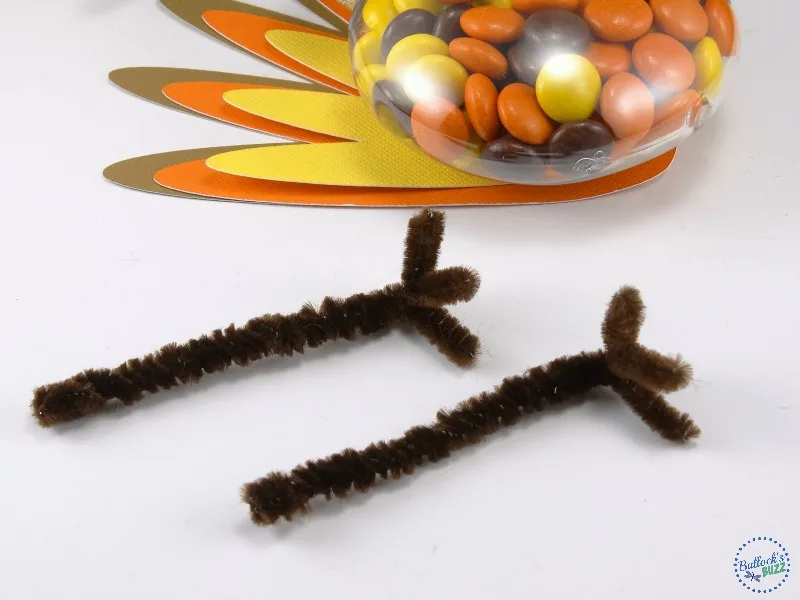
Using hot glue, attach each leg to the bottom edge of the ornament, making sure that at least one-and-a-half inches of excess pipe cleaner is sticking out the backside. This is what will act as a stand to prop your turkey up.

And there you have it! These Thanksgiving Turkey treats are sure to be a hit at any holiday gathering, bringing smiles to friends and family alike!
*Many ornaments are marked not for use with food. These particular ones were not marked at all. Although I am not sure how much, if any, types of chemicals would leach into the candy, it is something you may want to consider. I have seen similar, food-safe ornaments on Amazon.


Show Off Your Turkey Treats Thanksgiving Craft!
This Turkey Thanksgiving Craft tutorial is so simple and so much fun to make! If you do decide to give it a try, let me know! Nothing makes me happier than seeing your own take on my crafts and recipes!
Tag me at @bullocksbuzz (Instagram and Facebook) or @alainabullock (on Twitter). And be sure to use #BullocksBuzz so I can see your creation and share it!
Also, share it with friends and family by using the social share buttons right below the post title!
More DIY Thanksgiving Crafts And Recipes
Looking for more simple Thanksgiving and Fall crafts and recipes? Then look no further than below. I think you will love these!
Free Printable DIY Instructions
DIY Candy-Filled Thanksgiving Turkey Treats

Create fun candy-filled Thanksgiving turkey treats with this easy DIY guide! These adorable ornaments double as table decor and sweet surprises, making them perfect for kids' parties, classroom treats, or a festive addition to the Thanksgiving table. Use a Cricut for quick cutting or trace by hand for a personal touch—follow our step-by-step instructions to make these delightful candy-filled turkeys for your holiday celebrations! Instructions are for 1, but make as many as you need.
Materials
- Clear, round, disc plastic ornaments
- Cardstock in red, orange, yellow, and brown
- 6 six-inch long Brown pipe cleaners/chenille stems per turkey
- Wiggly eyes
- Reese’s Pieces
Tools
- Cricut or other cutting machine
- Scissors (if no cutting machine)
- Hot glue gun and gluesticks
Instructions
- Clean Ornaments
Wash the ornaments with hot soapy water, swirling it around inside. Rinse thoroughly, then place them upside down on a rack to dry. - Fill Ornaments
Once dry, fill each ornament with Reese’s Pieces® and securely replace the cap. - Cut the Feathers
Use either a cutting machine (like a Cricut or Silhouette) or scissors and pre-made stencils, cut feathers from cardstock. If you have a Cricut, use the provided Thanksgiving Turkey Treats feathers file. - Assemble and Attach the Feathers
Glue the feathers together, layering with the largest in the back, medium in the middle, and smallest in front. Then, use hot glue to attach the assembled feathers to the back of the ornament. - Assemble and Attach the Head
Cut a 1.4 x 1.4-inch circle from brown cardstock for the head. Then cut a small orange triangle for the beak and an elongated red teardrop shape for the snood. Next, attach wiggly eyes, the beak, and the snood to the brown circle to form the turkey's face. Then hot glue the head onto the front of the silver cap of the ornament. - Make and Attach Legs
For each leg, twist together three of the six-inch-long pipe cleaners, starting about 1.5 inches from the bottom and twisting all the way to the top. Next, bend the untwisted ends (the toes) at a 90° angle to create feet. Then use hot glue to attach each leg to the bottom edge of the ornament, making sure that at least one-and-a-half inches of excess pipe cleaner is sticking out the backside. This will act as a stand to prop your turkey up. - Enjoy!
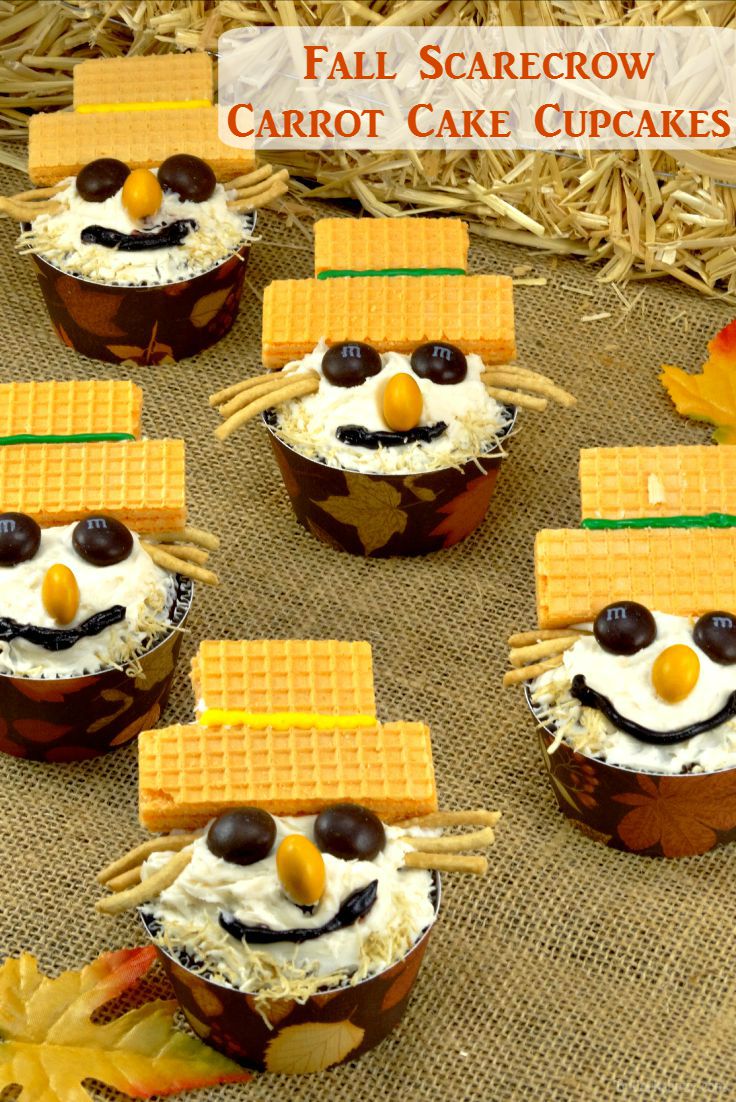

Fall Scarecrow Carrot Cake Cupcakes + Cupcake Wrapper Printable


Pumpkin Gingerbread with Spiced Glaze
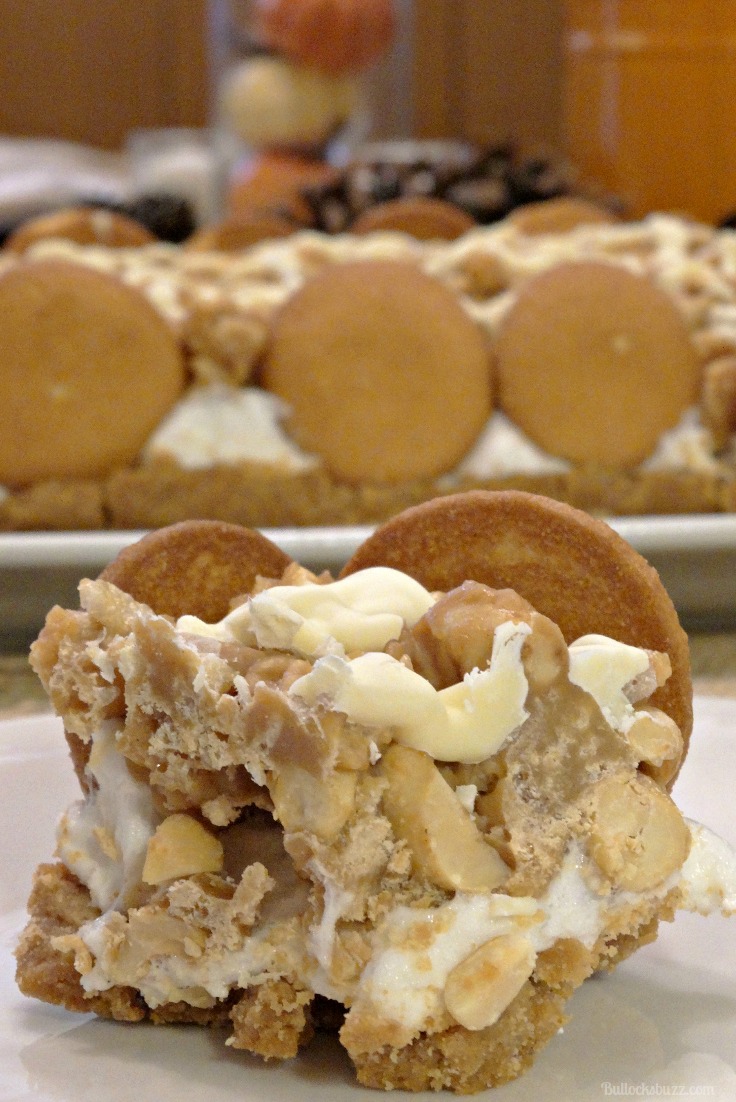

Thanksgiving Entertaining: NILLA, PB and Mallow Squares Recipe
Do you have a favorite Thanksgiving treat? I’d love to hear about it! In fact, I may even feature your treat in a blog post, with credit to you, of course! Share with us in the comments below.
Linda C Siker
Tuesday 6th of November 2018
I still can not get the pattern for the feathers but get a request to sign on the Circut which I do not have. I read it was fixed so I must be doing something wrong. I can try to draw the feathers but it will not be nearly as cute. Thank you s much for your help.
Alaina Bullock
Tuesday 6th of November 2018
Hi Linda, Ah, I think I know the problem. The file is actually a Cricut cutting file, so I think that is why you cannot get it to open. Sorry! Do you have children? If so, try tracing their hands for the feathers, or you could Google 'feathers', print out an image of one and use it as a stencil.I don't know about you, but I can't draw a straight line to save my life, lol.
Kim West
Monday 20th of November 2017
How did you get the turkeys to stay upright with just the pipe cleaners? The bodies seem to be too heavy. Thanks!
Alaina Bullock
Monday 20th of November 2017
Hi Kim! I cut them a bit long so there was a fair amount sticking out from both the back and the front side. I also bent them a tad to balance it all equally. I really had to sit there and adjust until I got them just right, then glued them with hot glue. Also, remember, its 3 pipe cleaners twisted together into 1 per leg. I hope this helps!
Eli
Wednesday 1st of November 2017
Hi
I am trying to use your link for the feather file and it only redirects me to the Cricut Desing Space page and can't find the file. Am I doing something wrong. Please Help...
Alaina Bullock
Wednesday 1st of November 2017
Hi Eli, I've contacted Cricut to ask them. I can pull it up as can a few others I've checked with. However, a lady had the same issue the other day, and she sent me a new link to use, but it was the same that is in the post. I personally think it has something to do with the new Design Space, but as soon as I find out, I will reply here! Sorry! If you want to try it, this is the link the other lady gave me: https://design.cricut.com/#/design/48319683 Copy and paste that and pls let me know if it works. I'll be back as soon as I hear from Cricut - you're welcome to email me at alainabethb @ gmail if you'd like. :) SEE MY NEWEST REPLY I BELIEVE I FIXED IT - IT IS CORRECTED IN THE POST AS WELL :)
Eli
Wednesday 1st of November 2017
Hi Pam, Im trying to download the feathers however, in the link above takes me to the circuit website but it does not show the actual feathers. Is there something else that I need to do to get the image?
Alaina Bullock
Wednesday 1st of November 2017
Hi Eli, I double-checked the link and it is coming up for me. However, let me contact Cricut and see if perhaps it has something to do with the new version of Design Space as it came out after this post. I will come back here as soon as they reply, and let you know.
sararith
Tuesday 29th of November 2016
i really love how the carrot cupcakes look. It is very funny and beautiful. I would do the same for kids. hehe