This post may contain affiliate links. I only recommend products I use and love. Read the full disclosure here
Updated on: November 17, 2020
Originally published on: December 24, 2016
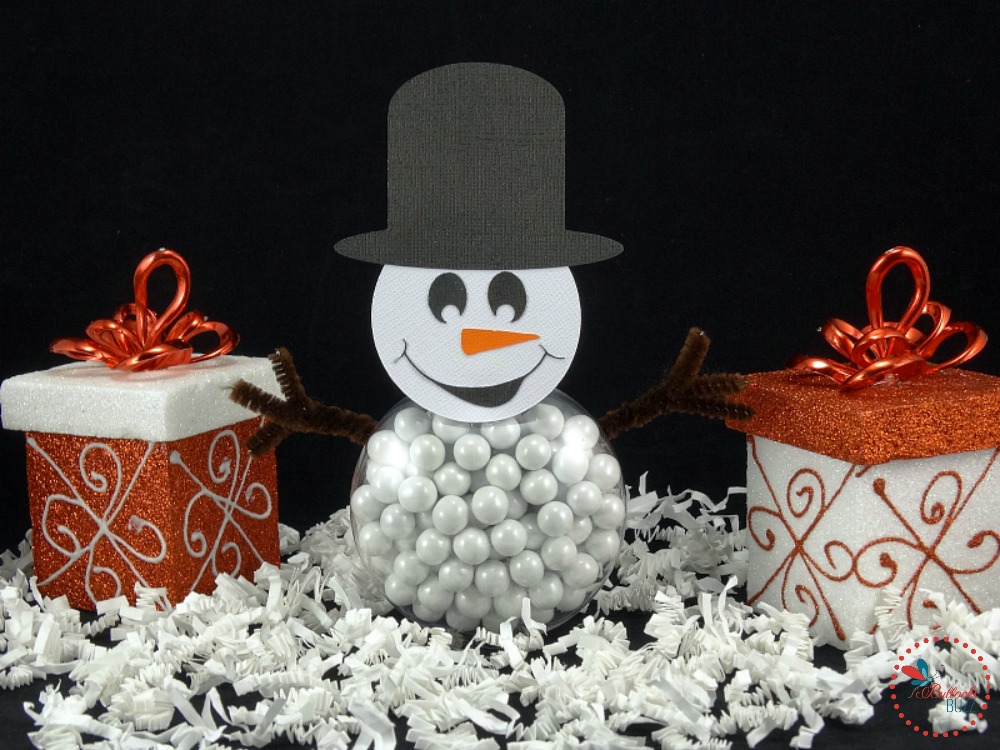
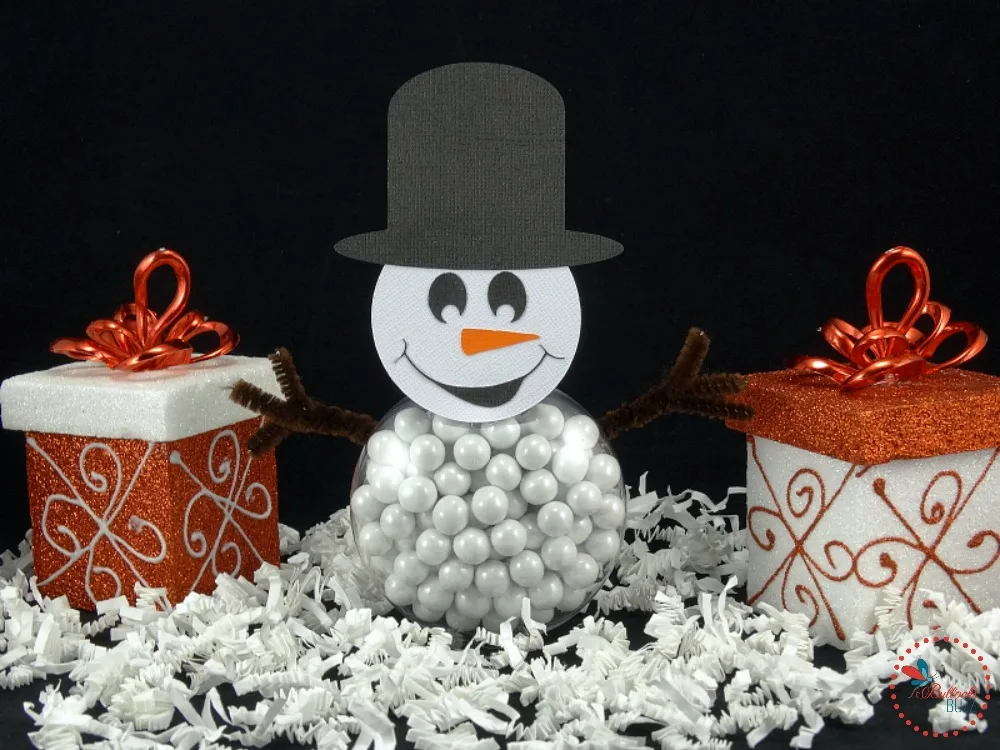
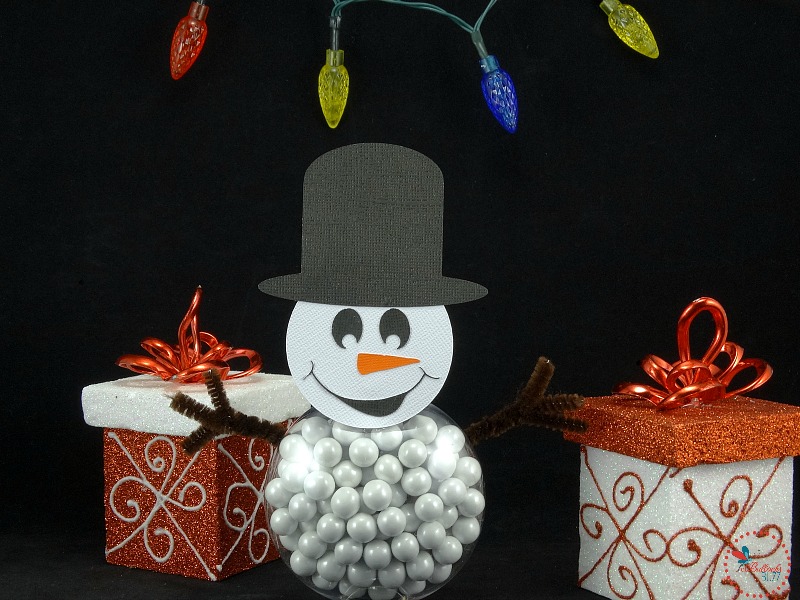
DIY Christmas Snowman Treats
One of my favorite parts of the holiday season, aside from all of the parties and food of course, is the crafts! Lately I’ve been obsessed with making candy-filled crafts. And since my Thanksgiving Turkey Treats were such a big hit, I took a bit of inspiration from them to make these sweet little DIY Christmas Snowman Treats!

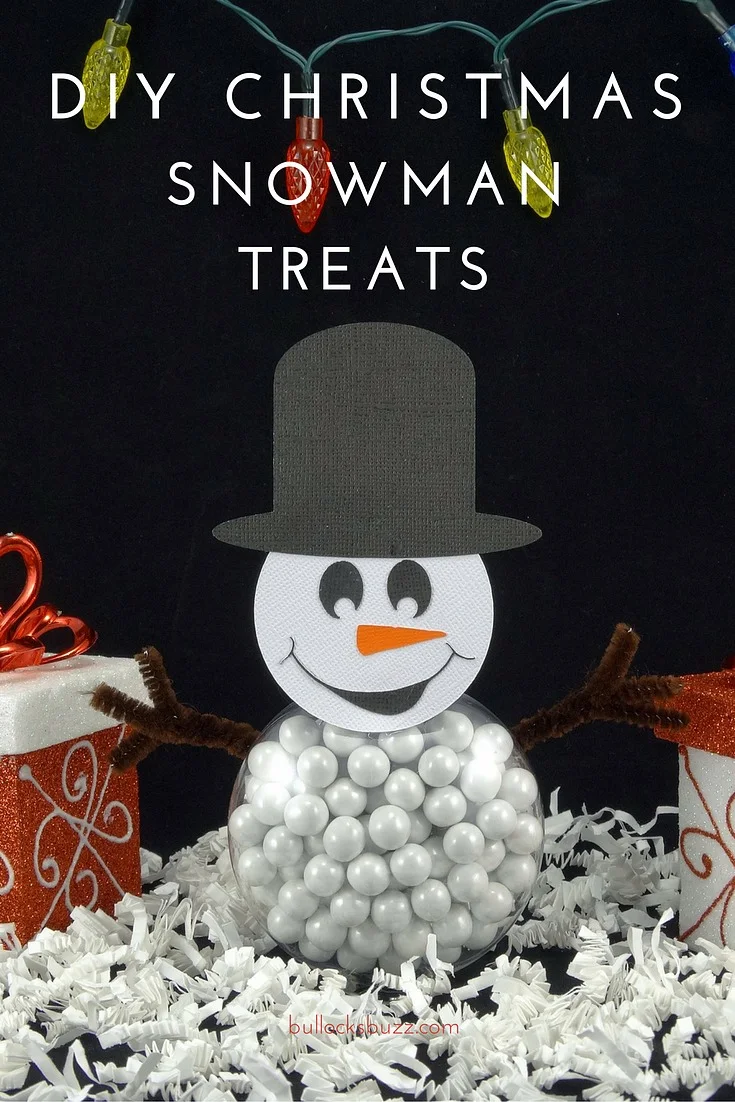
Filled with candy-covered chocolates, these DIY Christmas Snowman treats are perfect for holiday parties, Christmas or Hanukkah stocking stuffers, and even as place holders on your holiday table!
Since I can’t hardly draw a straight line, I used my Cricut Explore Air™ to make these snowman. But no worries if you don’t have a Cricut or other die cutting machine! All you need is some scissors and card stock and you are good to go! You can find the general sizes I used below. Best of all, these are so quick, inexpensive and easy-to-make, you can have them done in just minutes!
How to make DIY Christmas Snowman Treats
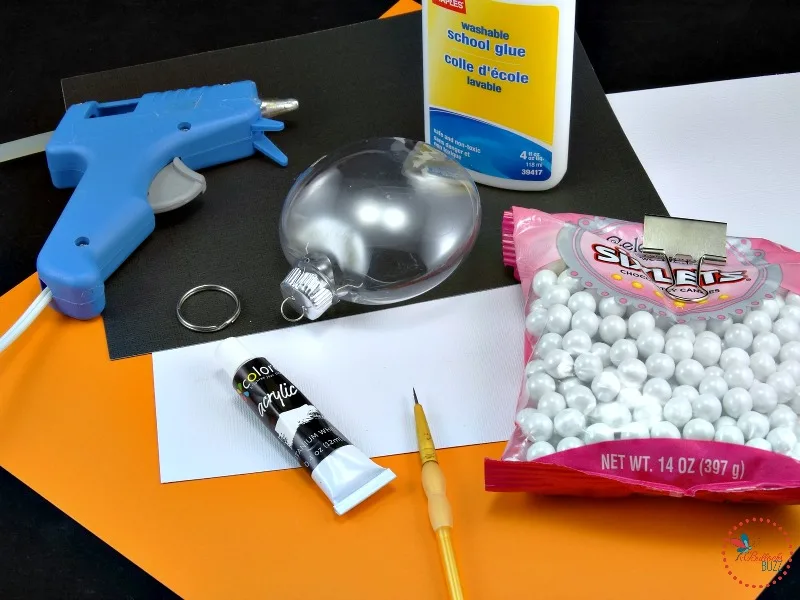
To Make DIY Christmas Snowman Treats You Will Need
Please note, I added Amazon affiliate links to make shopping easy. If you make a purchase through these links, I’ll make a small bonus at no extra charge to you:
Clear, round, disc plastic ornament
Cricut Explore or other die cutting machine (or scissors)
Snowman head and hat file – if you have a Cricut
Snowman face file – if you have a Cricut
Cardstock in white, orange, and black
Brown pipe cleaners
Craft glue or even school glue
White Sixlets or similar candy
Hot glue gun and glue sticks
Round metal key ring (or something similar to help it stand)
White craft paint (optional)
(To make things even easier, you can purchase any of the necessary items by clicking on them in the above list. These are affiliate links so if you make a purchase using them, I’ll make a small commission at no extra cost to you).
Directions to make DIY Christmas Snowman treats
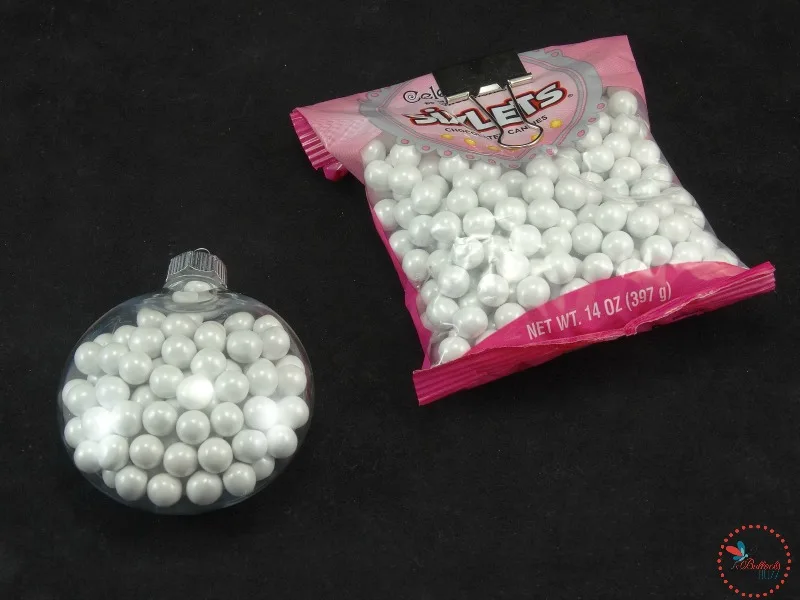
Begin by washing the ornaments with hot soapy water first. Swirl it around inside, rinse and place upside down on a rack to dry.*While the ornament dries, if you want to, paint the lid using white craft paint. This is totally up to you as the lid will be hidden behind the head.
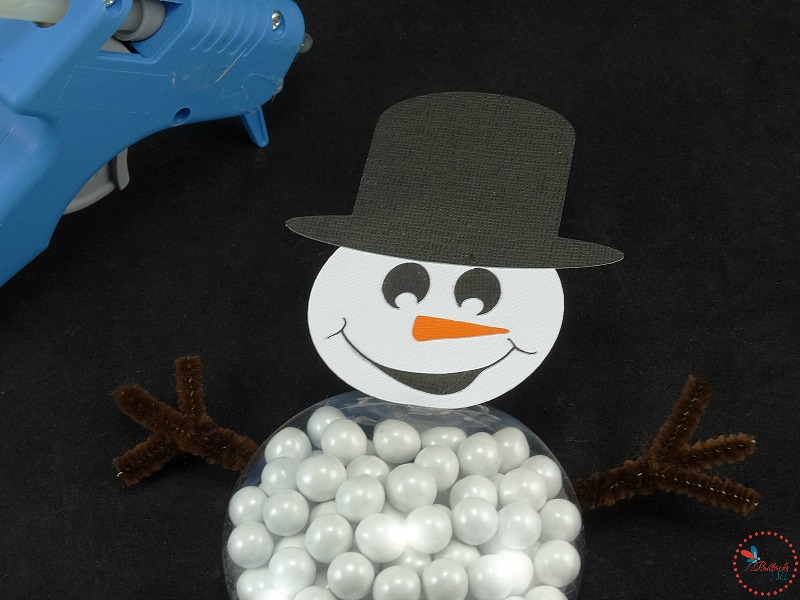
Once the ornament and lid are dry, fill the ornament with the white Sixlets or similar candy, and replace the cap.

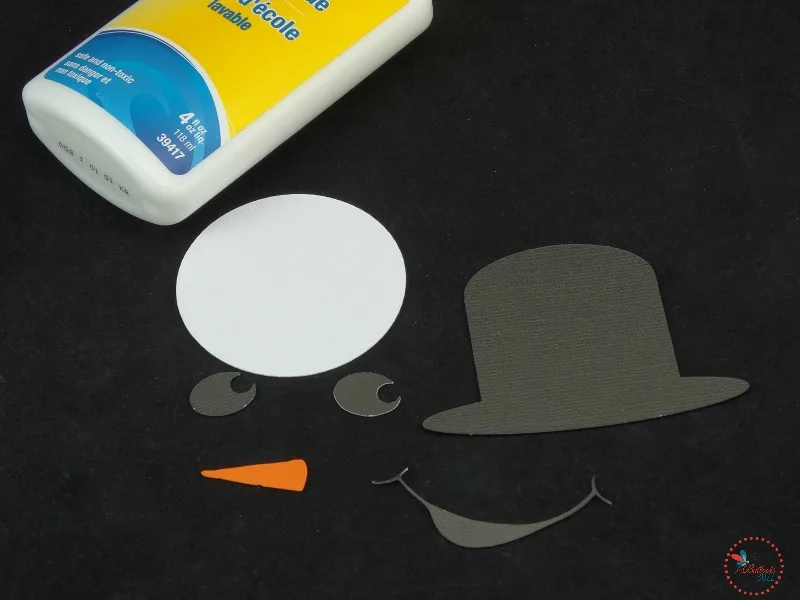
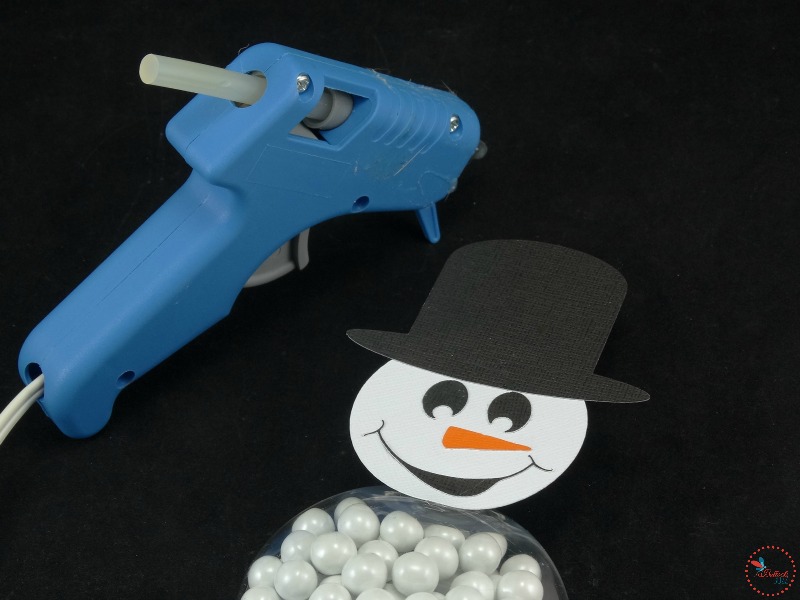
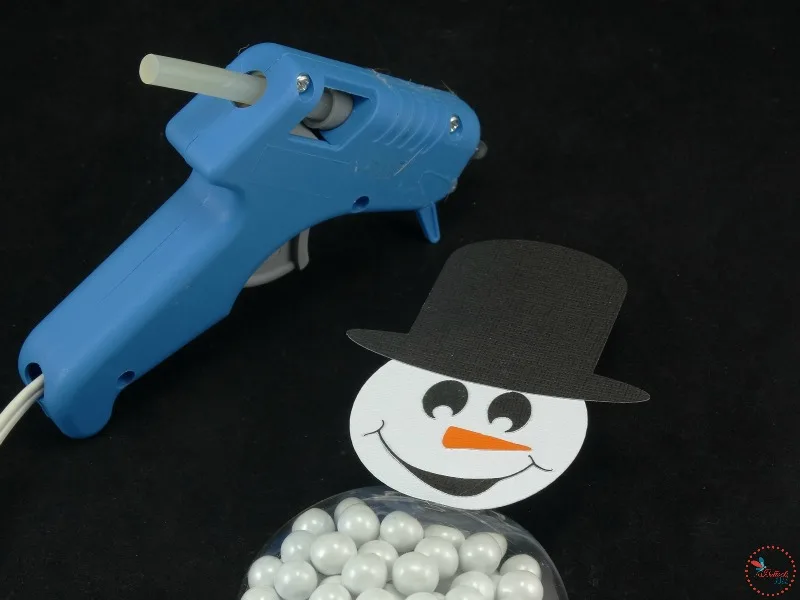
Next, using either scissors or a die cutting machine, cut out a white circle for the head, and an orange carrot-shaped nose. Then cut out the eyes, mouth and hat from the black card stock. If you have a Cricut machine, you can use my Christmas Snowman head and hat file. For the facial features, you can either design them yourself using basic shapes, or you can find a file online.

Make sure you size your files to fit the ornament. To give you a general idea of sizes, here are mine:
- for the head, I sized mine to 2.3″ wide by 2.3″.
- the hat was sized to 3.14″ by 2.23″
For the head, cut out a circle measuring 1.4 by 1.4 inches from white card stock. Then cut a carrot shaped nose from orange card stock, and the eyes and smile from black card stock.
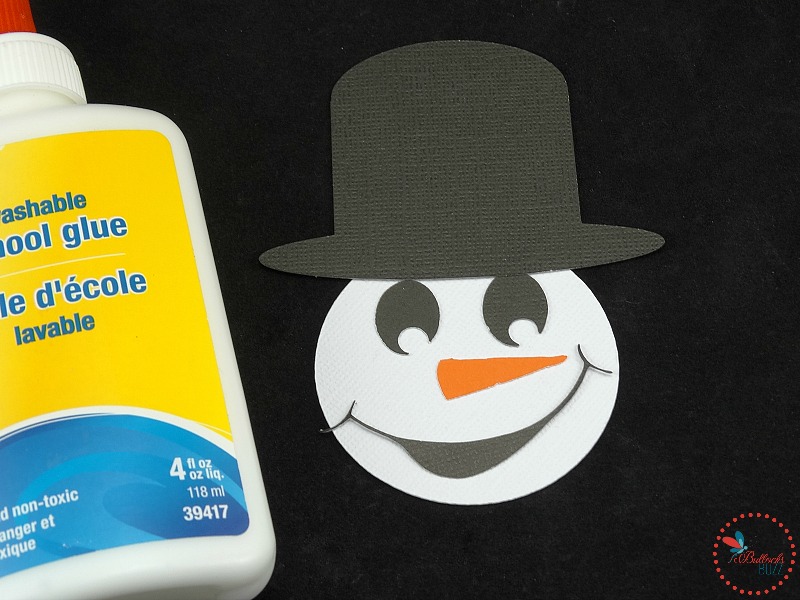

Now, using craft glue, add the hat and the facial features to the head. Then glue the head to the very top of the ornament.
To make the arms, simply twist together 3, three inch long brown pipe cleaners, leaving a small amount at the ends untwisted. Next, spread out the parts that are not twisted together to form the fingers. Attach each arm to the back side of the ornament using the hot glue.

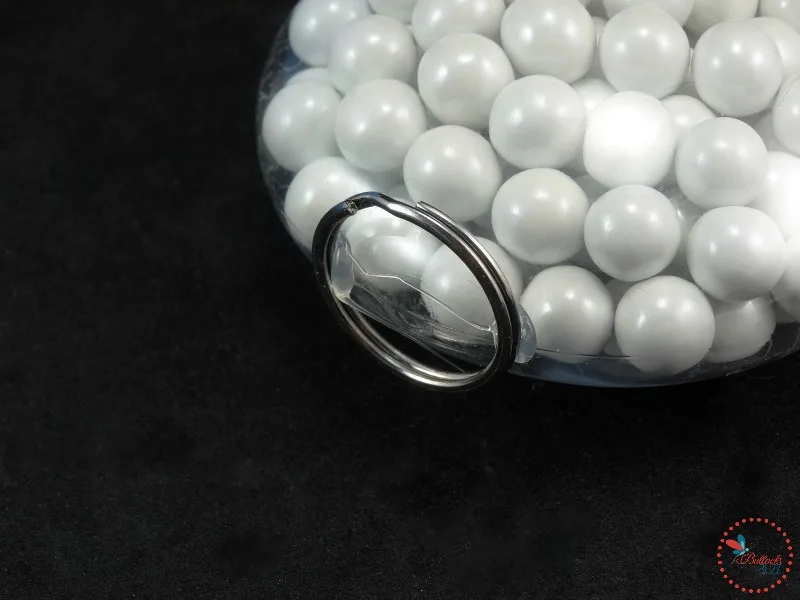
This last step depends on whether or not you want your snowman to stand up. If you do, simply hot glue a round, metal key ring to the very bottom of the ornament. I’m sure you could use something else, but I happened to find one in my desk drawer while looking for something to use and it worked perfectly! 🙂

And there you have it. A super cute DIY Christmas Snowman treat that will make them grin with delight!

I hope you like these DIY Christmas Snowman treats as much as I enjoyed making them! Share with your friends and family by using the social sharing buttons below the post title. You can also pin the images to save them for later!
*A lot of craft ornaments are marked not for use with food. The ones I have were not marked at all. However, although I am not sure how much, if any, types of chemical would leach into the candy, it’s something you may want to consider. They do have similar, food safe ones on Amazon and in many craft stores.
Other easy Christmas and Hanukkah treats and recipes you may enjoy

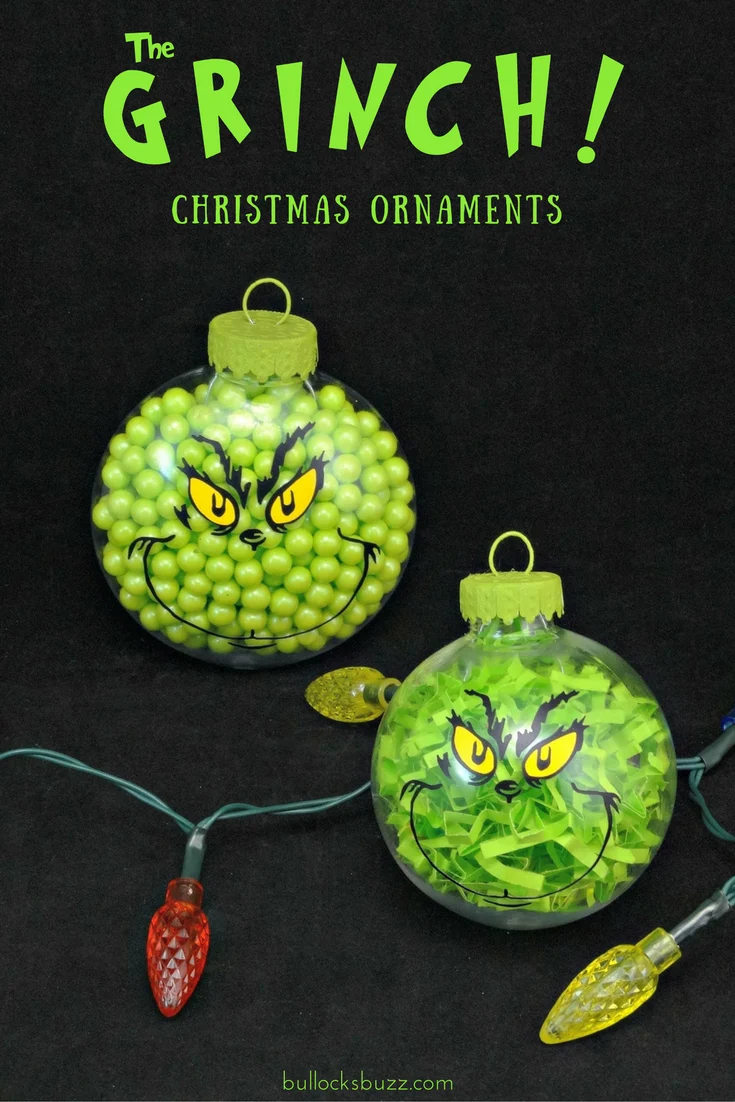
 Two DIY Grinch Christmas Ornaments
 DIY Christmas Ornaments – Crinkle Paper Character Ornaments

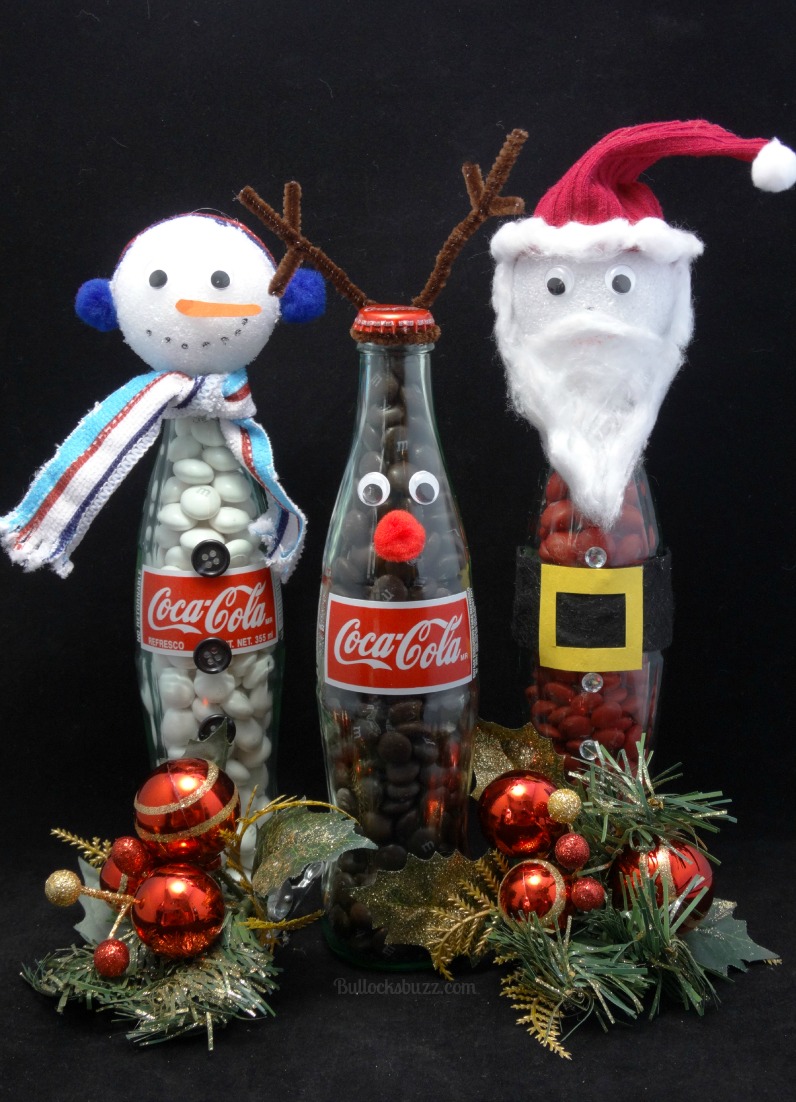 DIY Coke Bottle Christmas Characters

Do you have a favorite DIY Christmas or Hanukkah treat? I’d love to hear about it! In fact, I may even feature your treat in a blog post, with credit to you, of course! Share with us in the comments below.