
This post may contain affiliate links. I only recommend products I use and love. Read the full disclosure here
Updated on: October 13, 2026
Originally published on: October 13, 2026
You know that faucet you keep meaning to fix? Or the cold air sneaking in around the front door? Some home maintenance tasks are so easy to put off that we practically stop noticing them. Until the drip gets louder, the room gets colder, or that little repair suddenly isn’t so little anymore.

And I get it. Between work, family, and everything else on the to-do list, inspecting the bathroom caulk probably isn’t your idea of a fun Saturday. But giving these spots a little attention now can help you catch problems before they become bigger headaches.
Below are 14 things worth checking around your home, with tips on what to look for, what you may be able to handle yourself, and when it’s time to call a professional. Not every home has radiators, a fireplace, or a mail slot, so simply focus on the ones that apply to yours.
Plumbing and Moisture Problems Worth a Closer Look
Water has a way of getting your attention eventually. The trick is catching a leak or moisture problem before it leaves a stain, damages a cabinet, or turns into something you can’t ignore.
1. The Toilet That Refills When Nobody Has Flushed
If you hear the toilet tank filling up all by itself, take a peek inside. Water may be slipping past the flapper into the bowl, causing the tank to refill even though nobody has used it.
The flapper is the rubber piece near the bottom of many toilet tanks. It needs to sit properly to seal the opening. A worn flapper, tangled chain, or incorrect water level can keep that from happening.
One simple check is to add a few drops of food coloring to the tank and wait without flushing. If color appears in the bowl, there’s a tank-to-bowl leak. Flush afterward to help prevent staining.
Before buying anything, see whether the chain is caught or holding the flapper open. If the flapper needs replacing, shut off the water supply and flush to drain the tank, then follow the replacement instructions.
Take the old part or your toilet’s model information to the store. Because fixing a toilet is annoying enough without buying the wrong piece!
2. The Faucet Drip You’ve Somehow Tuned Out
Drip. Drip. Drip.
It’s amazing how quickly something irritating can become background noise. But a dripping faucet is still wasting water, even when you’ve gotten used to hearing it.
A worn washer, cartridge, or seal may be the culprit. The right repair depends on your faucet, so check its brand, model, and manufacturer’s instructions before taking it apart.
Turn off the water supply under the sink first, and cover the drain so those tiny screws don’t disappear. Use the correct replacement parts rather than guessing at what might fit.
While you’re there, look inside the cabinet for dampness, water marks, or dripping connections. A leak underneath the sink needs attention, too.
If the shutoff valve won’t close, the faucet is badly corroded, or you’re unsure how to proceed, call a plumber. There’s nothing wrong with getting help before a small drip becomes a much wetter project.
3. The Caulk Pulling Away From Your Tub
Caulk may not be pretty or exciting, but it does an important job. When it cracks or separates from the tub or shower, water can get into the gap.
Check the corners and the seams where the tub meets the wall. Look for peeling edges, missing sections, and areas where the sealant is no longer attached.
If the surfaces underneath are sound and dry, remove the old caulk, clean the joint according to the product instructions, and allow it to dry thoroughly. Then apply a bathroom sealant compatible with your surfaces and smooth the bead.
And yes, you really do need to wait before using the shower again. Follow the cure time on the label instead of assuming it’s ready because the surface feels dry.
If you uncover soft material, persistent moisture, or recurring mold behind the old caulk, stop and have it checked. Fresh caulk won’t fix damage hiding underneath.
4. The Bathroom Fan That Makes Plenty of Noise
A bathroom fan can sound like it’s working hard while barely moving air. If the room stays damp after showers, it’s worth checking more than the switch.
With the fan running, hold a lightweight piece of tissue against the grille. If suction holds it in place, air is moving. This is only a quick check, though—it won’t tell you whether the fan provides enough ventilation for the room.
A dusty cover is a good place to start. Turn off the power at the breaker before removing it, then clean the cover and accessible dust according to the manufacturer’s instructions. Keep water away from electrical components.
If airflow is still weak, the motor, ductwork, or outside vent may need attention. Bathroom exhaust should lead outdoors, not into the attic.
And if moisture or mold keeps coming back, have the cause investigated instead of repeatedly cleaning the same spot and hoping for the best.
5. The Gutters You Haven’t Thought About Since Last Fall
Gutters are easy to forget when the weather is nice. Then a rainstorm comes along, and water starts pouring over the edge.
Leaves, twigs, and other debris can block the flow, sending water down the siding or onto the ground beside your foundation. Look for overflowing sections, sagging gutters, loose connections, and downspouts that aren’t draining properly.
Check them around seasonal leaf fall and spring debris, adjusting the schedule for the trees around your home. Some yards need more frequent attention than others.
Also look at where the downspouts empty. Water should flow away from the foundation toward a suitable drainage area. An extension may help, as long as it doesn’t create a trip hazard or send water somewhere it shouldn’t go.
If the job requires difficult ladder access or getting onto the roof, hire someone equipped to handle it. If water still pools after everything is clear, the drainage around the house may be part of the problem.
Drafts You Don’t Have to Keep Putting Up With
Before turning up the thermostat again, check whether warm air is escaping or cold air is coming in. Sometimes, the problem is right around the door you walk through every day.
6. The Hot-Water Radiator That Won’t Warm Up Evenly
If you have hot-water radiators, one that’s warm at the bottom but cold at the top may have air trapped inside. Gurgling can be another clue.
Bleeding the radiator can release that air, but check your system’s instructions first. This process is for hot-water radiators, not steam radiators.
Turn off the heating and let the radiator cool before starting. Put down a towel, hold a cloth or container beneath the bleed valve, and use the correct radiator key to open it slightly. Close it once the air has escaped and water begins flowing steadily.
Bleeding the radiator can release that trapped air, but check your system’s instructions first. This process is for hot-water radiators, not steam radiators.
Not sure which heating system you have? Leave the valve alone and ask a heating professional. The same goes for a stuck valve or a radiator that keeps having the same problem.
7. The Door Seal That Has Seen Better Days
A closed front door shouldn’t come with its own breeze. If yours does, inspect the weatherstripping around the frame.
Look for flattened sections, cracks, loose pieces, and gaps. During daylight, check whether light shows around the closed door. On a windy day, feel along the edges for incoming air.
Don’t forget the bottom. A worn door sweep can leave a gap even when the rest of the door seals well.
Replacement weatherstripping needs to match your setup. Some types press into a groove; others attach with adhesive or screws. Clean the surface before installing it, and check that the door still closes and latches comfortably.
If the door sticks, sags, or has uneven gaps, its alignment may need fixing first. Adding thicker weatherstripping won’t necessarily solve that.
8. The Fireplace Damper Left Open Between Fires
A cozy fire is wonderful. An open chimney when you aren’t using the fireplace? That can give indoor air an escape route.
For a wood-burning fireplace, check that the damper is closed when the fireplace isn’t in use—but only after the fire and embers are completely out and cold. Open it again before lighting another fire.
Gas fireplaces and gas logs have different requirements. Follow the appliance instructions, and don’t close a damper or block a flue unless those instructions allow it.
If the damper is stuck or damaged, have a chimney professional inspect it. A removable draft blocker may suit some unused wood-burning fireplaces, but it needs to be compatible with the setup and removed before use.
This is one of those fixes where knowing exactly what you have matters.
9. The Gaps Around Your Baseboards
Cold air near an outside wall may be coming through gaps around the baseboards. Take a closer look at the joints where the trim meets the wall and floor.
For a small, stationary gap between the baseboard and wall, paintable caulk may help. Clean the joint, apply a thin bead, and smooth it according to the product directions.
The floor seam needs a little more care. Some flooring needs room to expand and contract, so don’t automatically seal every gap you see. Check the flooring guidance first.
If the gap is large, the trim is damp, or the draft remains, have the area inspected. The source may be behind the baseboard rather than at the visible seam.
A neat line of caulk is satisfying, but it’s even better when it actually addresses the problem!
10. The Windows—and Mail Slot—Letting Air In
A drafty window doesn’t automatically mean you need to replace your windows. Start by checking the seals and whether the window closes properly.
Look around the sash, which is the moving part of the window, and along the surrounding trim. Worn weatherstripping may need replacing. An appropriate caulk may help at stationary joints.
Choose materials made for your window type, keep drainage openings clear, and make sure the window still opens, closes, and locks after the repair.
If your front door has a mail slot, check whether the flap closes fully. A compatible brush-style draft cover may help cut down on air coming through while still allowing mail to pass.
Broken hardware, damaged frames, or a window that won’t close securely need more attention than a little foam tape.
Safety Checks Worth Moving Up Your To-Do List
These next tasks may not change how your house looks, but they deserve attention before the painting, decorating, and other projects waiting their turn.
11. The Smoke Alarms You Can’t Remember Replacing
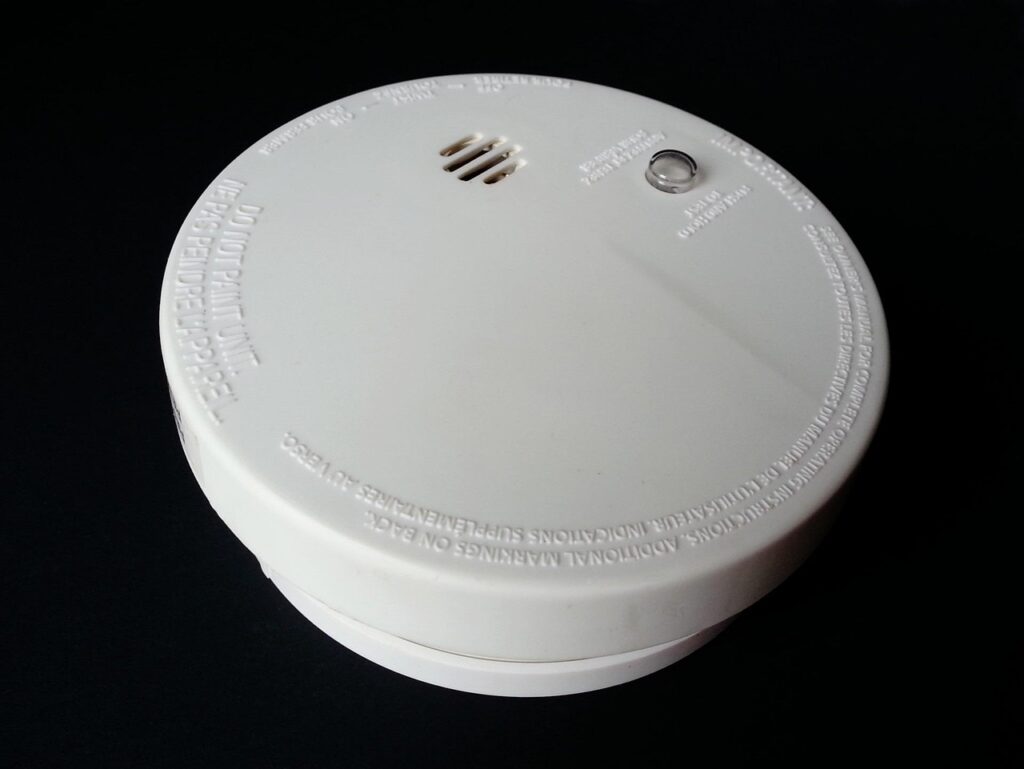
When did you last replace your smoke alarms? If the answer is “I have no idea,” check the date on each unit. Replace smoke alarms every 10 years and test them monthly. Follow the manufacturer’s battery instructions, too, since sealed-battery models and alarms with replaceable batteries have different requirements.
Use the test button as directed, but remember that passing a test doesn’t extend the alarm’s replacement date.
When buying a new alarm, check its mounting and wiring requirements. Don’t assume it will fit the old base or connect to your existing system.
If a hardwired replacement requires wiring changes, have a qualified electrician do the work. And if you can’t determine an alarm’s age, check with the manufacturer rather than assuming it’s still within its service life.
12. The Carbon Monoxide Alarm That’s Reached Its Expiration Date
Carbon monoxide alarms don’t last forever, either. Check the replacement date and instructions for your particular model.
An end-of-life signal means the unit needs replacing. A fresh battery won’t bring an expired sensor back to life.
The U.S. Fire Administration recommends CO alarms on every level of the home and outside each separate sleeping area. Follow the alarm manufacturer’s instructions for installation and testing.
Because carbon monoxide is colorless and odorless, you can’t count on noticing it yourself.
If a CO alarm sounds, get everyone outside into fresh air and call 911. Don’t stay inside trying to figure out where it’s coming from.
13. The Dryer Lint Hiding Beyond the Screen
You clean the lint screen, so the dryer is taken care of, right? Well, not entirely.
Lint can also build up behind the dryer and inside the exhaust vent. If clothes are taking longer to dry, the appliance seems unusually hot, or airflow at the outdoor vent is weak, have it checked.
A burning smell is a reason to stop using the dryer until the problem has been investigated.
Follow the appliance instructions for inspecting and cleaning accessible vent sections. Disconnect power before cleaning, use suitable tools, and be careful not to crush or loosen the duct when moving the dryer back.
Long vent runs, roof outlets, and gas connections can make this a job for a professional. The U.S. Fire Administration’s dryer safety guidance explains why both the lint filter and vents need attention.
It’s easy to forget what’s behind an appliance. This is one spot worth remembering.
14. The Outlet That Feels Warm or Won’t Hold a Plug
Loose plugs, scorch marks, buzzing, sparks, unusual warmth, and burning smells are warning signs you shouldn’t brush off.
Stop using the affected outlet and contact a licensed electrician. Don’t repeatedly plug something in to see whether the problem happens again, and don’t cover discoloration with a new faceplate.
If there’s smoke or an active fire, leave the home and call 911.
An outlet may look like a small thing to replace, but the cause of the problem needs checking. This is one home maintenance task I’d leave to someone qualified.
Finally Getting Those Small Repairs Done
You don’t have to get through all 14 home maintenance tasks in one weekend. Take care of immediate safety concerns and active leaks first, then fit routine maintenance into your schedule.
For anything you need help with, take a photo and jot down what you’ve noticed. “The bathroom faucet drips after I turn it off” is much more helpful than trying to remember which sink was giving you trouble when someone arrives.
And if your list keeps getting pushed to “next weekend,” a little help can go a long way. For everyday repairs like door adjustments, weatherstripping, caulking, and minor plumbing work, a service such as HandyBandi may be worth considering. Share your list and ask which jobs they can handle together and which need a specialist.